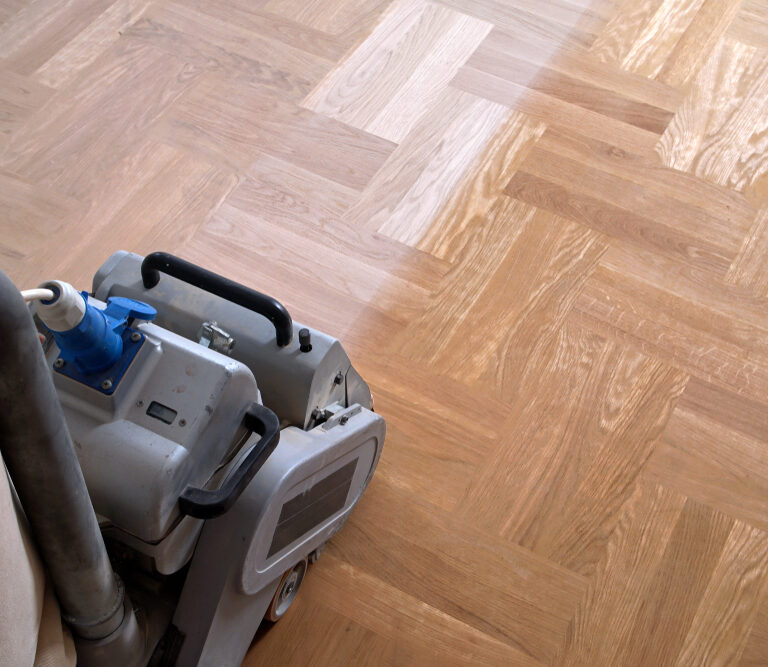
Refinishing old hardwood floors is an affordable way to bring new life to the interior of your home. Whether you’re taking on an at-home DIY project or you’re renovating a house to sell, a good sander for hardwood floors will make the process a lot easier.
In this guide, we’ll talk about how to choose the right sander for your floors and give you our top picks for the best sanders for hardwood floors in 2021.
- How to Choose a Sander for Hardwood Floors
- Top 8 Best Sanders for Hardwood Floors 2023
- 1. Best Overall Sander: Powr-Flite ORB1420 Orbital Floor Machine
- 2. Best Premium Sander: Clarke Floor Sander Orbital Dust Control
- 3. SKIL 7510-01 Sandcat Belt Sander
- 4. Best Budget Sander: WEN 6369 Variable Speed 5 Amp Drywall Sander
- 5. Best Sander for Small Jobs: DEWALT Palm Sander
- 6. Most Beginner-Friendly Sander: Bosch ROS20VSC Palm Sander
- 7. Most Versatile Sander: TACKLIFE 13-Piece Belt Sander Kit
- 8. Best Sander for Detail Work: TACKLIFE Classic Mouse Detail Sander
- Frequently Asked Questions About Hardwood Floor Sanders
- Final Word
How to Choose a Sander for Hardwood Floors
Choosing the right sander for your hardwood floors will come down to a few key factors: the size of the floor your sanding, the size of the sander, the type of sander, and the power of the motor. Here’s a quick breakdown of each of those factors.
Floor Size and Dimensions
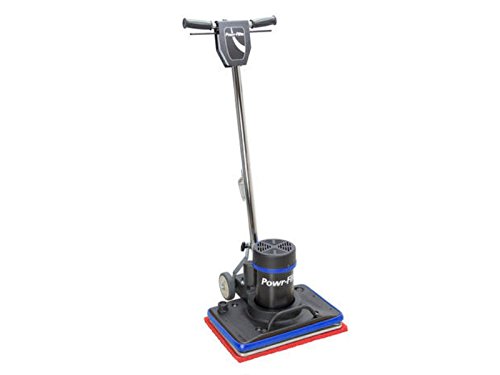
If you’re refinishing all the floors in your home, you’ll want a sander that’s not only large enough to cover more space, but that provides pressure control and other features to help ensure an even result across all the floors. Professional floor sanders like this Powr-Flite sander are the best choice for larger jobs.
For smaller spaces or spaces with a lot of odd angles and narrow corners, a smaller sander is a better option. It can get into the nooks and crannies without damaging the walls. A handheld sander with an angular plate shape, like this detail sander will be your best bet for those projects.
Motor
The more powerful the motor, the faster the sanding plate or belt can oscillate, and the more pressure it can apply. This speed and pressure help not only get the job done faster but create a more consistent result across the floor.
The power of a motor is either given in amps or horsepower. We’ll include both in our product descriptions for easier comparison.
The higher that number (of amps or horsepower), the faster and stronger it is. For handheld sanders, you’ll likely need something with between three to seven amps (under one horsepower). For larger floor sanders, look for something in the eight to 15 amp range (above one horsepower).
Sander Plate Size and Shape
The plate size allows you to cover more ground in a shorter period of time. Large, square plates are great for wide, open spaces. Narrower plates are better for getting into edges and corners. If you’re just sanding one room or this is a one-off project, you’d do better with smaller plate size.
It will take a little longer to get the project done, but it will allow you to use one sander through the entire process because you can use it in the open areas and along the edges and corners.
If you’re redoing the floors of an entire house or you’re planning to renovate and flip houses regularly, larger plate size is a necessity. Without it, you could be adding entire days to your project.
Sander Type
Sanders fall into different categories based on their shape as well as the way that their plate oscillates. For example, orbital sanders rotate while drum sanders move in a back and forth motion. Take a quick look below at the major differences between the types of sanders:
Belt Sander
Rather than a sanding plate, a belt sander features a loop of sandpaper that wraps around wheels. When the motor is turned on, the wheels spin, pulling the loop of sandpaper around. The key benefit is that they are much easier to control and maneuver. This makes them ideal for edge work.
The key drawback is that they tend to be light on extra features. When they do come with dust compartments, they’re usually small and need to be emptied out often. For professionals, the lack of versatility can also be a problem. Belt sanders rarely do more than sand. So you won’t be able to wash or polish with the same machine.
Drum Sander
A drum sander features a large plate that you attach your sandpaper to. When the motor is turned on, this plate will begin to oscillate rapidly. Usually, they’re designed to move in a front to back or side to side motion.
The key advantage here is power and size. Drum sanders are heavy-duty enough for professionals and large enough to handle large projects.
They also tend to pull double duty. The plate can be fitted with other materials in addition to sandpaper. Cloths and spongelike sheets allow you to give the hardwood a deep clean before sanding and then a gentle polish after you’ve refinished it.
The key drawback is the difficulty of operation. Inserting the sheet of sandpaper has to be done correctly or it won’t sand properly.
Orbital Sander
Orbital sanders come in a wide variety of sizes but still tend to be smaller than drum sanders. They oscillate in a circular motion instead of side to side. This circular motion creates a smoother, more even result that’s ideal for finishing floors.
The key drawback is in efficiency. You can probably manage a medium DIY project with one if you’re willing to put in the extra hours, but professionals and house flippers will quickly become frustrated with how long it takes to complete a room with an orbital sander.
The list below features a mix of large, professional sanders and smaller sanders. No matter how big or small your project, you should be able to find something on this list that suits your needs.
Top 8 Best Sanders for Hardwood Floors 2023
1. Best Overall Sander: Powr-Flite ORB1420 Orbital Floor Machine
Editor’s Rating:
Quick Facts:
- Plate Size: 20”x14”
- 5 Horsepower (10.4 Amps)
- Orbital Sander
This professional floor sander doubles as a cleaner and polisher as well, depending on what pad you fit it with. It’s powerful enough to remove paint, adhesive, and damage on any hardwood with ease.
Power and Features
At 1.5 horsepower, this orbital floor sander is strong enough to handle any sanding, cleaning, or polishing job. You won’t need to use any chemical paint or finish removers. You can just get straight to sanding. Despite its high horsepower, it’s also surprisingly quiet for a heavy-duty floor sander.
One tradeoff that allows this machine to be priced much lower than other professional sanders is the lack of a dust trap. You’ll need to hook this up to a shop vacuum to trap the dust. If you don’t already have a shop vacuum, that’s another piece of equipment you have to buy before you can get started.
Functions
This is strong enough and large enough to handle any sanding job you could throw at it. If you’ve got a huge project or multiple projects, this is a great option.
The comfort grip handles and the conveniently placed start-stop levers make this easier to handle, even for beginners. The ability to operate while standing also prevents the aches and pains that come with attempting to sand an entire floor with a handheld sander.
The main drawback with this unit is price. It’s affordable for a professional sander, but it’s still expensive for most DIY budgets. If you’re just refinishing your own floors and don’t have any need for a floor sander after that’s done, this is a lot of money to invest in a professional quality machine.
You might be better off getting a smaller, more affordable sander like this belt sander and just spending a little more time on the project.
Pros
- Powerful 1.5 Horsepower motor can handle any job
- Also cleans and polishes floors
- Easy to handle
- Compatible with a shop vacuum
Cons
- Expensive
- Dust trap not included
Editor’s Rating:
Quick Facts:
- Plate Size: 20”x18”
- 17 Horsepower (15.65 Amps)
- Orbital Sander
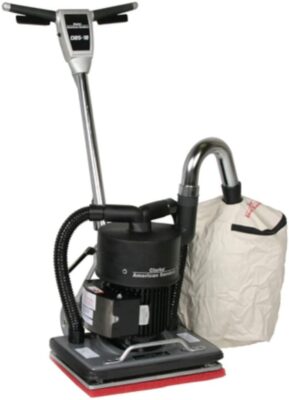
This Clarke floor sander is a prime example of everything a professional level machine has to offer. It’s high powered, easy to maneuver, and comes with a built-in dust vacuum system, so you don’t have to drag a shop vacuum behind you as you go.
Power and Features
At over two horsepower, this floor sander is a serious, heavy-duty machine. There’s almost nothing it can’t do.
The handles are adjustable to work at whatever angle is most comfortable for you. The pad comes with a pressure plate so you can adjust the pressure you’re applying to the floor without having to manually push down on the machine.
It even comes with its own vacuum system and large dust-trap, so you can skip the shop vacuum and the repeated trips to empty out a tiny dust trap.
Functions
This large, professional floor sander is ideal for big projects or for those who renovate houses for a living. You’ll be able to sand all the floors in a house quickly and effectively, no matter how bad the condition of the wood is.
For all these great features, you do have to deal with a high price tag. In fact, this sander is so expensive that we wouldn’t recommend it for anyone who’s only planning to do one or two projects with it.
For professionals and soon-to-be house flippers, however, this is a great investment. You’ll find sanders out there for almost double the price that don’t offer as much functionality as this one. So, if you’ve got enough work for it, this is a great sander to get.
If you’re not ready to make that kind of financial commitment but still want something professional, consider the Powr-Flite sander.
Pros
- Adjustable handle
- Adjustable pressure plate
- Built-in vacuum system
- Large dust trap
- Ideal for large projects or professionals
Cons
- Expensive
3. SKIL 7510-01 Sandcat Belt Sander
Editor’s Rating:
Quick Facts:
- Belt Size: 3”x18”
- 87 Horsepower (6 Amps)
- Belt Sander
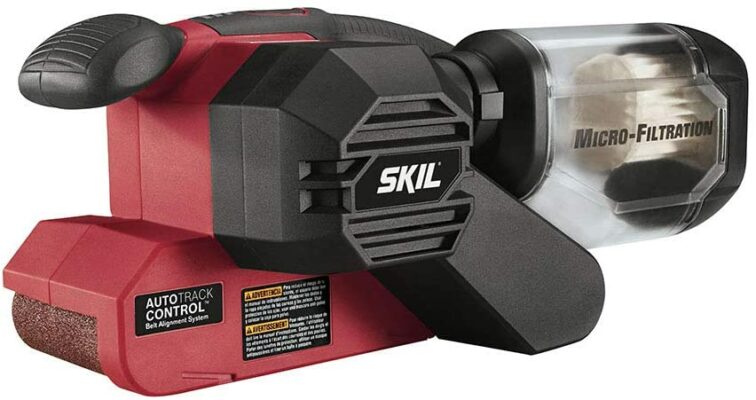
Belt sanders like this 6-amp Sandcat are a great option for those who want versatility and low investment. This can handle edge and detail work with ease, but it’s also strong enough to do the bulk of the sanding work on your next floor refinishing project.
Power and Features
At six amps, this is plenty of power to sand through even the toughest jobs. The belt sanding design is also more efficient than orbital plates, so you can still finish large projects with it, even though it’s significantly smaller than a professional floor sander.
One issue with the design is with the dust trap. It doesn’t offer great vacuum suction so you’ll end up with a lot of dust on your floors instead of inside the dust trap. Fortunately, this sander is compatible with shop vacuums. When you attach a vacuum hose in place of the dust trap, the dust collection works perfectly. Unfortunately, you’ll have to buy it separately if you don’t already have one.
For a sander with a more functional dust trap, you might prefer this Bosch sander.
Functions
This belt sander is great for all kinds of projects. Sand your entire floor, including the edges. Then, use it to sand furniture, drywall, and anything else in your home that needs sanding. As long as you fit it with sandpaper in the right grit size, this handy belt sander is up to the job.
One of our favorite features on this sander is the special pressure control technology. If you start applying too much pressure, this machine will warn you to ease up. This is a great feature for beginners and anyone who isn’t used to belt sanders.
Pros
- Versatile, all-purpose sander
- Great for most projects
- Compatible with shop vacuum
- Pressure control technology
Cons
- Ineffective dust trap
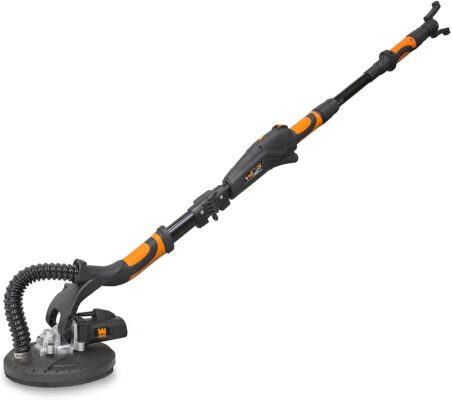
4. Best Budget Sander: WEN 6369 Variable Speed 5 Amp Drywall Sander
Editor’s Rating:
Quick Facts:
- Disc Size: 9”
- 72 Horsepower (5 Amps)
- Orbital Sander
The ability to sand your floors without bending over with a handheld sander is a luxury that’s surprisingly affordable if you opt for this pole sander. It’s designed for drywall sanding, but with the right grit size on your sanding plate, it will do a great job on your hardwood floors as well.
Power and Features
If you’re just refinishing your own floors and have little use for a sander after that’s done, it can be hard to justify investing in a large sander. However, trying to sand all the floors in your home with a handheld sander can be backbreaking work.
That’s what makes this pole sander a wonderful option. The long handle allows you to sand floors while standing, as you would with a professional floor sander. The 5 amp motor is just powerful enough to handle most moderate refinishing jobs.
It might struggle with painted wood or wood that’s been covered by other flooring. But with the aid of chemical finish or paint removers, you should still be able to get the job done.
Functions
This is best suited to one-time large home renovation projects. For example, if you’ve just bought a fixer-upper for yourself, this pole sander is a great all-purpose tool you can use to refinish the hardwood floors, sand down the new drywall, and handle other flat surfaces.
It’s not practical as the main floor sander for a professional contractor, but it’ll make a DIYer’s life much more comfortable.
While it’s meant to be a drywall sander, the coarser sanding discs included will work on hardwood floors. The coarsest grit included is 60, however, so it won’t work on tougher jobs. Check out our grit size guide below for more information on what the discs in this set can do.
You can buy additional sanding discs for this that are coarser and will work on tougher jobs like paint or adhesive removal. While that is an added expense, this is still going to be a lot cheaper than a professional sander, and you still can stand up while using it. That’s a feature you’ll really appreciate by the second or third hour on the job.
Pros
- Ability to stand up while sanding
- Much more affordable than professional sanders
- Powerful 5-amp motor
Cons
- Included sanded discs not suited to tougher jobs
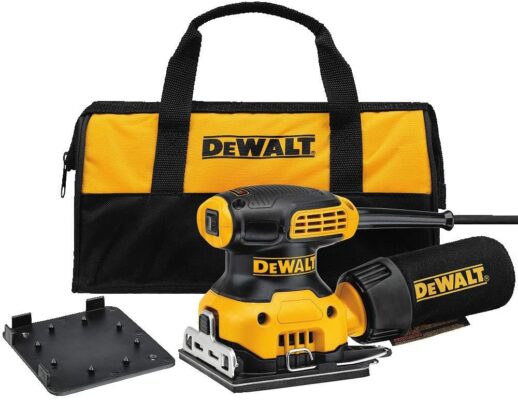
5. Best Sander for Small Jobs: DEWALT Palm Sander
Editor’s Rating:
Quick Facts:
- Plate Size: 4.5”x5.5”
- 3 Horsepower (2.3 Amps)
- Orbital Sander
This small palm sander is meant for equally small projects. It’s ideal for finishing the detail work around the edges of the floor and in the corners. It’s also great for lots of other odd jobs around the house, so it’s a good pick for someone who doesn’t want to invest in a bigger sander they rarely have use for.
Power and Features
This is a handy little sander to have around the house. It’s compatible with normal ¼ sheets of sandpaper that you can get at any hardware store. So you can get any grit size you need to sand any surface you need.
It’s not the most powerful sander on the market, but it packs just enough horsepower to handle the usual around the house tasks. You can sand edges, woodwork, furniture, walls, and anything else that needs sanding.
This versatility is valuable for DIYers and hobbyists. You might be reluctant to invest in a sander when you only plan to refinish your floors once every decade or so. Since this can be used on a variety of home projects and it’s very affordably priced, it’s not too steep an investment. You’ll have it on hand for any odd job that comes up over the years.
Functions
This is really only suited to small projects. You can use it to do the edges and angles without damaging walls or other flooring. If you are incredibly patient, you could potentially sand an entire floor with it. But if you’re planning to sand the floors in your whole house, you definitely want to at least go up to a belt sander like this Sandcat sander.
The main drawback of this model is that the port where the dust compartment attaches is proprietary. You will only be able to attach the dust compartment that comes with it. Since this compartment is small, this is inconvenient for larger projects. You’ll have to stop what you’re doing to empty it out periodically.
For something that is compatible with a shop vacuum hose so that you can sand your floors without interruption, try this pole sander.
Pros
- Compatible with standard ¼ sheet sandpaper
- Multi-purpose
- Great for detail and edge work
- Compact and easy to handle
Cons
- Not compatible with shop vacuums
- Too small for large projects
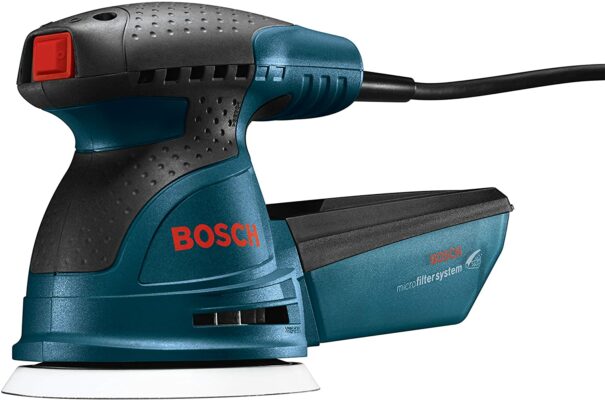
6. Most Beginner-Friendly Sander: Bosch ROS20VSC Palm Sander
Editor’s Rating:
Quick Facts:
- Disc Size: 5”
- 35 Horsepower (2.5 Amps)
- Orbital Sander
This is a great pick for your first sander. It’s affordably priced and comes with features that make it easier to use for people who’ve never used a sander before. You get a good balance of quality construction and versatile functionality.
Power and Features
Some of the features that make this beginner-friendly include the dampening pad, the vibration muffler, and the soft grip.
The dampening pad helps prevent swirl marks from appearing in the wood, so first-time sanders are less likely to leave noticeable grooves or scratches in the wood as they sand. The muffled vibrations make this easier to control, even if you’re not used to operating a sander. This also further minimizes the risk of leaving behind grooves and scratches in the floor.
The soft grip also makes this more comfortable for longer-term use. This is a valuable feature if you do plan to use this on an entire floor. It’s small, so it will take a very long time to complete a whole floor, but you won’t get fatigued as quickly as you would if you attempted this with the other palm sanders on this list of similar size.
It’s also compatible with industry-standard hook and loop sanding sheets, so there are no proprietary parts to special order here.
Functions
Like other palm sanders on this list, it’s best suited to detail work. You’ll be able to get right up along edges without damaging the walls or accidentally sanding surfaces you don’t want to sand (like the carpet at the edge of the room).
The eight-foot cord also gives you a lot of room to work with without needing to plug it into an extension cord. In our safety tips below, you can read about why you shouldn’t plug your sander into an extension cord.
The key drawback is speed. There are variable speeds on this sander, but you’ll likely find yourself only using the max speed. At lower speeds, the orbital movement tends to become wobbly, making it harder to control. For smoother results and better control, the maximum speed is the only one that really works.
Pros
- Compatible with industry-standard sandpaper
- Long power cord
- Dampening pad prevents scratch marks
- Soft grip handle
- Great for detail work
Cons
- Lower speeds are less functional
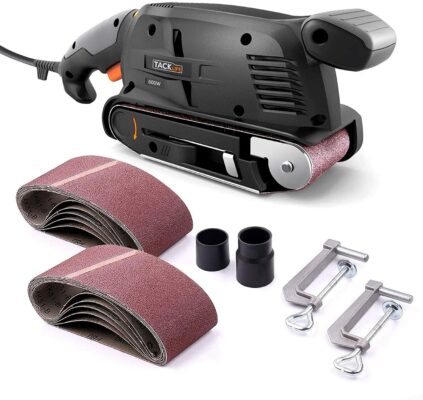
7. Most Versatile Sander: TACKLIFE 13-Piece Belt Sander Kit
Editor’s Rating:
Quick Facts:
- Belt Size: 3”x18”
- 72 Horsepower (5 Amps)
- Belt Sander
This belt sander is a great choice for refinishing your hardwood floors or any other woodworking projects you’ve got. The tool, along with its accessories, makes it one of the most multi-purpose sanders you could buy.
Power and Features
This 5 amp belt sander is strong enough to complete the entire floor refinishing project, from the main sanding through to the edge and detail work. In addition to power, you’ve also got customizability. There’s a 6-speed dial on the machine that allows you to adjust the speed to best suit the work you’re doing.
It also comes with two metal clamps that allow you to turn it upside down and fix it to a table. This way, you can sand smaller items with more finesse and precision.
If you remove the dust trap, you’ll be able to use one of the two vacuum adapters to attach a vacuum hose. This means it’s compatible with just about any vacuum cleaner you happen to have, even residential (non-shop-vac) vacuum cleaners.
One inconvenient feature of this model is the dust trap. It’s small and it’s not secured to the equipment well, so it’s liable to fly off while in use. That means all the dust it trapped is now scattered on the floor.
Fortunately, it is compatible with a shop vacuum. We highly recommend just immediately attaching it to a shop vac rather than risking it with the dust trap. You’ll end up pulling out the vacuum anyway if the dust trap flies off.
For a sander with a more securely fitted dust trap, consider the TACKLIFE mouse sander.
Functions
This sander is ideal for small to medium jobs. For personal use, you would be able to get away with using it to refinish all the floors in your house. The wide array of sanding belts that come with it are great for the later stages of your grit sequence.
However, for the first stage of sanding hardwood floors, you will need to buy additional sanding belts. The ones included are 80 grit and 120 grit. These are not coarse enough for the first stages of sanding, even on floors that are in great condition.
Pros
- Powerful 5-amp motor
- 6-speed adjustable dial
- Includes metal clamps for attaching to a table
- Includes 13 sanding belts
Cons
- Dust trap liable to fly off during use
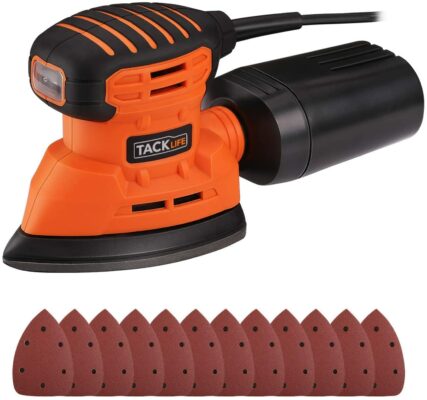
8. Best Sander for Detail Work: TACKLIFE Classic Mouse Detail Sander
Editor’s Rating:
Quick Facts:
- Plate Size: 5.5”x5.5”
- 2 Horsepower (1.1 Amps)
- Orbital Sander
The TACKLIFE mouse detail sander is very affordable and very well-suited to the job it was built for. It’s great for getting into corners and in the small spaces on ornate furniture or details in the woodwork throughout your home.
Power and Features
It’s incredibly well-adapted to getting into corners and sanding along the edges of other floor types in your room. It’s also powerful enough to strip away paint or shellac, which is a pleasant surprise on such a compact piece of equipment.
So it can handle all the small jobs and detail work with efficiency and provide high-quality results. However, it’s just too small for anything more than detail work. Sanding anything more than a small room with this would take weeks.
It’s affordable enough to get alongside a belt sander like the TACKLIFE belt sander or a professional sander like the Clarke floor sander.
We definitely would recommend it as your go-to detail sander to pair with one of those larger options. However, it’s not a good choice as a standalone or all-purpose sander.
Functions
Some of the strongest selling points on this sander include the comfort grip, the securely fitted dust trap, and the low vibration level. This low vibration means it’s quieter than other sanders. More importantly, it’s more comfortable to use for longer periods of time. Your hand won’t get fatigued as quickly from the vibrations.
Beyond being too small for large jobs, a key drawback to this design is the proprietary shape of the sanding plate. We love that the pointed end helps you sand into tight corners or around awkward angles. However, replacing the worn-down sanding plates will require special ordering the correct shape.
It won’t work with the standard plates you find in the store. For a detail sander that does work with standard sizes, you might prefer the DEWALT palm sander.
Pros
- Shop vacuum compatible
- Ideal for detail and edge work
- Low vibration functionality prevents hand fatigue
- Secure dust trap
Cons
- Proprietary sandpaper shape is difficult to replace
- Not practical for large projects
Frequently Asked Questions About Hardwood Floor Sanders
Refinishing your floors can feel like a major project. It’s actually a pretty straightforward process, but it’s natural to have a lot of questions about it before you commit any time or money to take it on. Here are answers to some of the most common questions people have before sanding their hardwood floors:
Can You Use an Orbital Sander on Hardwood Floors?
An orbital sander is perfectly safe to use on your floors. However, they aren’t as efficient, especially when it comes to the heavier duty early stages of the sanding process. The main problem is that orbital sanders are better suited to fine sanding, which you do in the later stages of the process.
They simply aren’t aggressive enough for the more difficult tasks. If you have any of the following issues, you’ll need to at least go for a strong belt sander like the TACKLIFE belt sander to do the heavy lifting.
- Uneven floors or bumps in the floor
- Paint or shellac layer
- Adhesive and other treatments found on hardwood that’s been covered by carpet or other flooring
- Old wood that has already been refinished multiple times
Then, you can finish the job with an affordable orbital sander like the WEN pole sander. If your floors are in great condition and only have a thin layer of finish or no finish at all, you can get away with using an orbital sander throughout the entire process. But it will still take you about 2-3 times longer to do the job than if you had started with a belt or drum sander.
If it’s just a single DIY project, that extra time may be a reasonable tradeoff for the cost savings from buying a more affordable sander. If you plan to refinish more than one floor, though, you’re likely going to lose your patience and eventually want to spring for a second, orbital sander to speed up the process.
What Is the Best Type of Sander to Use on Hardwood Floors?
You read a bit about the main types of sanders you can choose from but which one offers the best results on hardwood? The answer really depends on the project you have in mind. So let’s take a more detailed look at the key features and functions of the different types of sanders discussed earlier:
Belt Sander
Belt sanders are a great option for DIY projects. They’re more compact and affordable than drum sanders but more effective than orbital sanders. They can also handle edge and detail work well.
This is the best choice for medium projects or large, one-off projects. You’ll be able to get the floors in your entire house done without spending thousands on a professional sander. If you’ve got multiple projects to complete, however, that professional sander might be the better choice.
Drum Sander
Drum sanders are large sanders that you can operate while standing up. This makes them more comfortable to use on larger projects since you won’t have to be hunched down with a belt or orbital sander for hours at a time.
However, they are also much more powerful and can be difficult to control, especially if the plate moves side to side. You’ll use a lot of effort to keep the sander moving in a straight, forward line. This is something you can get used to but if you’re only sanding the floors in one room or one house, it’s probably not worth the effort or the investment.
A smaller belt sander will do just as good of a job, at a fraction of the price, and with much less effort to keep it under control. You should only invest in a drum sander if you’re planning to complete multiple projects or you have a very large, multi-story house where all the floors need refinishing.
Drum sanders are also too bulky to handle more delicate work like sanding down the edges near the start of a different type of floor. It’s also harder to get into the corners without damaging the walls.
Professionals typically get a smaller belt sander or an orbital sander along with their larger drum sander. They’ll do the bulk of the sanding with this and then finish the edges and details with the smaller sander.
Orbital Sander
As mentioned above, orbital sanders are best for the final stages of the sanding process when the finish has been removed, and all that’s left is to smooth out the grit marks. You can use them for the entire project if the project is small and you have the patience to spend more time sanding.
However, they are not recommended for professionals or anyone who plans to do a larger project or multiple projects. They can take 2-3x longer to get the job done, so something that would take a couple of days with a belt or drum sander can end up taking over a week with an orbital sander.
What Grit Sandpaper Should I Use for Hardwood Floors?
When you sand, you are going to use something called a “grit sequence.” A grit sequence is a set of sandpapers in different grit sizes. You’ll begin with the roughest, most abrasive grit. Sand the whole floor with that. Then, move down to increasingly finer grit sandpaper until you have achieved the correct result.
When shopping for sandpaper, the larger grit sizes have smaller numbers. For example, a 12 grit sandpaper is coarser than a 24 grit sandpaper.
The grit sequence you choose depends on what floor conditions you’re dealing with. For the first sandpaper in your grit sequence, choose from one of the following grit sizes, based on the condition of your floor:
- 12 grit. This coarse grit should only be used on hardwood that was previously covered by carpet or other flooring and, therefore, has adhesive or other treatments that need to be sanded away.
- 16 grit. Start here if your wood floors have been painted or treated with a shellac finish.
- 20 grit. Start with this grit size if your floor is noticeably uneven and needs to be flattened.
- 24 grit. This is the best size to start with for old floors that haven’t been refinished in decades or still have a heavy coat of finish.
- 36 grit. This is best for new wood that hasn’t yet been finished before or only has a thin coat of finish.
Once you’ve chosen one of the above to start with, choose the next grit size in your grit sequence from the options below:
- 60 grit. Use this after a coarser grit (12-20) to smooth out major scratches and sanding marks.
- 80 grit. Use this if you started with a finer grit (24-36) to smooth out major scratches and sanding marks. For most hardwoods, you’ll be ready to apply finish after going over it with 80 grit sandpaper.
If your floors look smooth and even throughout the room after the second sanding in your sequence, you might be able to call it a day and start applying the finish.
If there are still some noticeable sanding marks or patterns on the floor, you will need to add a third grit to your sequence. Choose from the following:
- 100 grit. Use this if there are still noticeable sanding marks on your floors after using the 60 or 80 grit. If you’re planning to stain the floors, you’ll want to use this even on floors without noticeable markings to prepare the wood. The stain will soak in better.
- 150 grit. Use this if the marks left by 60 or 80 grit paper are noticeable but extremely faint.
The result should be an even, perfectly smooth wood floor with no finish left and no noticeable scratch marks or grooves from the sanding. If you don’t use the right sequence, you can end up with unsightly grooves and grit lines in the surface of your floor.
The key is to start with as fine a grit as possible to avoid over-sanding. And remember to sweep and vacuum away the excess dust in between each stage of your grit sequence. For additional help in coming up with the right grit sequence for your floors, check out the detailed information on grit sequence here.
Is It Cheaper to Sand and Refinish Hardwood Floors?
In almost all cases, it’s much cheaper to sand and refinish a hardwood floor than to replace it. When hardwood starts to look dull and damaged, this is most often just a symptom of the finish being scratched or faded. Sanding and refinishing is all you need to make your floors look as vibrant and new as the day they were first installed.
All new real hardwood floors can cost tens of thousands of dollars. If you sand and refinish the floors you have, you’re looking at a small fraction of that cost. With a professional sander like this Powr-Flite floor sander, you can also do periodic maintenance like cleaning and polishing to extend the life of your floors.
With that in mind, there are some cases where you might actually need to replace your floors. If it hasn’t been well maintained, the damage might be more serious than just the finish. Here are a few signs your floors might need to be replaced instead of refinished:
- Cracks in the wood. This is a structural issue that may mean your floors have already been sanded down too much over the years and are now too thin to support the normal weight of furniture or people walking around.
- Water damage. You can’t sand away water damage. If the wood has softened from the water, it won’t be as structurally sound again even after it dries.
- Loose or creaking boards. This is either caused by water damage or a crack in the foundation, both of which are more serious problems than a floor sander can fix.
In short, as long as your floors look and feel structurally sound, they are still in good condition. If the only issue is scratches, discoloration, or excess wear in high traffic areas, a good sander and a fresh coat of stain or finish is all you need to bring them back to life.
If only an odd board here and there are loose or the water damage has only affected a limited area, you might be able to just replace that patch of floor and keep the rest. After those patches have been repaired, sand and refinish it all together to make sure the finish is even and consistent.
Safety Tips for Using a Hardwood Floor Sander
Sanders are incredibly useful tools, but because of how powerful some of the motors are and how dangerous the dust created can be, it’s important to know the proper safety precautions to take before you start sanding. Here are some of the most important safety measures you should take:
- Don’t use an extension cord unless the machine specifies a type of extension cord that is safe to use with the machine. Sanders take a lot of power and are liable to overheat most extension cords, causing fires.
- Make sure to unplug the floor sander before changing the sandpaper. Double-check. Triple-check. You can put yourself at serious risk of injury if it’s plugged in and turns on while you’re replacing the sandpaper.
- If you are able to use an extension cord with your sander, completely uncoil the cord. If it’s still coiled in a loop, it can easily overheat and melt the rubber that protects the wires.
- Wear protective eyewear and a mask while using it. Even though many sanders come with dust bags, there will still be some stray particles that you don’t want to breathe. You should also put up plastic sheeting in entryways to prevent dust from getting into other areas of the house.
- Don’t light matches or ignite any other flame in a room where you’ve just sanded the hardwood. Both the wood itself and the old finish are extremely flammable and the small particles are liable to explode if exposed to flames. You do not want a room full of fire dust.
The dust created by sanding is not just wood particles. It’s also composed of toxic and highly volatile compounds from the old finish that was on your floors. This is why it’s so vulnerable to flames and why you don’t want to breathe it in. You can find additional hardwood sanding safety tips and information here.
Other Tools for Hardwood Floor Projects
Taking on a hardwood floor refinishing project? Doing a remodel, addition, or floor redo? Simply looking to add to your DIY arsenal? Check out some of these tools that might be useful for a hardwood project:
- Respirator: In construction and DIY, the most important thing is taking care of yourself. This means that the most vital part of any refinishing project is a respirator, something that can be bought for a fraction of the price of the sander itself. A pro tip? Replace your filter frequently with a P100 cartridge that filters out about 99.97% of particulates
- Coveralls: Coveralls are almost as necessary as a hardwood sander itself to any refinishing project. Invest in a pair that will last you for years to come.
- Steel Toe Boots: A sander will eat all the way through your boot in a New York minute. Avoid an unintentional full foot pedicure by grabbing a solid pair of sturdy steel toes.
- Tile Saw: If you’re doing all of your floors at once, make sure you grab a tile saw to help get the job done in your bathroom or your kitchen.
Final Word
The most influential factor when choosing a sander is project size. For small, one-time projects, an expensive professional sander is probably overkill. For larger projects or for anyone planning to use this sander on multiple projects, a handheld sander is likely going to be too small to get the work done in a timely manner.
Beyond the project size, you also want to think about the kind of work that needs to be done.
If you’ve got a lot of angles and narrow corners, you’ll need a sander like this one from Bosch to reach into those angles without damaging the wall or edges of other flooring types.
If the room is a standard square or rectangle with all hardwood, a larger sander like this one from Clarke can get the job done quickly and efficiently.
