Cutting glass is not a skill that you’re likely to use often, unless you have kids who play with a ball inside the house or your face shatters a lot of mirrors. However, it’s a skill worth learning to avoid the expense of paying a glazier for a 5-minute job. It’s also easy enough for anyone to do with minimal practice and just one inexpensive tool.
Equipment and Materials Needed to Cut Glass
Unlike many other DIY projects, you don’t need any expensive tools and equipment. In fact, it costs less than $20 (excluding the glass itself) in most cases, and still under $50 even for more expensive equipment like bottle cutters.
To cut sheet glass, you will need:
- A sheet of glass (and maybe a couple of practice pieces if it’s your first time)
- A glass cutter
- A flat work surface – to avoid cracking or scratching the glass
- A ruler or measuring tape
- A straight edge (can be your ruler)
- A couple of drops of oil (optional) – preferably mineral or machine oil
- Window/glass cleaner (optional) – just standard household window cleaner will do
- Cut-resistant gloves (optional)
- Marker (optional) – dry erase markers are ideal as you can rub them off afterward
- A dowel or a small piece of wood (optional)
Pro tip: When it comes to choosing an oil, try to avoid vegetable or other cooking oils as they can be thick and sticky.
As you can see, most of the materials are optional, but they will make it much easier to cut the glass cleanly. The rest is easily found or bought. Here’s a closer look at the equipment you’re going to need.
Glass
The thickness of the glass you’re working with is going to affect how easy it is to cut.
- Window glass is usually around 3 to 4 mm thick and the easiest to cut.
- Picture glass, used in picture frames, is much thinner at 2 mm, which can be trickier to handle unless you have some experience already.
- Glass and mirrors that are 5 mm or thicker can also be difficult to cut well without experience as it requires more force.
If you are just starting, get some cheap or free glass to practice cutting before moving on to your main project. It can take a few tries to get it right. Framers and glaziers often have small offcuts that can’t be used elsewhere and are destined to be thrown away that they might be willing to give to you for free. Or you can find inexpensive picture frames at a pawn shop with the glass still in them, to repurpose or practice on.
Cutting Tools and Oil
There are two types of glass cutting tools. One is simply a handle with a cutting wheel, while the other has an oil compartment that lets out a thin stream of oil as you cut.
The oil is optional but does help you to make a smoother cut. Without oil, the cut edges of the glass will have tiny chips. This is not an issue if you’re going to cover it with window putty, but you’ll want to avoid it for finer glasswork.
Window Cleaner
This is unnecessary if you are working with new glass, but if you are working with offcuts or glass that has been sitting around for a while, cleaning the glass will help you get a smoother cut. Grease, dust, and other dirt can cause your glass cutter to shift while cutting, breaking your nice, straight line.
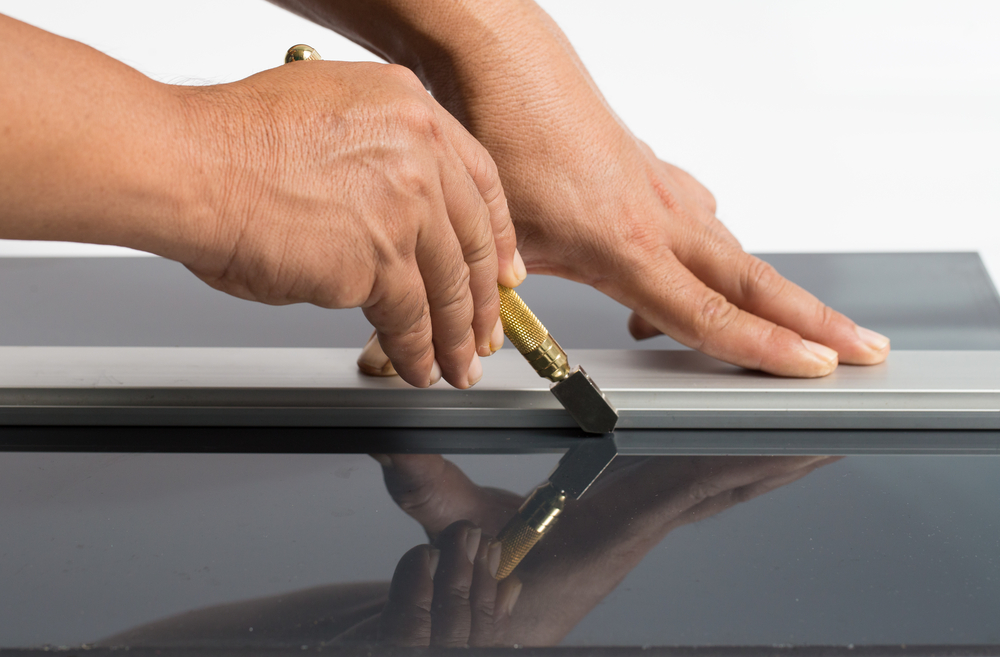
Cut-Resistant Gloves
Glass is incredibly sharp, especially when freshly cut. If you are cutting large sheets of glass or very thin glass, cut-resistant gloves are a good idea to protect you from a sudden ER visit.
Ruler or Measuring Tape and Marker
While some projects (such as reglazing windows) have a little leeway, other projects need to be cut very precisely, so it’s important to have an accurate measuring device. A dry-erase marker will clearly show you where you need to cut.
Straight Edge
This has two purposes, to make sure all edges of the glass are straight and at 90-degree angles to each other, and to give you a guide while cutting. Stained-glass windows can be done freehand as you often use smaller pieces and need to create curves, but larger pieces of glass, such as for windows and mirrors, need a straight guide as there is a long, straight cut to create.
To ensure right angles on your piece of glass, you can check them using a carpenter’s square or set square.
Dowel or Pencils
After you have scored the glass, a dowel or small piece of wood (like a pencil) can be used to elevate the glass slightly and help break the glass at the scoreline.
5 Steps to Cut Your Glass
The process of cutting glass is simple but does need a little practice and confidence. Once you’ve done it a few times, however, you’ll wonder why it took you so long to try it out. Here’s our simple 5-step process.
1. Positioning
Place your clean glass on a flat surface. A flat surface, ideally tile, concrete, wood with some felt, or even a thin towel, will protect the glass from scratches and support the sheet while it’s being cut. You don’t want all of your hard work to be for nothing with glass that is scratched or broken in the wrong place. Felt or toweling will also prevent the glass from sliding around and messing up your straight cut.
Your flat surface can be on the floor, but you might be more comfortable using a table or workbench to raise everything.
2. Measure and Mark
Using a ruler or tape measure, measure and mark out where you need to score the glass. Since there are often minor discrepancies between different rulers and measuring tapes, try to use the same ruler or tape for measuring the space you need to reglaze and for marking the size of the pane that needs to fill it.
If you are just practicing, this is unnecessary, but you might want to make a measurement anyway to see how accurately you can cut.
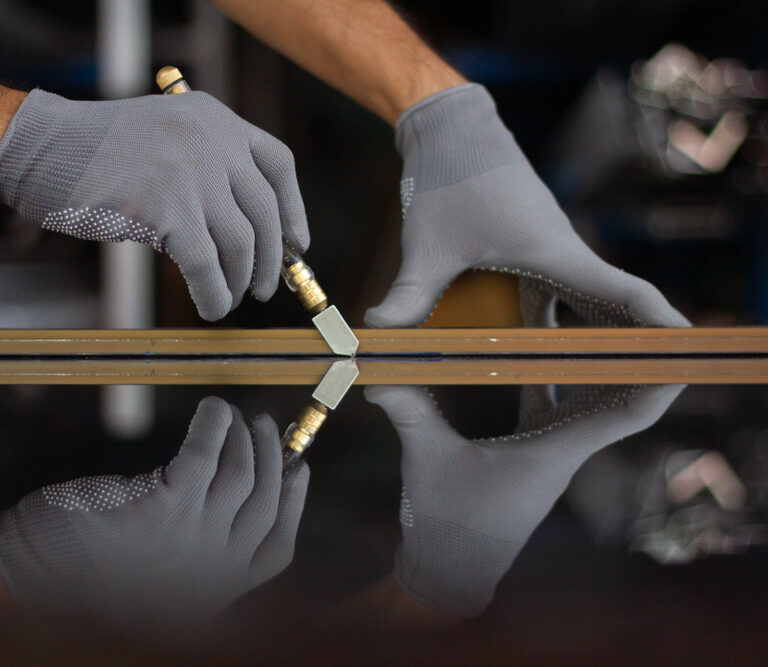
3. Line Up the Straight Edge
Place your straight edge along your marked line. This can be the same ruler you used to measure the glass (if it’s long enough) or a straight piece of wood. Make sure to leave a small gap between the straight edge and the marked line to accommodate the plastic or metal on either side of the cutting wheel.
It might only be a tiny amount, but if you need the glass to fit into a specific place, that small miss-cut can affect how well the glass fits. This is another good reason to do a few test cuts first and figure out exactly how much space you need to account for.
It is at this point you should brush on a little oil if you’re choosing to do this. A glass cutter with an oil well won’t need to have oil brushed onto the glass as well, but standard glass cutters would. You don’t need to apply much. The more oil you use, the more you’ll need to clean up afterward.
4. Score
Press the glass cutter firmly onto the glass and run it along the straight edge in one smooth movement. Pressing too lightly can cause the cutter to glide along the surface instead of cutting into it. Pressing too hard might crack the glass in a way that you want to avoid.
You’ll hear a hissing or crackling sound, a little like bacon in a hot pan. Don’t be alarmed; you’re not breaking the glass. That’s just the sound of the cutter scoring. Try to maintain an even sound and pressure throughout the cut. If the cutter has missed part of the line, you can go over it, but you risk creating a score that is wiggly or misaligned. It’s okay to leave an incomplete line as long as most of it has been scored well.
If you have a particularly thick piece of glass, it is a good idea to score on the other side of the glass as well. This will ensure you get a clean, smooth break in the next step.
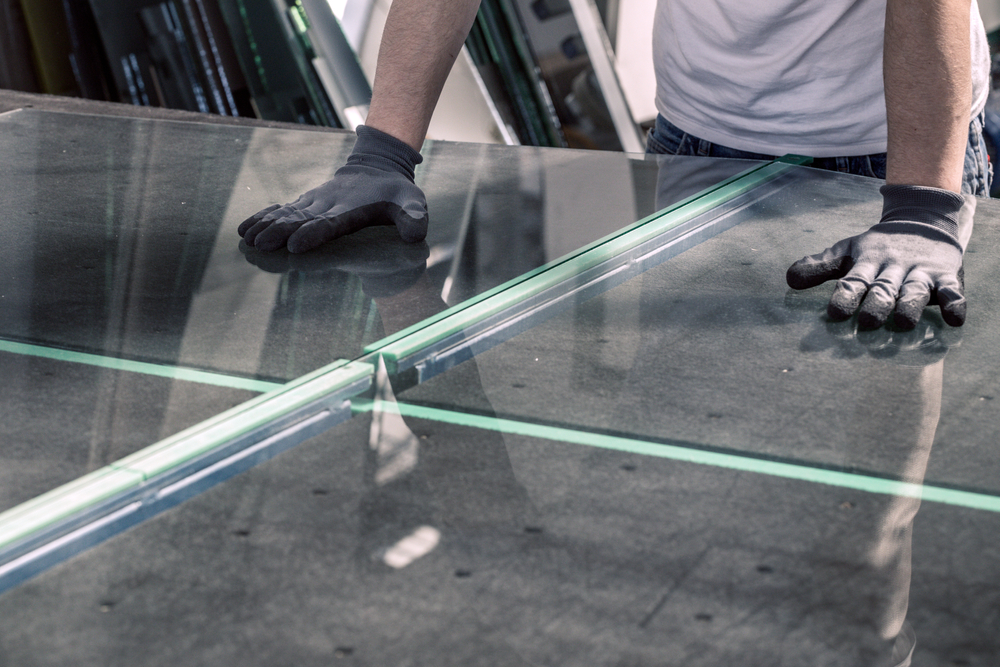
5. Break the Line
Place the dowel, pencils, or small piece of wood under the scoreline and gently press your hands down on either side of the cut. The glass should crack neatly along your scoreline.
You can also tap the end of your glass cutter on the scoreline.
Alternatively, you can place the glass on the edge of your table or workbench and snap off the end piece. These methods work best if you are cutting off a thin piece from the edge of a larger piece of glass. Larger pieces will be better supported using the dowel method.
Now you know how to cut glass! If you feel like you need to learn a bit more before you try it out yourself, there are many instructional videos on YouTube to give you a better idea of what to expect.
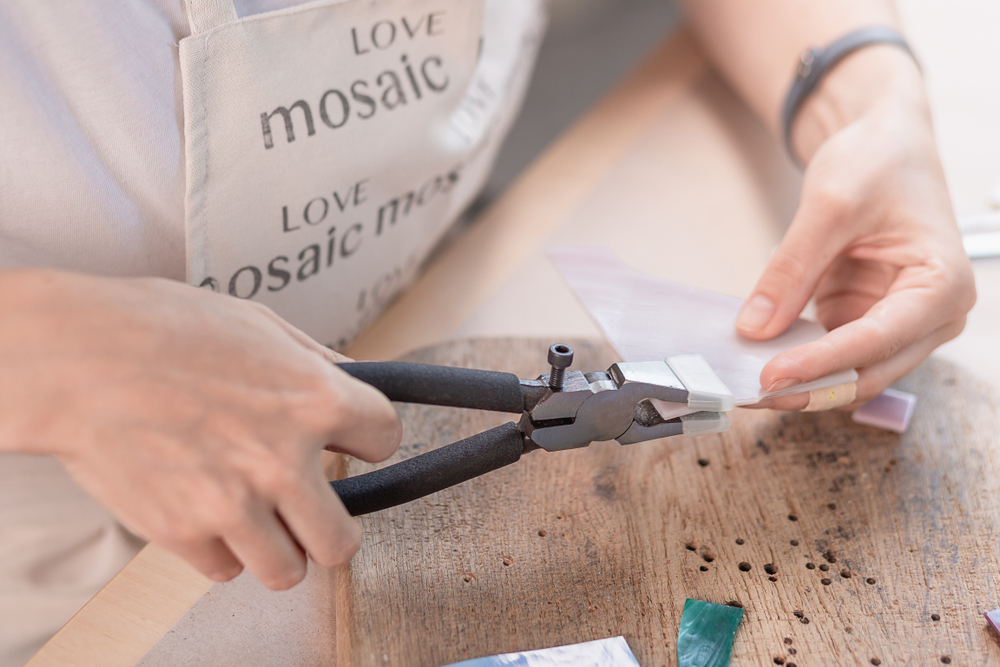
Cutting Stained-Glass and Bottles
Glass doesn’t only come in big sheets. Smaller pieces of glass for stained-glass windows are scored using the same glass cutter, but as the pieces are much smaller, they’re often broken off using pliers or tapped.
Bottles are a little more complicated as you need to score a curved surface and it can be difficult to keep a straight line. It can be done with minimal equipment if you use a stable surface to support your cutter while you rotate the bottle. However, you can also buy specialized bottle cutters that use the same technique of score-and-break but hold the bottle in a frame to ensure the score is straight.
Cutting to the Chase
As you can tell by now, “cutting” glass is a bit of a misnomer as you’re really just breaking it very carefully. Whether you’re cutting flat panes of glass or bottles, you need minimal equipment to cut glass easily at home, and the process is quite simple (with a little practice to get it perfect). So, what are you waiting for?