Cutting down a tree doesn’t end at cutting it down. You also need to deal with its root system, which if left alone, could become a huge hassle later on. While the idea of dealing with something that’s buried underground may be daunting, it’s not impossible as long as you have the right knowledge and the right tools.
In this guide, you’ll learn how to kill tree roots in various ways. Whether you do it naturally or chemically, you’ll finally be done with them once and for all.
What You Need to Know About Tree Roots
Studies have shown that roots can spread as far as four to seven times the tree’s dripline and usually grow about four feet underground. Knowing how deep the roots are helps you make an informed decision about what method to use to kill them. It’s also worth knowing that in rare cases, roots can grow well below four feet.
Usually, tree roots are harmless and don’t pose any kind of threat. However, there are times when they might grow into your sewer pipes, causing leaks and costly repairs. Roots can also encroach on your home and grow through your driveway. Once you notice that roots have started growing into areas they’re not supposed to grow, you should deal with them before they cause any damage.
Ways to Kill Tree Roots
There are three routes you can take when it comes to killing entire root systems.
The first is using natural products, such as Epsom Salt. This is arguably the safest method but it also takes the longest.
The second is using chemical products such as a tree root killer or a herbicide.
The last method—and also the fastest but most difficult—is removing the root system physically, although this may not be possible with larger trees.
Whatever route you pick, always make sure to employ safety precautions. Here is how to do all three.
Natural Method Using Epsom Salt
Also known as magnesium sulfate, Epsom salt is often used to treat magnesium deficiency in plants, which is characterized by yellow leaves. However, use too much of it and it will kill tree roots, since it will absorb moisture from the roots, causing them to dry out and die. Since this method can harm nearby vegetation, be sure to only target the tree roots you want to kill.
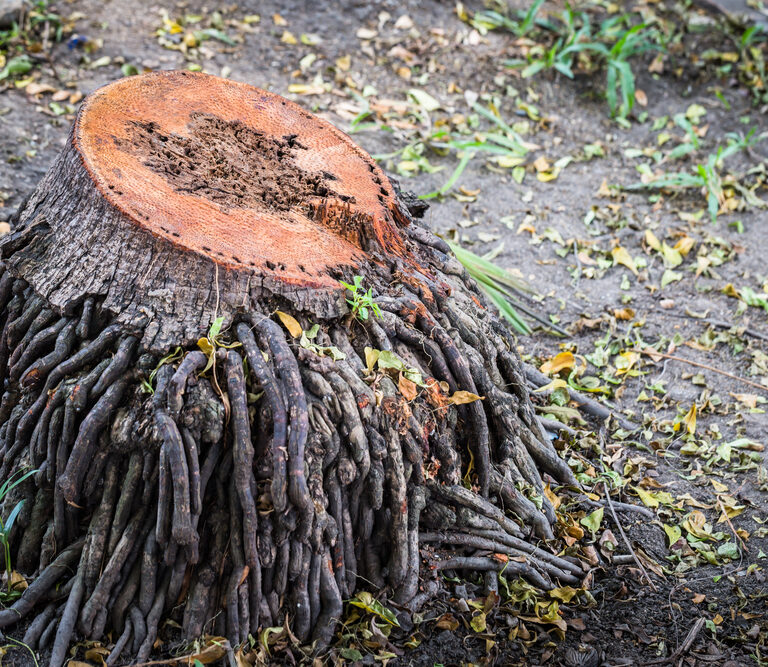
Step 1: Cut the Tree Stump Down
Cut the stump down as close to the ground as possible so that it will die off faster along with the root system. Expose the base of the tree by removing as much soil as you can.
Step 2: Drill Holes
Drill a bunch of one-inch holes into the stump and try to make them as deep as you can to maximize the reach of the Epsom salt.
Step 3: Fill Holes With Epsom Salt
Pour Epsom salt into the holes and funnel some hot water into each.
Step 4: Expose the Roots
Drill three to four-inch holes around the perimeter of the stump—or better yet—expose the roots by digging around them.
Step 5: Pour Epsom Salt Solution on the Roots
Mix a gallon of water with a gallon of Epsom salt, then pour the solution on the roots. When you’re done, cover the stump with a tarp. This will deprive the stump of sunlight, and also prevent the solution from getting washed away when it rains.
Step 6: Repeat
Repeat steps 3 and 5 every week for a month, or until the stump and roots are dead.
Chemical Method Using Herbicides
This method works much faster than just using Epsom salt. Before you start, however, you must understand the risks. Herbicides are very toxic and could kill nearby trees if their roots touch the roots of the tree you’re trying to kill. Apart from that, they can also have permanent harmful effects on the surrounding environment.
There are two main herbicides that can kill tree roots: those with glyphosate (at least 40% concentration) and those triclopyr amine (at least 8.8% concentration). What you need to use depends on the tree species you want to kill. The EPA has plenty of information on the appropriate chemicals to use.
Apart from the herbicide, you’ll also need to get safety equipment, such as safety goggles and nitrile or latex gloves. Wear a thick long-sleeved shirt and thick pants to protect yourself. You should also wear closed-toe shoes. A mask isn’t necessary, but you may wear it if you don’t want to risk inhaling the herbicide.
Step 1: Expose Fresh Flesh
If the tree has been cut down days ago, cut across the stump to expose new flesh. The surface has to be flat so the herbicide doesn’t trickle off onto the ground.
Step 2: Drill Holes
Drill one-inch holes several inches deep around the edge of the stump.
Step 3: Apply Herbicide
Mix equal parts water and herbicide and apply the solution to the surface of the stump using a paintbrush. By adding water to the herbicide, you are aiding the distribution of the herbicide from the live tissue onto the roots. This will kill the roots in two weeks or so.
Step 4: Discard Toxic Materials Properly
Take the paintbrush and the container you used to hold the solution to your local hazardous waste center.
Physically Removing the Stump
You might be able to pull out the stump as well as the entire root system if it’s not too large. This is a very labor-intensive method and may require heavy machinery, so if you’re not comfortable doing this, it’s better to leave it to the professionals. You could either use a winch to rip it out, grind it down so you can pull out the roots from underground, or use other methods and tools to pull it out.
Using a Winch
You’ll need a solid and stable tying point to use a winch, such as a tree or a truck. As for the winch itself, make sure you use one with a load capacity appropriate for the job you’re going to do.
Step 1: Clear the Area
Clear the area of vegetation, rocks, and other obstruction.
Step 2: Dig a Trench
Using a shovel, dig a trench around the stump until the roots are exposed.
Step 3: Cut the Roots
Cut the roots closest to the stump using an ax. You can use a chainsaw to cut the bigger roots, but remember to put a board under it so it doesn’t get damaged by the dirt or rocks.
Step 4: Extract the Stump
Attach the stump to the winch, then winch slowly so the tree doesn’t come flying at you. Once you’ve successfully extracted it, it should fall on its side, along with its root system.
Stump Grinding
If the stump is too large to pull out with a winch, you’ll need to grind it down instead. You can rent a stump grinder at your local home improvement store for about $100 a day. This can be a very dangerous undertaking, so make sure you know what you’re doing and that you wear protective gear. Ask the store if they can send someone over to train you. If they can’t, you might want to consider hiring a professional.
Step 1: Cut the Stump Down
Cut the stump as close to the ground as possible using a chainsaw so there is less wood to grind down.
Step 2: Remove Obstacles
Make sure there aren’t any rocks around the base of the stump as this can dull or damage the grinding wheel.
Step 3: Start Grinding
Position the grinder close to the stump. Start spinning the wheel then lower the wheel onto the stump. Cut away at the wood with side by side movements. Raise the wheel and move it forward to start cutting the next section.
Step 4: Repeat
Repeat step 3 until you’ve dug several inches into the ground, then shut the grinder off.
Other Methods
There are some other methods of removing stumps, including using a farm jack, a spare tire or simply by hand.
Farm Jack
Spare Tire
By Hand
How to Kill Tree Roots in Your Pipes
If tree roots have already invaded your pipes, what you can do is get a tree root killer with copper sulfate to kill the roots. Flush it into the lowest toilet in your house and it will kill the roots. You could do this every six months to prevent the same problem from happening.
Selectively Killing Tree Roots
If you don’t have tree roots in your pipe or if you don’t need to kill an entire root system, you could always selectively kill the roots that have grown in undesirable areas.
Step 1: Mark the Roots
Mark the roots using spray paint so you’ll know which ones to cut. Don’t cut too many roots if you don’t want the tree to die. If the roots are underground, just dig around them until they’re exposed. You don’t want to cut roots that are too close to the trunk since that can harm them as well.
Step 2: Cut the Roots
Using a trowel, create some room under the roots so you can cut them more easily. Working on one root at a time, cut the root using a hatchet. Use a pair of pruning shears if the root is less than an inch wide.
Step 3: Fill the Hole
Fill the hole with the dirt you removed earlier and pack it down with your hands.
The Root of the Problem
Killing tree roots is not an easy task—it’s laborious and can be time consuming. However, it’s not particularly difficult. Once they’re gone, you can rest easy knowing that they won’t cause damage to your house or get in your pipes.
Just make sure to practice safety precautions no matter what method you pick, and remember to wear protective gear when you need to. If after this article you feel it might be too much for you, consider hiring a professional. It won’t be cheap, but at least you’ll have peace of mind knowing it will be done the right way.