Granite is one of the most popular materials for countertops and backsplashes in homes across America. Available in thousands of colors, this natural stone is as sturdy and durable as it is timeless and elegant, giving even the smallest kitchens and bathrooms an air of luxury. In other words, if you’re unsure whether to prioritize form or function, opt for granite—it balances both perfectly.
Of course, because perfection has its price—the average slab of granite ranges from $50 to $100 per square foot—homeowners are often looking for ways to save when replacing their dated countertops and backsplashes. Like most remodeling projects, you may have realized that doing much of the work yourself will slash the cost of installing granite significantly.
Before you can install that countertop slab or those backsplash tiles, though, you’ll have to cut them to the appropriate dimensions. And when you’re talking about a stone as hard as granite, that can pose a challenge. With the right tools, however, it can be done.
In fact, if you can cut a sheet of plywood with precision, you have what it takes to cut granite. Ready to get started?
What to Consider Before Cutting Your Own Granite
While actually cutting granite is fairly manageable, even for those who don’t consider themselves all that handy, installing countertops and backsplashes is an intensive project. Because these tasks have such little room for error—a measurement that’s off by just ¼ of an inch could yield an unworkable piece of stone—homeowners tend to leave them to professionals.
If you’re determined to save money, buying an off-cut or discontinued slab is a great place to start. Before cutting and attempting to install it, though, ask yourself the following questions:
Is the floor perfectly level?
- Are all the angles in my kitchen exactly 90 degrees?
- Am I equipped to move all the appliances out of the way—and back—myself?
- Do I know how to uninstall the sink and then reinstall it after the granite has been placed?
- Can I use a single slab to finish the project? If not, do I know how to ensure a cohesive look when sealing
- multiple pieces of stone?
- Does the counter need an air gap for the dishwasher? If so, do I have the additional tools needed to cut one?
It’s worth noting that if you’re working with small tiles as opposed to large slabs, you have a bit more room for error. You won’t want to make too many mistakes, though, as replacing piece after piece will inevitably get costly.
How to Cut Granite
Once you’ve gathered the following tools, you’re ready to begin:
- C-clamps
- A dust mask
- Eye protection
- Ear plugs
- A tape measure
- A permanent marker
- Painter’s tape
- A circular saw with a diamond blade
- Cotton rags
- An angle grinder with a diamond grinding wheel
1. Set Up Your Workspace
To ensure clean, straight cuts, it’s imperative that you work on a stable surface. Place the slab or tile on a sturdy table or workbench and secure it tightly with c-clamps to keep it from shifting. Otherwise, chipping may result (it’s worth noting that if the tile is smaller than about 1 square foot, you may be able to secure it on the saw’s cutting surface without c-clamps). Then, don your safety gear, including ear protection and safety goggles.
If you’ll be using a dry saw, you’re also going to want to wear a dust mask. If you’ll be using a wet saw, there won’t be nearly as much dust, but a mask will still come in handy. Finally, tie back your hair, roll up your sleeves, and take off any loose accessories or articles of clothing.
2. Mark the Dimensions
With the price of granite being what it is, the saying “measure twice, cut once” applies now more than ever. Using the tape measure, confirm the exact dimensions you’ll need for the final product. Then, transfer these measurements onto the slab or tile, and apply the painter’s tape in the general area where you’ll be slicing through the stone. This will help prevent chipping.
Finally, use the tape measure to draw a straight line over the tape where you’ll actually be guiding the blade. This line will serve as a visual aid while you work, so make sure it’s precise.
3. Prepare the Saw
Review the saw’s operating manual closely, making sure to note any essential safety features. Once you feel comfortable proceeding, fit the machine with a diamond blade that’s designed for cutting slabs and tiles.
4. Make a “Back-Cut”
Granite is especially vulnerable to chipping and cracking at the very end of each cut, just before the sawblade breaks through the last bit of stone. To prevent such damage, start by making “back-cuts.” Determine where you’re going to end each cut, and then slice about two inches from the outside in, making sure to follow the line you marked.
5. Reposition the Blade and Get to Cutting
After finishing all the necessary back-cuts, reposition the blade to the start of the first cutline. Working slowly, guide the saw along the line you marked, applying a light, consistent pressure so the blade does most of the work.
While cutting granite is not especially difficult once you get into a groove, it can be somewhat tedious. Be prepared for especially long cuts to take several minutes—or more—to complete.
If you’re not using a wet saw, have someone spritz water onto the stone while you work. This will keep the equipment from overheating.
6. Scrutinize Your Work
Use cotton rags to wipe off the dust so you can inspect each cut closely once it’s done. If you’re not satisfied, reposition the tape and saw, and then make the necessary touch-ups to correct any minor issues. Once you are satisfied, move on to the next cut. As long as you work slowly and deliberately, you should end up with a final product that meets your needs and ultimately brings your vision to life.
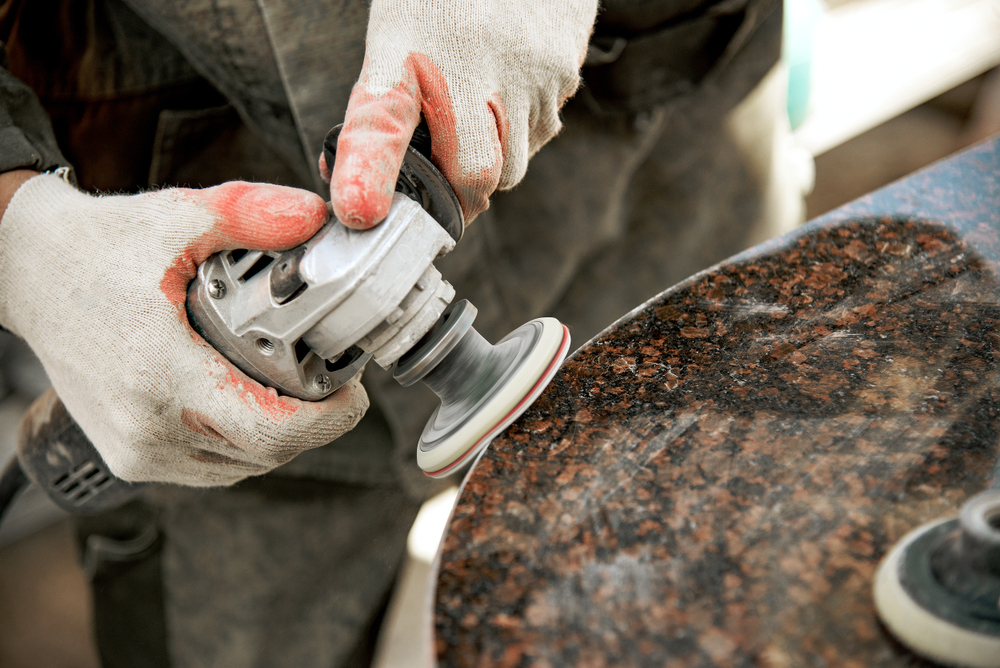
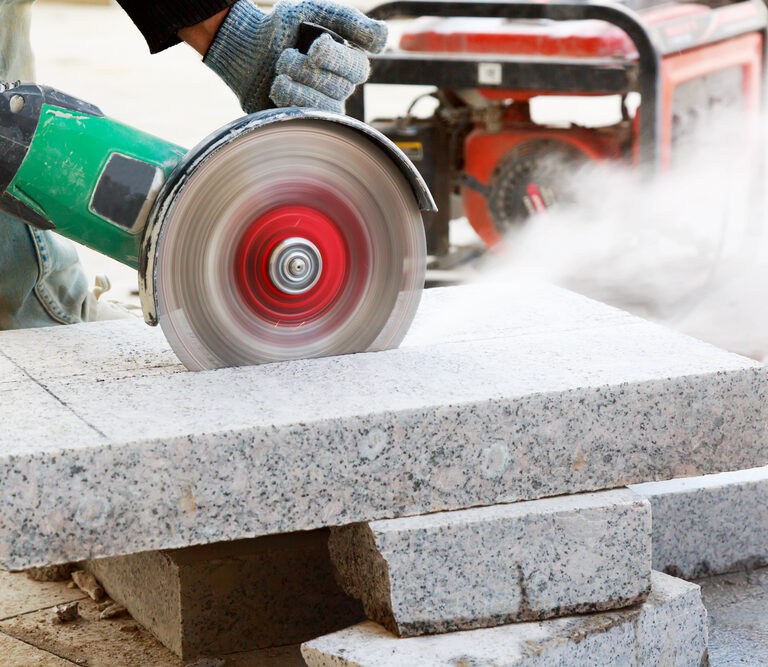
7. Shape the Edges
Once you’re done with every last cut, use the angle grinder to smooth and shape the edges. Wipe them off one more time with the rags, and then step back to admire your work.

Final Thoughts
When it comes to completing DIY projects, those who know their limits—and actually delegate tasks once they reach them—get the best results. If you feel confident in your ability to install granite throughout your home, it’s certainly worth trying; however, if you’re unsure of yourself for any reason, consult a handy friend who’s done it before, or call out a professional—before you start cutting the slabs or tiles.
Kitchen and bathroom contractors have all kinds of special tools for determining dimensions and finalizing layouts. After confirming the measurements, you can cut the granite yourself before they install it. This will reduce labor costs considerably, so you can still get the kitchen or bathroom of your dreams without going over budget.