Winter in colder climates often brings below-freezing temperatures, snowy conditions, and ice. In some cases, ice can collect on the edges of the roof as an ice dam.
While ice coming off the edge of your roof might look beautiful, it’s an issue for homeowners because it can do a significant amount of damage to your shingles and could lead to a leak. In fact, the longer you leave the ice dam on your roof, the higher the risk.
This guide will lead you through the process of removing an existing ice dam and taking the necessary precautions to ensure it doesn’t happen every winter.
What Causes an Ice Dam?
Ice dams form when snow on your roof melts and then freezes again, which happens all the time in the winter.
You’ll find the ice dams are more common on homes with abnormally warm attics because the heat transfers to your shingles and causes the ice to melt more rapidly. This melting often occurs during the day, and then frigid temperatures at night can refreeze the melting snow.
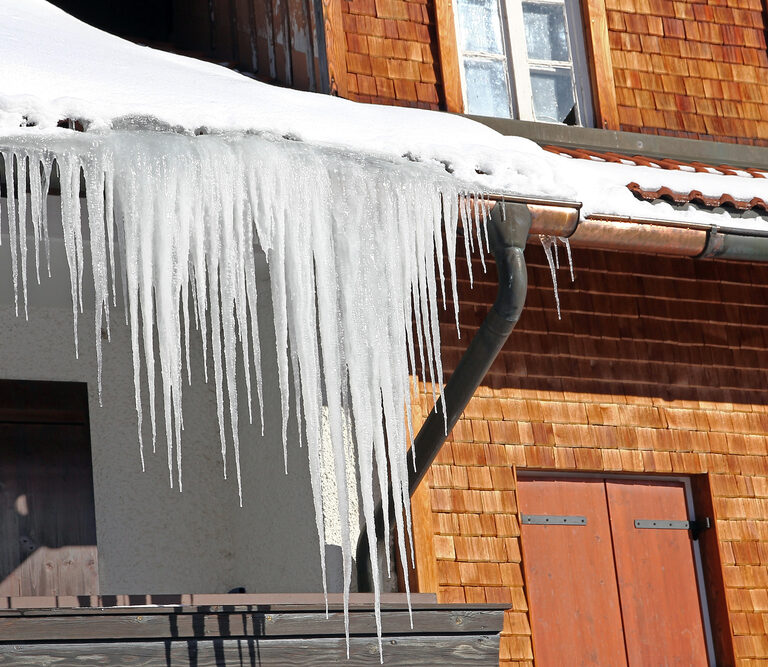
The snow will often freeze as droplets are running off the side of the roof, forming icicles that overhang the eaves.
As more snow melts and refreezes, the ice dam becomes more prominent and invasive, eventually preventing any water from running off the roof at all.
You could end up with a significant ice dam on your roof that won’t melt until you have a prolonged warm period if you don’t address it early. Therefore, you’ll want to take as many precautions as possible to prevent this damage to your roof.
Getting Rid of Existing Ice Dams
It’s difficult to tell if your attic is transferring too much heat to your roof until you end up with an ice dam. When you find yourself in this position, don’t panic because there are some things you can do to melt this ice before it does significant damage.
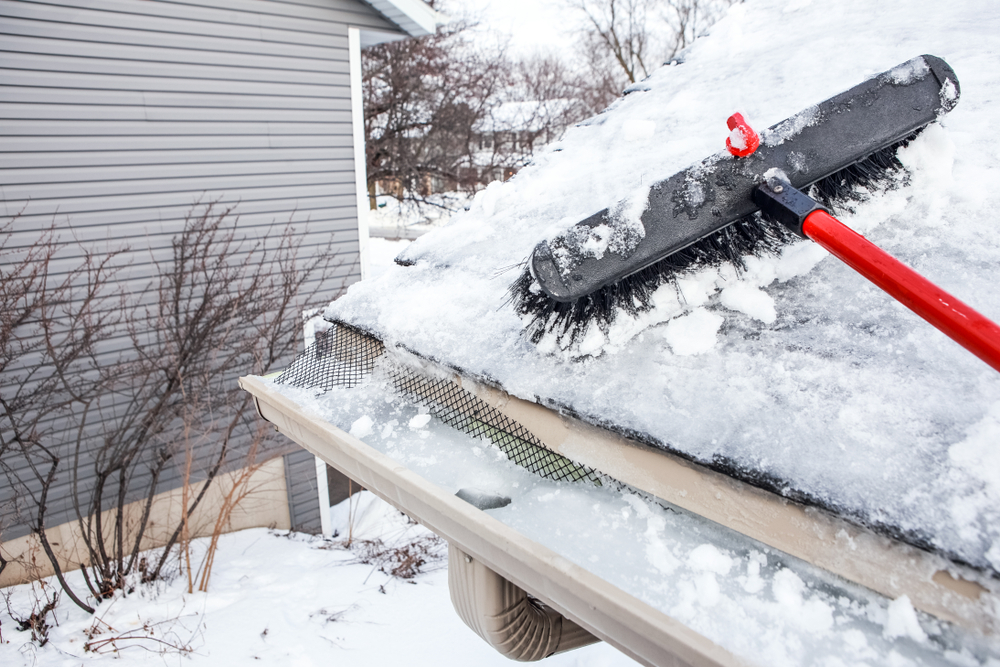
Remove the Snow
One method that you can try is pulling as much of the snow off your roof as possible with a rake or broom. Snow acts as insulation for the ice, so if you don’t have snow on top of it, the ice will melt faster in sunny conditions. Keep in mind that this method will only work if you’re expecting moderate temperatures in the next few days.
Use De-Icer
A trick that some homeowners use is putting calcium chloride de-icer into a set of pantyhose or inside a mesh bag and throwing it onto the roof. The de-icer will slowly melt the ice, and the stockings ensure you don’t end up with calcium chloride all over your roof when the job is complete.
Use Hot Water
An easy way to melt an ice dam on your roof is to spray it with hot water. This water will naturally dissolve the ice and allow it to drain through your gutters. Remember that you don’t want to spray pressurized water directly against the shingles to prevent damage.
Blow Some Cold Air
If the ice dam has already done some harm to your roof and you notice a leak, you can take a fan to your attic and blow some cold air on the hole. This cold air will help regulate the attic’s temperature and cause the leaking water to freeze, giving you time to complete a repair.
What Not to Do
There’s a lot of misinformation out there regarding ways you can remove an ice dam. Many of these techniques can cause more damage than the ice dams themselves, so you’ll want to avoid them as much as possible.
Remove It Manually
It might be tempting to get up on your roof with a hammer and chisel in an attempt to remove your ice dam, but this method isn’t recommended for a couple of reasons.
First, you could puncture holes in your shingles when trying to remove the ice manually, putting you in the difficult position of having to repair your roof in the wintertime. It only takes one solid strike to put a hammer or chisel through the ice and into your shingles, which is reason enough to avoid this ice removal option.
Next, climbing onto your roof to remove the ice is dangerous. Not only do you run the risk of slipping off the roof while you attempt to hack away at the ice, but if you happen to break a large chunk of ice off, it could take you over the edge of the roof with it as it falls.
Some homeowners will also attempt to pull the ice off the roof with a rake. This technique is probably the safest way to remove an ice dam manually, but you could pull the ice on top of yourself, and the risk of damaging your roof remains.
Use Rock Salt or Chemicals
Calcium chloride is safe for shingles, but substituting rock salt can do some damage. The reason is that rock salt can break down the asphalt in your shingles and the seals and metal fasteners on your roof, and it can also kill any plants under your gutters that happen to come into contact with it.
There are chemical ice melting solutions on the market that you’ll also want to avoid. Calcium chloride is available at most hardware stores, and it’s safe, so there’s no need to try anything else.
It can be tempting to remove your ice dam by quickly using tools or chemicals, but the risk usually isn’t worth the reward when doing so.
9 Ice Dam Prevention Methods
Once you’ve eliminated the existing ice dams from your roof, there are some steps you can take to ensure you don’t have to deal with the problem again. You can also preemptively utilize these preventative measures to avoid ice dams in the first place.
1) Heat Cables
If ice dams are a chronic problem on your property, you might think about installing some heat cables on your roof. You’ll have to put these cables up before it gets cold outside, but they do a decent job of melting snow and ice before they have the chance to build up and create a dam.
The problem is that heat cables use electricity and aren’t the most efficient method of preventing ice dams. Therefore it’s often better to go with a more permanent fix.
2) Add Ventilation
Ice dams form when the roof is at a different temperature than the eaves, and you can regulate this temperature by adding ventilation to the eaves and ridges. A ridge vent combined with continuous soffit vents allows cold air to circulate under the roof.
Make sure the ridge and soffit vents offer a minimum of one-square-foot of opening for every 300 square-feet of attic floor in your home to ensure enough air is moving through the area.
3) More Insulation
Insulation is essential when maintaining the temperature in your attic, and the problem could be that you don’t have enough of it. Adding some insulation to the attic floor keeps the heat inside your house and allows your attic’s temperature to stay more in line with the roof’s, preventing ice dams.
4) Divert Exhaust Outside
In some homes, exhaust fans from kitchens, bathrooms, and dryers send warm air into the attic and through the soffits. The problem is that this process can warm the attic or the roof, causing ice dams to form. Divert all exhaust directly outside to prevent this problem.
5) Sealed Can Lights
Recessed lights give off a lot of heat, and if they don’t have a proper seal, this warmth can make its way to the attic. You can alleviate this issue by exchanging your older can lights for newer versions that you can seal with insulation to prevent this heat transfer.
6) Cover Your Attic Hatch
The hatch you use to get into your attic most likely isn’t insulated and could allow heat to escape the house and cause problems in the attic. You can seal your attic hatch with weather-stripped caps that are made specifically for this job.
7) Seal the Ducts
Any ducts that move through your attic could be warming the area too much, especially if they aren’t sealed and insulated. Covering the duct joints with fiber-reinforced mastic or coating them entirely with foil-face fiberglass provides an additional layer of insulation and can minimize heat transfer.
8) Chimney Flashing
Homes with chimneys can experience ice dams as warm air escapes from the gap between the chimney and the house. You can close this gap by adding some flashing and holding it in place with a fire-stop sealant.
9) Caulk Pipes and Cables
A hole will likely accompany any pipes or cables that go through your attic. Caulk all of these holes using a fire-stop sealant and look for any additional penetrations in your attic that could be making it difficult to regulate its temperature.
Every home is different, so preventative measures that work on one property might not be effective on another. The first step is inspecting your attic before coming up with methods of regulating its temperature to prevent snow from prematurely melting off your roof.
Final Thoughts
Ice dams look harmless, but they can do a significant amount of damage to the roof of your home, especially if they’re showing up every year. Prevention is the best method of dealing with ice dams because if you can keep your attic a bit cooler, the snow won’t melt as quickly, and ice dams won’t have an opportunity to form.
Try a few of these methods before winter arrives to keep your roof in great shape by preventing the damage that these buildups of ice can create.