When vinyl flooring gets dirty, old, or just has a dated style you don’t like, it can make the whole room feel unappealing. So, learning how to remove vinyl flooring yourself is one of the most cost-effective ways to update your home with a fresh new look—especially if you luck out and find some original hardwood hiding underneath!
In this guide, we’ll tell you what tools you’ll need and then walk you through how to remove vinyl flooring, step by step. Also, if you have the new vinyl plank flooring, we’ll give you some tips on how to remove that, as well.
What You Need to Remove Vinyl Flooring
Before you get started, make sure you’ve got all the right equipment. This can go a lot of ways. If you’re a purist, you can get this job done with little more than a scraper, a chisel, and sheer determination. If you’d rather take the easy road, you can buy a power scraper and breeze through the job in a fraction of the time.
In the equipment list below, you’ll find all the tools and equipment you could use to make this job as painless as possible. The ones with asterisks in front of them are a must-have to get the job done. The rest are nonessential, but will help you keep your sanity if you use them. Choose your weapons and start scraping!
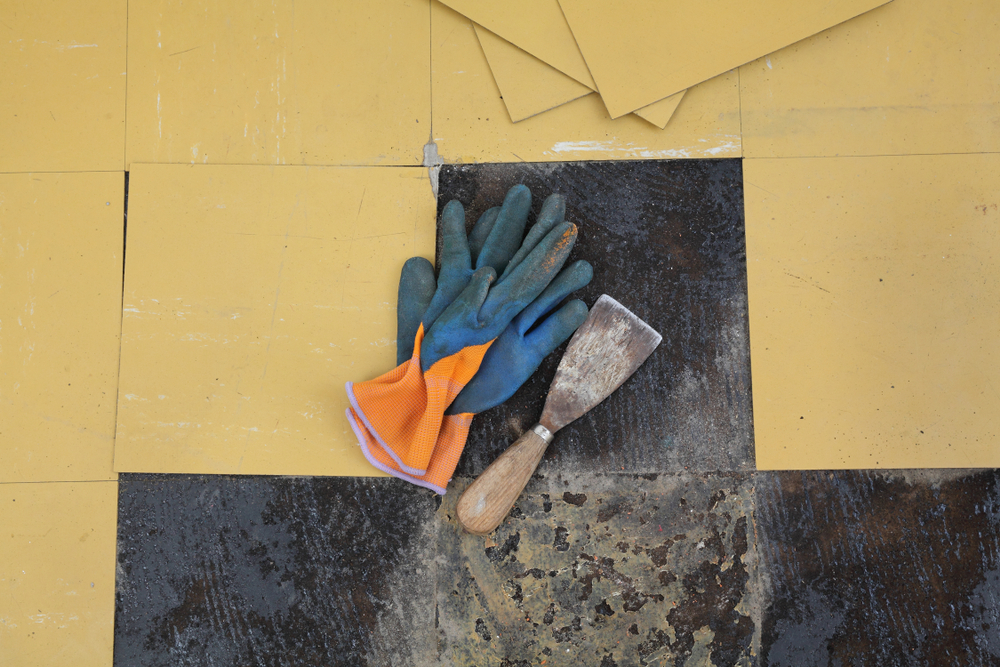
Scraper*
Your putty knife will do. A paint scraper would be better.
Hammer and Chisel*
A mallet would actually be easier to use than a hammer, but if you’re trying to save money, any hammer will work—or really any blunt object you can easily hit the end of your chisel with.
Shop Vacuum
These are awesome for cleaning up big debris that a regular vacuum can’t handle. It’s handy to have one around for any big clean up jobs, so if you buy a shop vac for this project, you’ll find plenty of uses for it afterward, as well. You can also just pick up the big debris by hand, though, if you want to save money.
Heat Gun
This softens the adhesive, so it’s easier to pull up the vinyl and remove the glue later. If you own a hair dryer, you can use that. It’s not quite as powerful as a heat gun, but it’ll do.
Power Floor Scraper
This basically does all the work for you, so you just have to push it along the floor. However, these machines cost thousands of dollars, so unless you do this professionally, you’re better off seeing if your local hardware store will rent you one.
You’ll also need some kind of soap, water, and a broom for the clean up stages.
Step-By-Step Instructions
Step 1: Clean Up
To start, you need to take out any furniture and remove baseboards or other trim from the edges of the floor. Do this carefully if you plan to keep the baseboards or trim. Then, do a quick sweep and mop of the area, so you’re working with a clean surface.
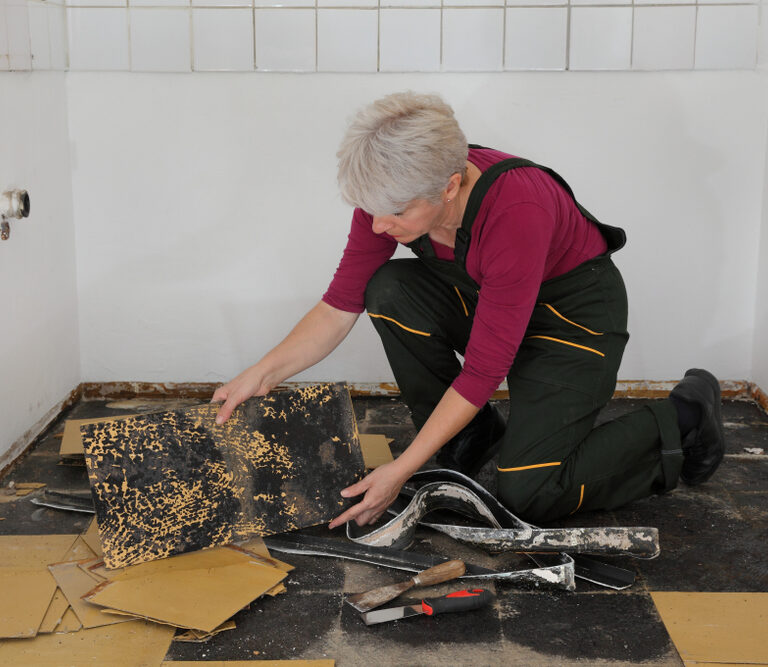
Step 2: Slice the Vinyl Flooring Into Strips
Start at the edge of the wall. The flooring shouldn’t be glued down where it meets the wall so you’ll be able to pull up the edge. If it is glued down, we wish you the best of luck. You’ll need to spend some time with your scraper trying to pull up those glued down edges.
Once you have your edge pulled up, make a cut in the vinyl every 12 inches or so. It doesn’t have to be exact. This step just saves you from having to wrestle with a solid, room-sized sheet of vinyl later on. Instead, you can remove each strip, one at a time. It’s a lot easier.
Step 3: Pull and Scrape
This is the truly tedious part of the whole job. So, choose a good podcast or put on your most energizing playlist to keep yourself sane for this step.
Gently pull up a strip of vinyl flooring. Doing it gently will prevent you from ripping it. The more intact it is, the easier it will be to pull it off. If you rip it apart, you’ll end up spending a lot of time scraping off little bits of vinyl at a time—making this whole process even more of an ordeal than it has to be.
When you feel resistance and the strip won’t pull up anymore, use your scraper to slide under the glued-on vinyl and peel it away from the floor. When the scraper isn’t working, switch to your hammer and chisel to chip away at the stubborn glue.
Repeat this process for each strip until your floor is vinyl free.
Step 4: Remove the Adhesive
First, take a breather. You’ve just finished the most annoying step. You’re almost in the clear. After you’re done congratulating yourself, it’s time to get rid of any glue residue that remained stuck to your subfloor.
To do that, put a mixture of soap (any kind will do) and hot water (as hot as your faucet will go) in a bucket. Apply that to the entire floor and then just let your floor sit and soak in the soapy water for about 10 minutes or so.
After the glue is (hopefully) softened by the soapy water, it should be easy to scrape it off. If it isn’t, it might be time for the hair dryer (or the heat gun, if you bought one).
If you are bringing in the hair dryer, make sure you completely dry the floor first. Electrical appliances and puddles of water are not a good combo!
Once your floor is 100% bone dry, get the hair dryer (or heat gun) and point it directly at a stubborn bit of glue. Keep it there for a minute or so. You can mutter threatening things at it while you’re waiting.
After the glue has been softened by the heat, try attacking it with the scraper again.
Repeat this process until you’ve worked through all the adhesive.
You need to do this step, even if you’re just planning to put down a fresh layer of vinyl flooring. The new floor won’t be able to adhere smoothly if there are rough patches of old glue on the subfloor.
Step 5: Clean Up (Again)
To end, you’re back where you started: with a broom, shop vac, and a mop. Sweep up all the debris and old vinyl flooring into the garbage. Vacuum up the smaller bits and glue residue. Go over the subfloor with a mop and soapy water to get rid of any dust and dirty spots. That’s it!
If you’re planning to put down new flooring (which you probably are), this final clean up step is extra important. Putting new flooring down on top of dirty flooring will create problems later, as glue or grout won’t adhere properly, or your new floor won’t lie down neatly and evenly.
How to Remove Vinyl Plank Flooring
A newer, budget-friendly option that’s appeared on the market recently is vinyl plank flooring. These are usually designed to imitate hardwood and other, less budget-friendly flooring options. While they are still vinyl, they go down a little differently than a big sheet of vinyl. Most often, this flooring is sold as a set of planks that either get glued to the floor, just like regular vinyl, or click together and “float” above your subfloor.
The cool thing about this flooring is that if it gets damaged somewhere, you only need to replace the damaged planks. The uncool thing about it is that it can be tricky to isolate a single plank or a few planks for replacement without damaging other planks in the process.
If you have the glued down planks, the process will be pretty much the same as the steps we discussed earlier—only more tedious, because you won’t be able to pull up long strips of flooring. You’ll be going plank by plank.
If you’re just trying to remove a few damaged vinyl planks, here’s what you’ll do:
Step 1: Slice the Planks
Use a razor to cut along the edges of the damaged planks. Cut down far enough to get through the adhesive underneath.
Step 2: Get an Edge
Use your scraper or a blade to carefully pull up the corner of the damaged plank without hurting any of the surrounding planks.
Step 3: Pull up the Planks
Once you have a good edge pulled up, continue pulling it up and scraping as you go until you’ve got the whole plank removed. Watch where you’re scraping to make sure you don’t accidentally loosen or scratch any of the surrounding planks.
If you have the floating planks, they’ll be a lot easier to remove. Just start at one wall and pull up a board. It will unclick from its friends, and you can keep going. You’ll likely be done in minutes, leaving you plenty of time to gloat at all of your friends scraping away at their glued down vinyl flooring.
If you’re just replacing a couple damaged sections, you still need to start at the nearest wall and remove planks until you get to the damaged ones. These floating floors are like one interconnected system, so you can’t just pull up a plank from the middle. Once you’ve worked your way to the damaged section, replace those and click all the planks you removed back into place.
Final Thoughts
Hopefully our helpful and instructive guide has provided you with all the information you need to learn how to remove your old vinyl flooring. It’s a simple, if somewhat tedious, job—though it’s generally well worth the effort.