Whether you’re building a home from scratch or renovating a time-worn bathroom, ceramic tiles are fantastic to install on your floor and walls. Water-resistant, durable, and super easy to clean, they’re the material of choice for the modern home.
But there is one major drawback: getting them installed can be an expensive endeavor.
The good news is with adequate research and intermediate DIY skills, you can save hundreds of dollars by doing the deed with your own two hands.
In this handy how-to guide, we’ll show you the ropes through seven easy steps.
The Pros and Cons of Ceramic Tiles
Before you get started, it’s worth considering whether ceramic tiles are really your best bet. Let’s take a quick look at some of the pros and cons.
The Advantages of Ceramic Tiles
The key benefit of ceramic tiles is water-resistance, essential in high splash zones like bathrooms and kitchens. If installed properly with high-quality grout and then sealed with an appropriate sealant, tiles are entirely impermeable—no more stressing about accidental spills.
Durability is another core advantage. Although tiles are arduous to install, they’ll last 20 years or more if you get the job done right. Ceramic tiles are hard to break, and if you do crack one, you can easily replace that one specific tile.
We also love how easy tiles are to maintain. Forget about bringing out the vacuum cleaner—a simple sweep will clean dirt and debris. And due to their non-porous nature, tiles are virtually impossible to stain permanently. A little elbow grease and a non-toxic cleaning solution like vinegar are enough to eliminate the most stubborn stains.
The Disadvantages of Ceramic Tiles
Ceramic tiles have a hard, rigid surface, making them much less comfortable to stand on than soft materials like carpet or wood. To soften somewhere you stand for long periods, consider throwing down a fluffy rug.
Ceramic tiles aren’t the best insulators; think long and hard if you live in an extreme climate. During the winter, tiles become cold on bare feet. In the summer, the opposite applies. Although comfortable enough to walk on, the radiant heat will warm up your home.
Ceramic tiles are quite heavy, which means they may not be suitable for an upper-story room. If you’re hoping to install tiles on a second or third floor, it’s best to get an architect’s assessment to check whether the extra weight could compromise the structural integrity.
And finally, ceramic tiles are expensive to get installed—unless you decide to DIY, that is.
How to Install Ceramic Tiles: A Seven-Step Guide
Learn how to install ceramic tiles yourself in this step-by-step guide.
1. Evaluate Your Workspace
Take a close look at the area where you plan to install your tiles, known as the substrate. Your substrate is as essential as the tiles themselves, so keep this factor at the forefront
Common substrates include plywood, backer board, and concrete, all of which work well. If you’re installing tiles in a high splash zone like the shower or bathroom floor, opt for backer board as it boasts the best water-resistant properties.
Regardless of what you go with, it needs to be completely even, spotlessly clean, and stable enough to support the heavy tiles. Even a slightly uneven surface will see tiles peel off over the years.
- Clean the surface thoroughly.
- Ensure the entire area is true to the plane and free of bumps.
- Keep an eye out for any flaking paint or wallpaper, unsecured sheet flooring, and loose plaster.
- Scrape away any imperfections.
If it’s not possible to create a stable and even surface, you best giving tiling a miss.
2. Measure the Area Carefully
The measuring process varies depending on whether you’re doing walls or the floor. In either case, symmetry is key.
Measuring Floors
- Pinpoint the precise center of the surface.
- Measure in from the sides.
- Avoid having narrow tiles on one edge of the room and wide tiles on the other.
- Be especially careful when tiling small rooms.
Rooms often aren’t square, which makes tiling a bit more challenging. If you use the primary edge as a baseline and install your tiles parallel to the wall, you’ll achieve optimal symmetry.
- Draw perpendicular chalk lines from the center to divide the room into quadrants of approximately equal size.
Measuring Walls
On walls, you need to ensure your tiles are level rather than slanting to one side.
- Use a spirit level to mark an even top line.
- Measure the wall and avoid having to place thinly cut tiles on either edge.
- Snap a centerline and top line on the wall.
3. Laying Out the Tiles
Now you’ve determined the center point, marked the top-level line, and prepared the surface, it’s time to lay out the tiles.
To be clear, “laying out” means positioning the tiles in place while dry. Don’t add any adhesive or mortar just yet. The objective is to check whether the tiles will be sufficiently symmetrical.
- Lay out the tiles in a uniform manner.
- Use even spaces between tiles to account for grout lines.
- Bigger tiles require bigger spaces.
Don’t squish the tiles too close together to condense the lines because grout requires sufficient surface area to bond. If your lines are compact, the tiles won’t hold firmly, and the grout will be susceptible to leaks and cracks.
So what’s the perfect size? Anywhere between 1 and 3mm is good. Aim for smaller grout lines on the walls and wider ones on the floor.
4. Cutting the Tiles
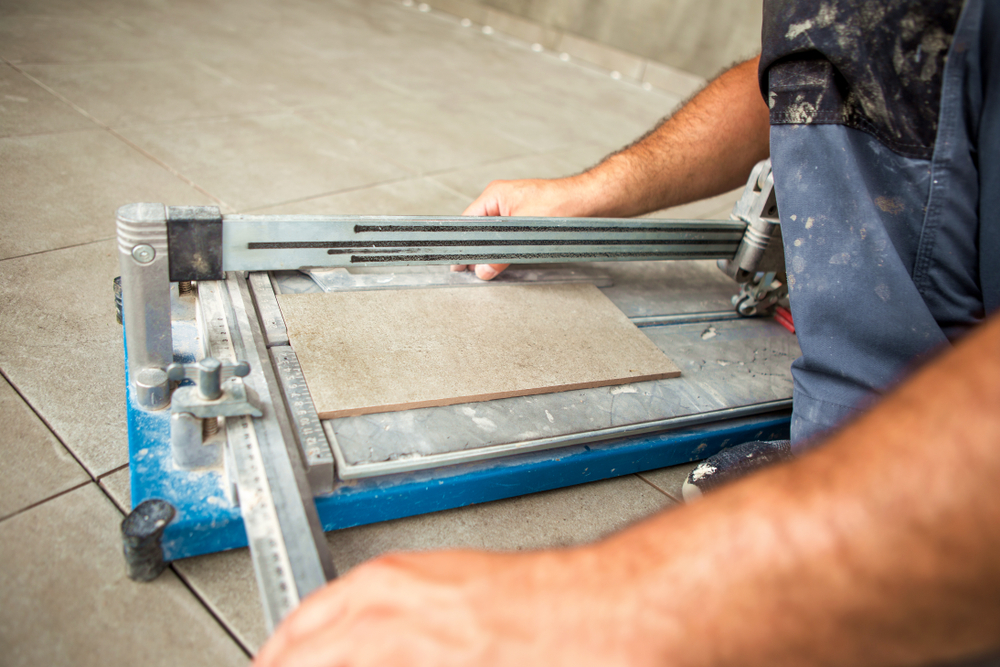
Your tiles won’t fit perfectly, so you’ll need to cut some of them down to size.
- Measure the space where you need a smaller tile.
- Draw those dimensions into the ceramic tile with a ruler and felt-tip pen.
- Double-check your measurements.
- Get your tile cutter
- Hold the tile in place by pressing the edge into the adjustable fence on the tile cutter.
- Align the axis you need to cut with the center line in the tile cutter.
- Lock the fence in position.
- Exert firm and even pressure on the lever to slice the tile.
- The idea is to cut it correctly the first time to avoid needing a second attempt.
- Snap off the tile.
Not all tile cutters work the same way, so read the instruction manual. It may take some practice to master the technique.
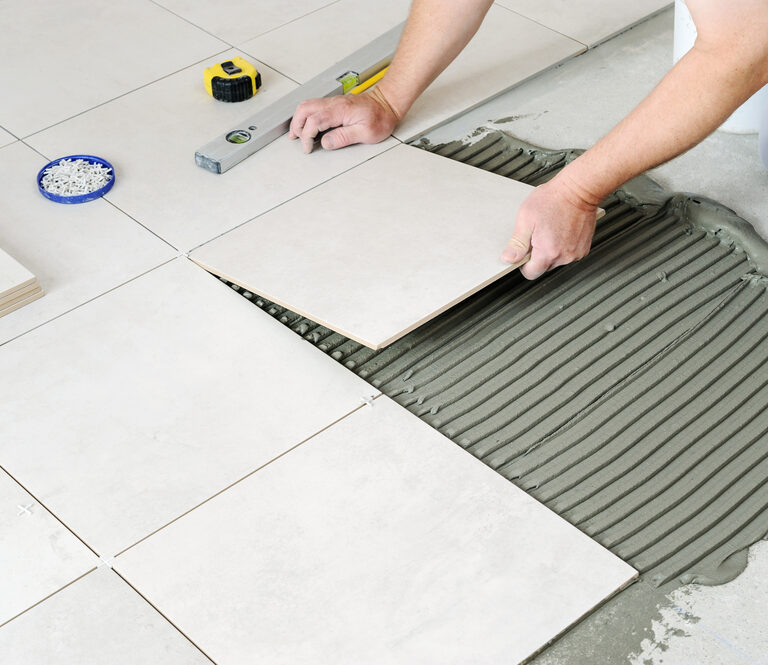
5. Adhering the Tiles
The next step is to stick the tiles in place. As moisture will inevitably make its way under the tiles, aim for a water-resistant material, ideally a pre-mixed adhesive or a thin-set mortar.
Always begin in the middle and work out towards the perimeter. You need to avoid touching the tiles until the adhesive has fully cured (check the label for the curing time).
- Spread the adhesive in a smooth, even layer across the surface using a square notched trowel.
- Position each tile in place, exerting a small twist to smear the adhesive slightly.
6. Grouting the Tiles
Now the adhesive has cured, you can safely apply your grout.
- Prepare the grout as per the instructions on the box.
- Spread the grout evenly between the tiles with a grout spreader.
- Use the spreader to push the grout between the lines and joints.
While white is a popular color, it’s also harder to clean. Consider using a dyed grout, which can enhance the aesthetics of the tiles. Choose carefully, though, because you don’t want to rip it up and start again if you’re unhappy with the color.
7. Cleaning and Sealing the Tiles

Applying grout is dirty work, and you need to move fast before it dries. The cleaning process often takes longer than the application, so get ready to spend an hour or more. Don’t skimp on this step because dried grout is a nightmare to remove.
- Wipe off the excess grout on the tiles using a sponge.
You’re now ready for the final phase: applying a sealant. Of the various options available, the grout sealant pen is the easiest to use.
- Pop on a pair of gloves
- Allow the grout time to cure (check the label).
- Apply a grout sealant over all your grout lines, following the instructions on the label.
How to Install Tiles: Final Thoughts
Although it’s a relatively long and labor intensive-task, installing tiles is easy for anyone with moderate DIY skills. And the savings a home job entails is well worth the effort—you now have a chunk of spare cash to spend on something you love.