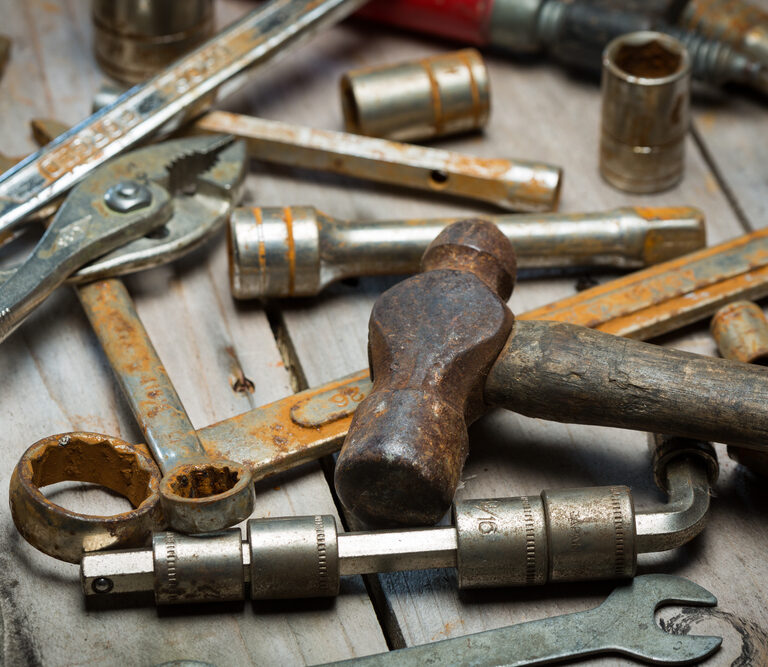
Rust is a natural sign of wear and tear, and can affect machinery, furniture, and even tools. But rust isn’t just unsightly – it can make your tools harder to use, and less effective overall.
If left alone, it can also cause irreparable damage to your tools that could render them useless. If your tools are rusty, removing the rust can help save your tools, and save you money in the long-run.
Preparing Your Tools for Rust Removal
When removing rust from your favorite tools, you’ll need to prepare them (and yourself) for the process. Since rust removal may require the use of harsh chemicals, we suggest you gather some basic tools and materials to keep you safe and get the job done right.
- Safety goggles
- Chemical-resistant gloves
- A bucket
- Dish soap
- A towel
- Sandpaper
- A wire brush, steel wool, or scouring pad
Clean Them Up
Once you’ve gathered your initial materials, you’ll want to give your tools a good cleaning with soap and water. This will help to remove any grease and dirt buildup present on the tools, allowing the chemicals to make direct contact with the rust.
Chemical Intervention
Once your tools are clean and dry, they’re ready for rust removal. You can technically skip the chemicals and use old-fashioned elbow grease and a metal scouring pad or brush to physically remove the rust. However, chemicals can make the job easier, and allow you to get into hard-to-reach spots you can’t physically access.
Natural Solutions
If you’re leery about using harsh chemicals, you’ll be happy to know that safe alternatives exist. Furthermore, you may already have them in your kitchen.
Vinegar
Vinegar, also known as acetic acid, is a versatile solution that can help remove rust from metal. You’ll particularly want to use white vinegar, as it’s more acidic than other types of vinegar.
Soak your tools in the vinegar for a few hours to remove most of the rust. If your tools are too big to put in a container to soak, then you might soak a rag in vinegar and place it over the rusty area.
Once your tools finish soaking, you should be able to wipe or buff away the remaining residual rust with a cloth or scouring pad.
Lemon or Lime Juice
Like vinegar, lemon and lime juice are acidic. In fact, they’re both actually more acidic than vinegar, so it may work more effectively to remove rust.
As with the vinegar, you’ll want to soak your tools for a couple of hours, either in a bucket or with a rag draped over the rusted area. Finish up by wiping the tools, and using an abrasive material to buff away any residual rust.
Powerful Chemicals
While natural household acids like vinegar and lemon juice are your safest option and typically work well for rust, they aren’t a cure-all. Sometimes, the rust on your tools goes beyond the scope of a simple household acid, meaning you’ll need to resort to more powerful chemicals.
As always, exercise caution when working with harsh chemicals. If these chemicals can pull the rust from metal in mere minutes, imagine what they can do to your skin.
Petroleum-Based Solvents
Petroleum-based solvents, like WD-40, are gentle yet effective chemical solutions that can help rid your tools of rust. That’s because they penetrate deep into the pores of the metal, loosening the bonds between the rust and metal, making it easier to remove the rust mechanically.
After spraying your tools and letting them soak in the solvent a bit, you can use a wire brush to scrub the rust off. Just keep in mind, while these types of solutions may displace water, they aren’t a good long-term solution for keeping rust at bay.
Acids
Acids are powerful substances that often etch metal, and can remove rust. With this in mind, you’ll want to ensure you’re using an acid that will convert the iron oxide into a water-soluble form, as some acids can actually cause rust.
Oxalic acid is one such acid that is commonly used for rust removal, and often comes in a powdered form. To use it, you’ll want a large bucket, water, and the acid.
As per the instructions, carefully mix the acid water and let your rusted tools sit in the solution. Once the tools have soaked in the acid for the specified period, remove and rinse them thoroughly with water.
Unlike petroleum-based solvents, acids can cause serious chemical burns and other major health problems, even from short-term exposure. When using acids, always follow the instructions and warning labels carefully and exercise extreme caution.
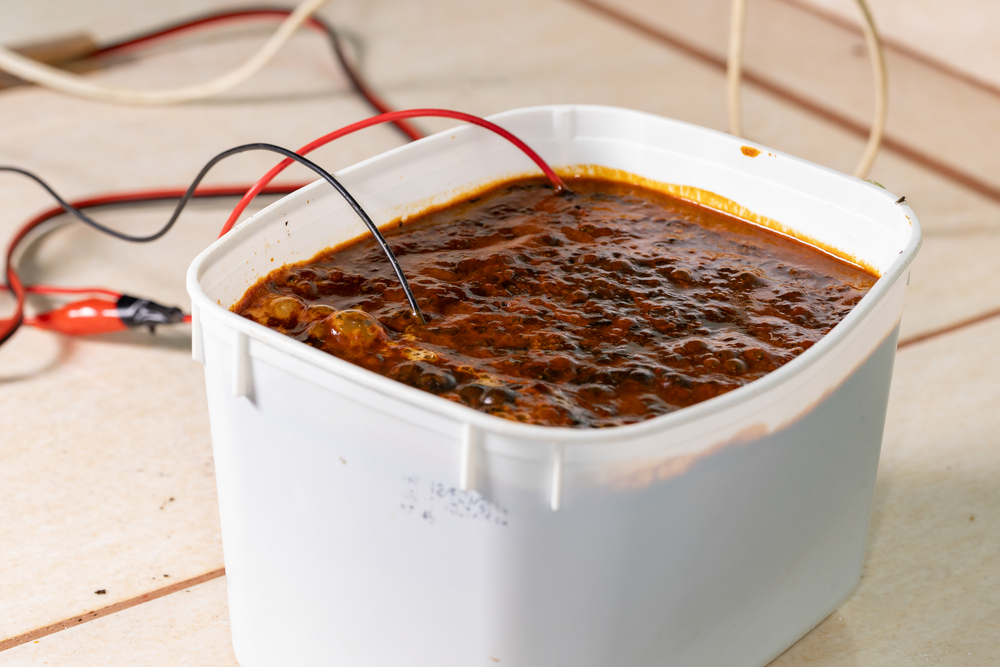
Using Electrolysis
If you want to take rust removal to the next level, then you could try using electrolysis. Electrolysis is the use of electricity to create a chemical change. For rust removal, that means using water, sodium carbonate, and electricity via a trickle charger to create a chemical change in the oxidized metal.
This is perhaps the most powerful solution for removing rust, and works on deep rust and pitting corrosion. It also works in a way that avoids doing damage to the underlying metal, making it a desirable method for removing rust on antique or otherwise valuable tools.
However, with great power comes great responsibility. Like harsh chemicals, electrolysis can present significant dangers, despite the seemingly benign components that make up an electrolysis tank.
If you decide that you want to give electrolysis a try, you can find a great video tutorial on how to make and use an electrolysis tank. When using electrolysis to remove rust, always make sure you’re in a well-ventilated area, and don’t stick your hands in the water while it’s working.
Mechanically Removing the Rust
Using chemicals or electrolysis will do most of the heavy lifting during the rust removal process. But in order to ensure your tools are rust-free, you’ll need to carefully inspect them and manually buff away any leftover rust with sandpaper or scouring pad.
If you want to skip all the fancy science and do it purely mechanically, you can do that too. Sandpaper works best for rust removal, though you can use a wire brush or metal scouring pad.
When using sandpaper, you’ll want to start with a low grit sandpaper, especially for heavy rust spots. As you get closer to the metal and the rust progressively disappears, you’ll want to transition to a finer grit sandpaper.
Using tools like an electric sander or drill sanding discs are a couple of ways to avoid most of the tedium and taxing work of manually removing the rust. If you insist on doing it by hand, then a sanding block can help speed up the process and make things more comfortable.
Preventing Future Rust
Once you have your tools rust-free, you’ll want to create a plan for keeping your tools from rusting again in the future. This will save you a lot of time and effort, and can prolong the life of your tools.
Keep Them Dry
Since rust forms as a result of metal becoming exposed to oxygen and water, the first logical step in preventing future rust is keeping your tools dry. This means not only keeping your tools out of the rain, but also keeping your tools out of high-humidity environments.
Easier said than done, right? If you store your tools in a drafty basement or garage, your biggest hurdle in rust prevention is likely humidity.
Dehumidifying Your Tool Storage Area
If you simply don’t have another spot for your tools, the next best thing you can do is dehumidify the area where you store your tools. The first obvious choice is to get a dehumidifier.
If you’re dehumidifying a large area, like your basement, then you’ll need a large dehumidifier. However, if you want something that’s more compact that you can store in your toolbox, you can use a small dehumidifier, or even go with something like moisture-absorbing packets and crystals.
You can also use things from around your home to help keep humidity low. These things include:
- Rock salt
- Charcoal
- Cat litter
- Baking soda
- Silica gel packets
Use a Rust Inhibitor
Dehumidifying the area where you store your tools is a great way to minimize the risk of rust, but it requires proactive upkeep. Another great way to prevent your tools from rusting is by using a rust inhibitor.
Rust inhibitors are generally a coating that sits on your tools to keep moisture from reaching the metal to form rust. Some rust inhibitors are rust-converting primers that require a follow-up coat of paint to work effectively – not likely something you want for your tools.
Instead, you’ll probably want something like this, which coats the tools and provides protection for a year or two, depending on where you store your tools.
Wrapping Up
Rust is unsightly, and can cause long-term damage to your tools. If you’ve found your tools are rusty, don’t worry. With a little work and the right tools, there are plenty of ways to restore your tools to their rust-free state, and prevent rusting in the future.