Your hot water heater is one of the most important appliances in your home. It allows you to have near instant access to hot water for washing dishes, cleaning, and of course, taking a nice hot shower. Depending on the specific model of hot water heater you have, it will contain anywhere from about 40 to 100 gallons of water. Being able to drain all of this water out safely is essential.
Fortunately, draining a water heater is a pretty simple and straightforward task that almost anyone can handle on their own. Just make sure that you do it correctly or you could end up with a huge amount of water on your floors, which can cause a lot of damage.
- Why Draining Water Heaters Is Necessary
- Step-By-Step Guide for Draining a Water Heater
- Step 1 – Turn Off the Water Heater
- Step 2 – Let the Water Cool
- Step 3 – Hook up the Hose and Perform a Quick Flush
- Step 4 – Turn Off the Water Supply
- Step 5 – Disconnect the Hot Water Pipe
- Step 6 – Fully Drain the Tank
- Step 7 – Turn On the Water Supply
- Step 8 – Close the Drainage Valve
- Step 9 – Let the Tank Fill
- Step 10 – Check for Leaks and Turn the Heater Back On
- Enjoy Your Newly Optimized Hot Water Heater
Why Draining Water Heaters Is Necessary
There are two main reasons why you might need to drain your water heater. The first, and by far the most common, is to help keep it working properly. Water heater manufacturers generally recommend draining and filling the tank about once per year. This is done to flush out any sediment and other things that can build up over time.
The other reason why you might need to drain a water heater is if you are planning on replacing it. A full water heater can weigh about 1000 pounds, so you definitely need to drain it before trying to remove it from your home.
No matter why you need to drain your water heater, the following instructions will help ensure you do it properly.
Step-By-Step Guide for Draining a Water Heater
If you need to drain your water heater, you will want to start by making sure that you have the right equipment for the job. Fortunately, it doesn’t take much to complete this process, and you likely have what you need already.
The main thing you will need is a standard garden hose. You will also need to know where the nearest drain is to your water heater. Once you have that ready, make sure you know where the shutoff valve for the hot water heater is, and the main shutoff valve for the water in your home is located. You shouldn’t need to turn off the main water line, but if something goes wrong, you will want to be able to react quickly.
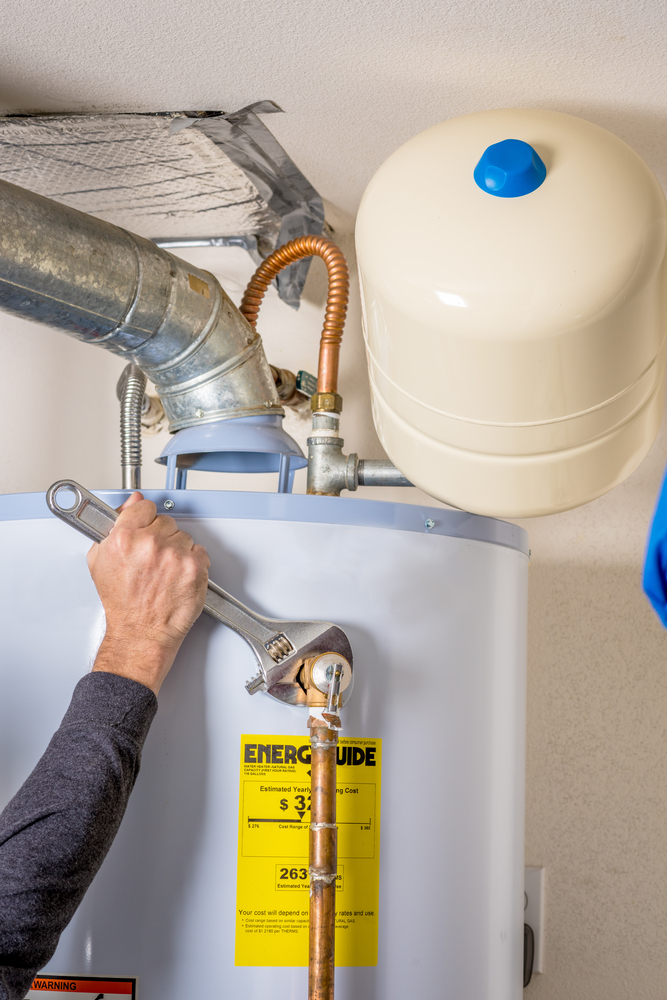
Step 1 – Turn Off the Water Heater
To get started, turn off the heat on your water heater. Every model will be different, so look for the instructions on the side of your unit. For electric water heaters, you can typically just unplug it or flip the switch to off. For gas units, you can turn off the gas line, so it won’t ignite or just turn the setting to off.
Step 2 – Let the Water Cool
Draining the water when it is hot can be dangerous, so it is best to let it cool. You can either just leave the unit alone for several hours to give it time to cool down, or run some hot water somewhere in your home so that it refills with cool water. It does not have to be completely cold, but bringing the temperature down to a point where it will not scald you if it splashes is an important safety step.
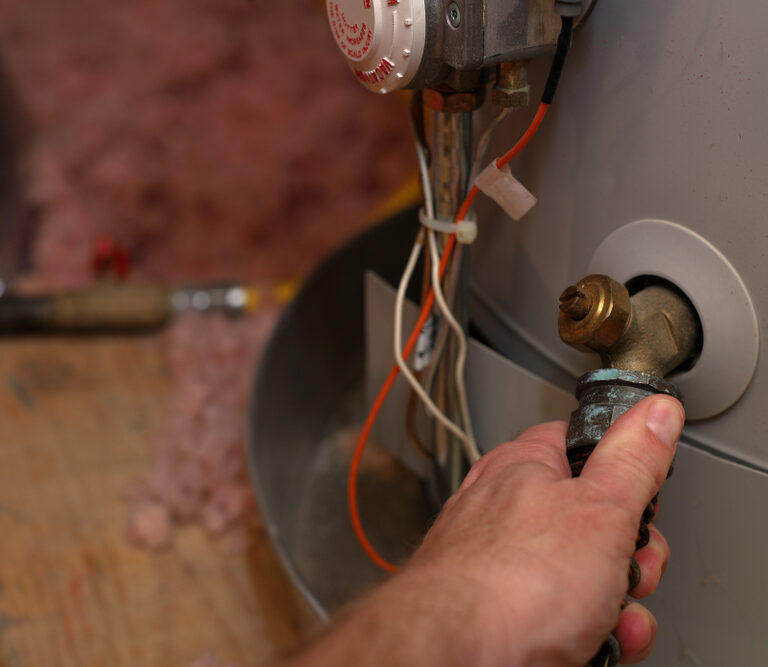
Step 3 – Hook up the Hose and Perform a Quick Flush
When ready, attach your garden hose to the drainage spigot at the bottom of your water heater. Make sure that it is secured in place so that it does not leak. Run the other end of the hose to the nearest drain, and position it so that it will not move when water is flowing through it.
Next, open the drainage faucet up briefly to let some water flow out. After a few seconds, turn it off and check to make sure all the water is going into the drain as desired, and not leaking in other places.
Open the drainage faucet again for several seconds, then close it off. Repeat this process 3-4 times. Since the cold-water source is still on, the water is under pressure. This process of briefly running the water will help to push any sediment out through the hose.
Step 4 – Turn Off the Water Supply
Turn off the cold-water supply that goes into your water heater. This will allow you to fully empty the tank in the following steps.
Step 5 – Disconnect the Hot Water Pipe
Since there is no pressure pushing water into the tank as it drains, you need to have an opening for air to flow in. To do this, disconnect the hot water pipe from the top of your heater. This will leave a clear opening for the air to flow into the tank as it drains.
Step 6 – Fully Drain the Tank
Open the drainage faucet on the bottom of the tank and leave it all the way open. Make sure to check the other end of the hose to ensure that the water is draining out smoothly and not backing up. If the drain does not drain out fast enough, turn the faucet off for a few seconds to let it catch up, then turn it back on.
Leave the faucet open. Once the water has stopped coming out of the hose, move on to the next step.
Step 7 – Turn On the Water Supply
With the drainage faucet still open, turn on the water supply to the water heater. This will quickly begin to fill the tank from the top, which can help to stir up any remaining sediment at the bottom, allowing it to drain out. Let the water flow into the tank and then out of the hose for several minutes.
Step 8 – Close the Drainage Valve
Once the water that is flowing out of the hose is coming out clear, close the drainage valve. At this point, you will want to open up a hot water faucet somewhere in the home (ideally a bathtub) and leave it open. Go back to the water heater and reconnect the hot water line. You can do this while the tank is filling up, but make sure that it is reconnected before the tank fills all the way.
Step 9 – Let the Tank Fill
Continue to allow the water to flow into the tank. You can disconnect the hose from the drainage faucet while waiting for this to complete. Look closely to make sure that it is not leaking at all. The amount of time that it will take to fill the water heater will depend on the size of the unit and how much water pressure you have in your home.
You will know that the water heater is full when you start to see water flowing out of the faucet you opened in the previous step (likely the bathtub). Once the water is flowing out of the faucet at a normal pressure, with no gurgling or air coming out, you can shut it off.
Step 10 – Check for Leaks and Turn the Heater Back On
Now that the water heater tank is filled back up, take one more moment to look closely around the bottom of the unit to see if there are any leaks. Also, look for any potential leaks around the hot water hose at the top.
If there are no leaks present, you can turn your hot water heater back on. Follow the instructions on the side of the unit. Make sure that the pilot flame is lit if you are using a gas appliance. It will take several hours for the water to heat all the way back up to its normal temperature.
Once the water has had time to heat up, go around to each faucet in your house and check to make sure they are working properly one at a time. Each faucet may briefly spit out air or dirty water as the water refills the various water pipes in your home. You can see an example of what it can look like when air is still in the lines at the beginning of this video.
Enjoy Your Newly Optimized Hot Water Heater
Congratulations! You have successfully drained and refilled your water heater. This will allow it to operate more efficiently, which will save you a little money on your gas or electric bill each month. More importantly, however, it will also help to extend the life of the water heater, so you do not have to replace it for years to come.