
Glass tile is an up-and-coming superstar in the home improvement scene, with scores of DIY fans reaching for the radiant material in lieu of ceramic or porcelain. Durable, impermeable, and easy to clean, glass tile is ideal for wet areas like backsplashes and showers—plus, it diffuses sunlight in a glorious shimmering glow.
In this instructional guide, we’ll show you how to cut glass tiles with four efficient tools: the wet saw, the bar cutter, tile pliers, and tile nippers. Follow our step-by-step guides to learn how to cut glass tile cleanly without leaving a shattered mess.
Tips for Cutting Glass Tile
Before we dive into our guides, here are a few useful tile-cutting tips for when you’re working with glass.
- Use a Glass Saw Blade: While a regular porcelain tile blade on a wet saw will get the job done, a diamond glass blade makes the process much easier. As the hardest substance on earth, diamond helps you make a clean glass cut without chipping the surface.
- Leave the Middle Until Last: If you’re struggling to get a clean cut, start on one end, move onto the other, and then cut through the middle. Although time-consuming, this method gives you more control over where the tile breaks, resulting in fewer chips.
- Cut the Glass Upside Down: Use your tile blade to cut through the backside first so that the blowout will be on the front. The front side will appear rougher at first, but you can sand it down until smooth. Give this tip a miss if you’re working with a solid glass with no backing.
- Round Down Your Notches: Avoid L- and U-shaped cuts wherever possible to minimize fragile notches. If you can’t forgo these shapes, round the inside corners down. A 90-degree cut is more likely to crack over time than a rounded one.
- Do a Dry Layout: Once you’ve cut your tiles, position them on the surface to gauge how they look before attaching them. Set the cut edges where they’ll be less visible—i.e., the underside of a cabinet—to hide inevitable imperfections.
- Safety First: When using a wet saw or nipper, tiny glass shards could fly from the blade and into your eye. Always wear safety goggles and pop on a pair of heavy-duty work gloves to protect your hands.
- Use a Dry-Erase Marker: Once you’re done cutting, you can easily wipe away your guidelines with a damp rag (permanent marker ink is hard to remove).
How to Cut Glass Using Four Different Tools
The ideal glass cutting tool depends on the project scope and tile type. We cover the four most effective options below.
1. Cutting Glass Tile With a Wet Saw
The wet saw works by squirting a steady stream of cold water into the glass tile in front of the blade, cooling down the surface to reduce friction and obtain a smoother cut. It’s a fast and effective option for large tiling gigs, especially when you’re working with lots of long straight edges.
Although the wet saw is an excellent all-round option, these machines don’t come cheap. If you’re not planning on cutting many glass (or ceramic) tiles in the future, hire one from a big-box home center or tool rental store instead.
The Tools of the Trade
The Step-By-Step Process
- Measure your tiles with a yardstick and mark a cutting guideline with a dry-erase marker.
- Pop on your safety goggles and a pair of rubber gloves. Leather gloves will only get soaked.
- Place the glass on a saw bed with the tile-side facing up.
- Align one edge flush with the saw bed fence and the marker line with the blade.
- Fire up the saw and let it run for 20 seconds to get up to speed.
- Ensure the water is spraying into the blade.
- Slowly feed the tile through the saw, pushing it away from you while supporting it on both sides of the blade.
- Repeat the process until you’ve got all your tiles.
- Power down the wet saw.
- Wipe off your marker lines with a damp rag.
- Smooth the cut edge with a diamond sanding block (if required).
Slow and steady is the key to a successful wet saw cut. Exert light, even pressure, and be mindful not to push too hard at the end to prevent chipping.
A diamond-coated glass cutting blade makes the process even easier.
2. Cutting Glass Tile With a Bar Cutter

A bar cutter, also known as a tile cutter, is a semi-mechanized way to score and snap your tiles—it’s much quicker than doing it by hand but less time-efficient than a wet saw. The cost-effective device has you align the tile along a bar, then score it with a cutting wheel before snapping it off with a handle-operated presser foot.
The Tools of the Trade
- A bar cutter
- Dry-erase marker
- Yardstick
- Diamond sanding block
The Step-By-Step Process
- Measure your cutting lines with a yardstick and mark them with a dry-erase pen.
- Put the glass tile on the cutter table facing upwards.
- Align the edge of the tile flush against the cutter table fence.
- Align the marked line with the cutting wheel.
- Press down firmly on the tile with one hand.
- Use the other hand to score the tile with moderate pressure, moving the wheel away from you.
- Align the presser foot with the scored line.
- Press down on the handle to snap off the tile.
- Wipe off any remaining marker lines with a damp cloth.
- Smooth the edges down with a sanding pad (if desired).
3. Cutting Tile With Tile Pliers
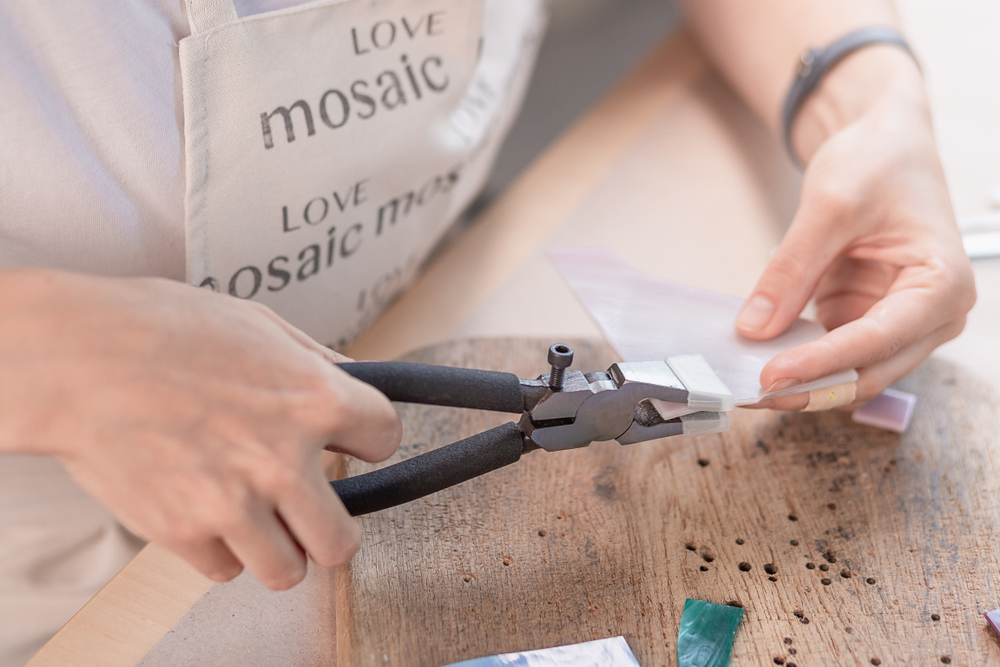
The tile plier technic is similar to a bar cutter (score and snap), except you don’t have a table top device to align the tiles. If you’re working with longer cuts, use a straightedge tool to help achieve an even line.
It’s slow going but effective if you don’t have much to cut—the technique is still popular among the pros for smaller tiles, especially mosaics.
The Tools of the Trade
- Tile pliers with cutting wheel
- Straightedge tool (for longer tiles).
- Dry-erase marker
- Yardstick
- Diamond sanding block
The Step-By-Step Process
- Use a yardstick and dry-erase marker to measure and draw your cutting lines.
- Position the glass on a flat surface facing upwards.
- Hold the glass in place with one hand. For long straight cuts, position a straightedge tool to guide the pliers.
- Use your other hand to align the cutting wheel on the pliers.
- Score the line with the cutting wheel, starting from the far edge and pulling the pliers toward you.
- Align the scored line with the jaws on the pliers.
- Squeeze down on the handle to snap the tile on the scored line.
- Wipe off the marked guidelines with a damp cloth.
- Smooth down the edges with a sanding pad (if required).
If you’re working with a mosaic sheet, snap the tiles individually and cut through the mesh with a utility knife.
4. Cutting Glass Tile With Wheeled Tile Nippers

This manual glass cutting method was the go-to option for the stained glass artisans of old who didn’t have fancy modern equipment to work with. Although rather laborious to use, wheeled tile nippers are a cheap and accessible way to cut small quantities of tiles.
The technique is especially effective for irregular shapes as you can nip away at the edges to create curves.
The Tools of the Trade:
- Wheeled tile nippers
- Safety goggles
- Dry-erase marker
- Yardstick
- Diamond sanding block
The Step-By-Step Process
- Use the yardstick and dry-erase pen to measure and mark guidelines into your tile.
- Put on your safety goggles.
- Hold the nippers in your hand like you would ordinary pliers.
- Position the wheels along your guideline.
- Squeeze down on the pliers with force to cut through the tile.
- Wipe off marks with a damp cloth.
- Smooth down the edges with a rubbing stone if required.
Each nip could send stray shards of glass rocketing around the room. Cover yourself appropriately and ask anyone else present to leave.
How to Cut Glass Tiles: The Last Word
Glass tile looks lovely in any bathroom, especially when sunshine illuminates the space to create a stunning sparkling effect.
And while it’s becoming increasingly popular in the DIY world, the material is prone to chipping or shattering when cut incorrectly. Follow the step-by-step instructions in our in-depth glass-cutting guide to slice through your tiles like a pro.