Have you ever wanted or needed to put a few holes in a tiled wall or surface but were apprehensive about how to begin the project? Were you worried about cracking the tile because of an unsteady hand? These are valid concerns, but you don’t need to fret. There are plenty of helpful tips and tricks at your disposal to make this process as painless as possible.
How to Drill Through Tile: Our Step-By-Step Guide
Now that you have an impression of what is at stake, let’s go through a step-by-step guide on how best to go about drilling through tile.
Step 1: Determine the Kind of Tile Your Home Has
There are three kinds of tile you will commonly see in most homes:
Glazed and Unglazed Ceramic
This is typically the most common tile used and will always be the easiest to drill. Glazed tiles are more decorative-looking, but unglazed are stronger and better suited for areas where strength is needed over aesthetics.
Porcelain
Porcelain is considerably tougher than glazed ceramic and difficult to drill through. Porcelain tiles are normally used for their high temperature-resistant properties. They can be as difficult to drill through as granite, depending on how they were formed. Sometimes porcelain tile looks stylistically like ceramic and can be deceiving.
Glass
This is much rarer and has only typically been used in the past decade or so. It’s mostly used either for decorative purposes or accents.
If you think that you might have something different besides ceramic tile, take a look at a wide variety of tile types here.
Step 2: A Small “Bit” on Power Drills
Drilling holes can be relatively simple for the most part, but when it comes to tile, that’s another story altogether. A cordless drill is highly recommended for a few reasons. First off, it allows for peak mobility without you having to worry about knotting up cords or having enough slack to reach the area you are working in. If you’re worried about overall power, many drills come with lithium-ion batteries. These kinds of batteries can last anywhere from three to six years and can handle at least 300 to 500 charge cycles per battery, if not more depending on the make and model. Most of the larger lithium-ion batteries for power tools will usually last way more cycles than that, however.
For more information on how best to maintain your lithium-ion batteries, please consult this helpful guide from Today’s Homeowner.
Step 3: Make Sure to Get the Right Drill Bit for the Job
You can’t just use a standard-issue drill bit for tile work. You’re going to at least need a carbide drill bit for most jobs. If you’ve got a tile that utilizes glass or porcelain, however, you’re going to want to go with a tougher diamond-tipped drill bit.
The good news is, neither one of these options are very expensive. Carbide bits will run on average around $10 or less, while diamond bits will average $20 or less, depending on the brand and model. Diamond drill bits are almost always a solid choice. Not only can they drill through all kinds of tile, but they also will last longer due to their heavy-duty design.
Step 4: Make Sure to Have Proper Safety Gear on Hand
Like all projects, you’ll need to consider the appropriate safety gear before starting. A safe working area means peace of mind and a better focus on the job at hand. Here are a few safety items we think you will need for drilling ceramic tile:
Safety Glasses
Because our eyes are delicate and any small piece of ceramic tile that chips off can easily irritate or even damage eyes.
A Mask
A mask with a filter of some kind, such as an N95 mask is ideal. Barring that, any kind of cloth barrier between your nose and the tile is better than nothing. It’s not a good idea to breathe in dust from tiles, as it can potentially irritate the lungs.
Gloves
We also recommend a pair of gloves that have non-slip properties to them. This is a good thing to have for gripping your power drill effectively in order to keep accidents from occurring. It also gives your hands some degree of protection at the same time.
Step 5: Plan out Your Attack
Since there’s relatively little room for error when drilling tile in your house, it’s a good practice to measure the area you’re working on at least several times before committing to a project of this kind. Let’s take a look:
1. Clean the surface of the tile, first and foremost. Make sure it’s clear of any dust, particles, or any other large pieces that can inhibit the drilling process. Also, be sure to check and see if there are any pre-existing cracks and wearing on the tile before you start drilling. If there are, consider choosing another tiled area to drill on. It will save you a lot of headaches in the long run.
2. Put masking tape in the portion of the wall you’re interested in drilling. Tape works well for this, since it’s easier to pinpoint a hole on a piece of tape you can draw on than the bare tile itself. The texture of the tape will also come in handy later, when you are trying to steady the drill bit.
3. A level tool can come in handy if you’re interested in installing something that needs two or more holes for mounting purposes. This is to make sure each hole you set is parallel with the other.
4. When setting hole marks, make sure that you center them as much as possible. The center of the tile is much stronger and less likely to crack than the edges are.
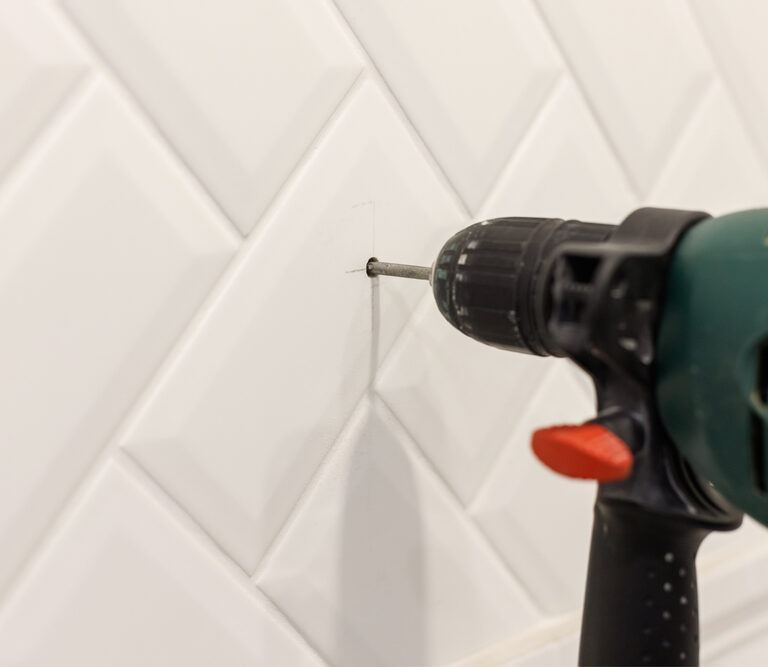
Step 6: Proceed With Drilling, but Don’t Rush It!
Keep your drill steady and at a lower speed when starting. This step is going to be crucial in keeping cracking and chipping to a minimum. Over the course of the project, though, you’re going to want to increase the speed accordingly to get the job done. Let’s take a look at this process:
- Safety first is crucial. Make sure you are at least wearing goggles, gloves, and a suitable mask that filters out any particles you might breathe in during this process.
- When you’re ready, take your drill bit and steady it on the mark you made on the masking tape in the previous step. The masking tape’s texture is going to help you in a big way when it comes to keeping that drill bit as steady as possible.
- Now that you are fully entrenched and stabilized, ease slightly on the drill’s trigger and drill slowly. This ensures that the hole you’re making is going in the right place. Once you start seeing a decent indentation taking form, you can increase the speed of the drill a bit. We still recommend not running it at full speed at this early stage. The faster the speed of the drill, the more potential mistakes you can make.
- Occasionally stop to check and make sure your drill bit isn’t overheating. Consider spritzing water lightly on the drill bit to keep it cool. This kind of work can easily overheat drill bits, and fast. Diamond-tipped drill bits can take a certain amount of punishment, but it’s better to maintain your tools properly in order to keep them lasting for as long as possible. So, to sum up, keep your drilling pressure low in these early stages and keep the drill bit cool by giving it occasional breaks during the process.
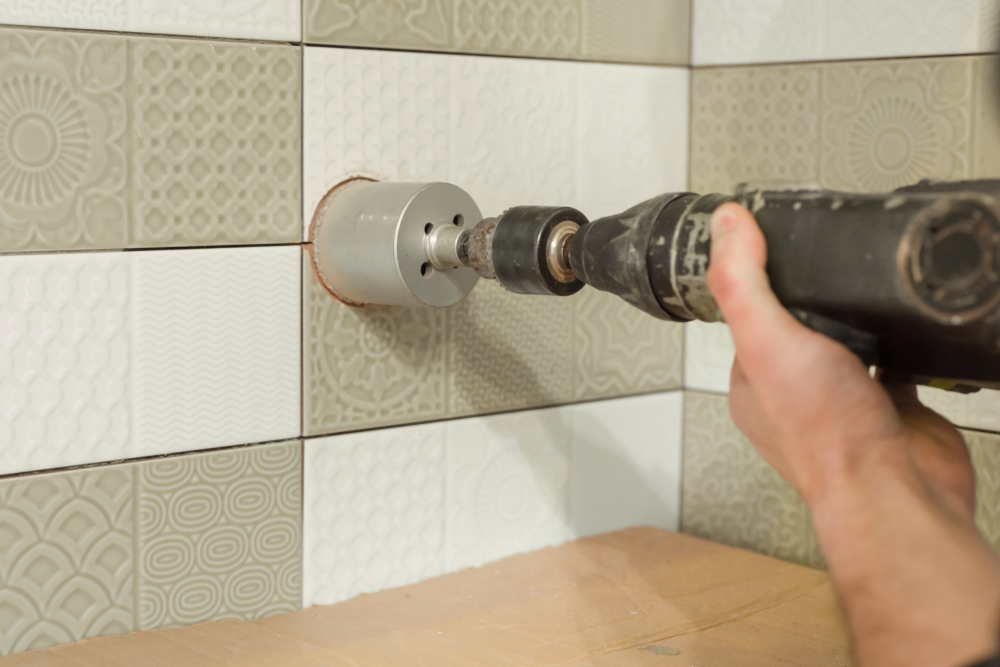
- There’s going to be a point where you are going to observe a shift in the tension the drill is having once the bit pierces through the tile at a certain point. At this stage, go ahead and amp up the drill’s speed while loosening up on the pressure. This keeps whatever is backing the tile from taking too much damage.
- At this point, it might be worth changing your drill bit to something more conducive for going through the material that backs the tile. For example, if the tile is attached to concrete, at this point you might consider switching to a drill bit that can handle masonry work. If it’s wooden underneath, consider a drill bit that’s suitable for wood.
- Repeat these steps above for every single hole you need to make. After you have installed your fixture of choice into the now-drilled tile, be sure to clean up any remaining tile particles that may have fallen onto your floor.
For a more visual guide of this process, check out this helpful video here.
Closing Thoughts
Drilling holes through tile of any sort can be a pain, but it doesn’t have to be. With these crucial steps listed above, you are now more than capable of successfully undertaking this project for any of your housing needs. Don’t put off installing that toilet paper holder any longer!