Drywall sanders allow you to remove old paint, level out freshly installed drywall, and do lots of other little projects around the house. They can make any DIY renovation project look much more professional.
In this guide, we’ll talk about how to choose a drywall sander, give you some sanding tips, and show you our recommendations for some great drywall sanders.
- How to Choose the Best Drywall Sander for Your Project
- Top 10 Best Drywall Sanders 2023
- 1. Best for Large Jobs: WEN 6369 Variable Speed 5 Amp Drywall Sander with 15’ Hose
- 2. Best Budget: HYDE 09170 Dust Free Drywall Vacuum Sander Kit
- 3. Best Manual Sander: Aouker Hand Sander with Grit Wet Dry Sandpaper Assortment
- 4. Best Premium Drywall Sander: Porter Cable 7800 4.7 Amp Drywall Sander
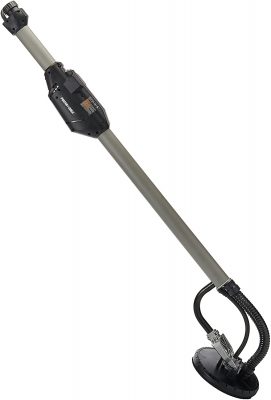
- 5. Best Pole Sander: POWER-PRO 2100 Electric Drywall Sander
- 6. Best Dust Control: HYDE 9160 Sponge Dust-Free Sander
- 7. Best for Detail Work: 3M Large Area Drywall Sanding Sponge
- 8. Best Overall: TACKLIFE 5-Inch Random Orbit Sander 3.0A
- 9. Most Powerful: TACKLIFE Drywall Sander 6.7A
- 10. Best Hand Sander: TACKLIFE Drywall Sander
- Drywall Sanders Full Guide and Sanding Tips
- DIY Drywall Sanding Tips
- Final Word
How to Choose the Best Drywall Sander for Your Project
Whether this is your first DIY renovation or you’re a professional contractor, choosing a drywall sander can be a tough process. There are so many brands and types and it’s not always obvious which one will fit your purposes best.
To start, narrow down the type of drywall sander you need. Then, decide what features and capabilities it should have. In this section, we’ll talk about how to make those decisions. In our full guide below, we’ll show you how to get the most out of your new drywall sander.
Pick the Right Type of Drywall Sander
Drywall sanders can be categorized into three categories based on how you use them. There are hand sanders, pole sanders, and manual sanders. Here’s a quick look at what differentiates them:
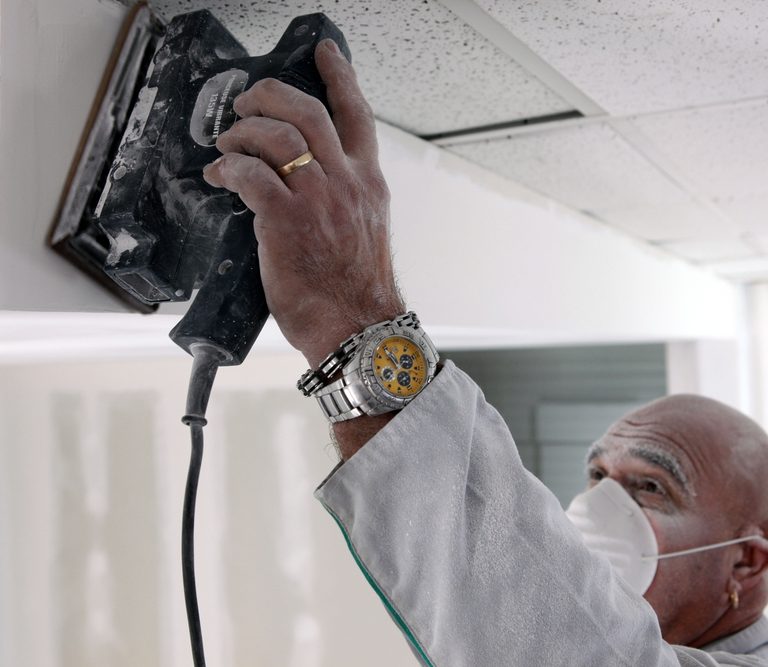
Hand Sander
Handheld electric sanders are some of the more versatile options out there. They can efficiently sand large areas as well as accomplish some detail work. Although, you won’t want to use them too close to corners or edges, especially if they have a rotary plate that can gouge into adjoining walls and ceilings.
Some hand sanders, like this one, even have the option of being mounted to a pole to become a pole sander.
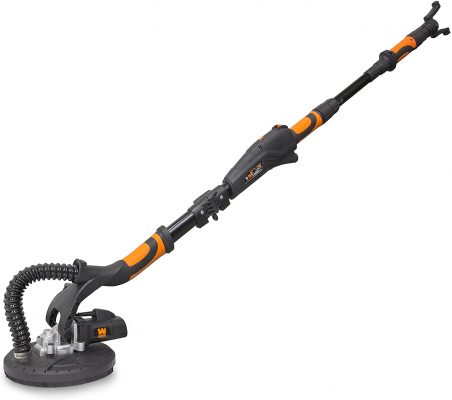
Pole Sander
A pole sander features a long pole with an electric sander at the other end. The main purpose of this design is to allow for reaching high spaces without needing to get on a ladder. Pole sanders like this one are a great investment for big renovation projects or professionals.
They may be too unwieldy and limited in function, though. You won’t be able to use a pole sander as comfortably as a hand sander and you definitely can’t do any detail or edge work with it.
Manual Sander
Manual sanders have no motor or moving parts. It’s just a gritty, coarse surface mounted to something that you can hold. It’s much more labor-intensive than an electric sander – but they are an essential, no matter what the job is.
There is always some detail and edge work involved in any project and for that kind of work, you need a manual sander like this one that you can easily and carefully sand corners, trim, and small areas with.
Focus on the Right Features
Once you know what type of drywall sander makes the most sense for your project, it’s time to get more specific about the details. You want to decide the grit on the sandpaper, the plate type, and other features to make sure you choose one that can do the job you’re doing.
Grit
Grit refers to the size of the grains on the coarse side of your sandpaper or sanding sponge. The smaller the number, the rougher the texture. For drywall, you don’t want to go below 100. These larger grits are too coarse and will leave visible scratches on your wall that will still be noticeable, even after you paint.
You also don’t want too fine a grit, though. Anything above 220 will likely be too fine to actually smooth down bumps and edges.
So, for drywall, your sweet spot is somewhere between 100 and 220 – and you’ll need a variety of grit sizes throughout the job. For the first part of your job, when wet sanding to level out the surface, use a larger grit (closer to 100) to get the more stubborn spots done. Then, let the wall dry and go over it with dry sandpaper of a finer grit (closer to 220) to finish the job.
Drywall sanders that come with a range of sandpaper of different grit sizes like this one can be a convenient way to get the right range of grit sizes without having to stress about it.
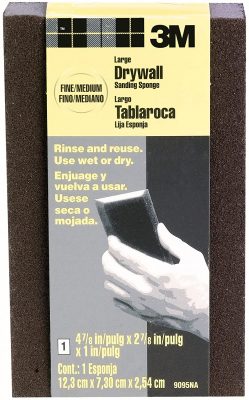
Also note that for sanding sponges like this set from 3M, the grit is given as a grade, not a number. Sponges are graded as fine, medium, or coarse.
Motor
The motor determines the RPMs of the sanding plate. Higher RPMs get the job done faster but also make the equipment more difficult to control and increase the risk of over-sanding some areas.
Ideally, you want a motor that has variable speeds, like this one so you can adjust based on your own comfort levels and the needs of the project you’re working on.
Motor power is usually measured in amps. The higher the amps, the higher the RPMs. For drywall, you’ll want something between about three and seven amps.
Weight and Balance
Any type of sander, whether pole-mounted or handheld, will need to be light enough for you to handle and maneuver. This is mostly a concern for electric sanders, which can flip or spin out of control if you aren’t able to get a good grip on them. When that happens, you could end up gouging your drywall or injuring yourself.
Weight can vary considerably with hand sanders as light as three or four pounds and pole sanders as heavy as 20 pounds. A lot of that weight comes from the motor. The more powerful it is, the heavier it tends to be. So, you have to strike that balance between having a powerful enough motor to get the job done and a manageable enough weight for you to comfortably use your new equipment.
There are other important factors to think about, which we discuss in detail in our full guide – where we will also show you how use your new tool.
So now, you’re ready to start browsing through some of our top recommendations for 2021:
Top 10 Best Drywall Sanders 2023
1. Best for Large Jobs: WEN 6369 Variable Speed 5 Amp Drywall Sander with 15’ Hose
Editor’s Rating:
Quick Facts:
- Motor: 5.0 Amp
- Grit: 60-240
- Weight: 9.2 lbs
The lightweight design and the built-in hose for dust collection make this a solid choice to be your next go-to pole sander. It’s powerful enough and versatile enough to handle a wide variety of jobs and it’s lightweight so you can easily take it with you.
Power and Versatility
The 5.0 Amp motor offers a range of speeds from 600 to 1500 RPM. It also has a precision dial rather than a fixed set of preprogrammed speed settings so you can get the precise RPMs you think will be best for the job. With this range, you can tackle just about any job from polishing down mud or joint compound to sanding off popcorn ceilings.
The range of sanding discs in different grit sizes adds even more to that versatility. The six sanding discs range in grit size from 60 to 240. For drywall, you’ll likely stick to using the 120, 150, and 180 discs. But the remaining grit sizes will be good for other surfaces, including wood and metal.
The built-in hose is a generous 15 feet long and it’s compatible with just about any shop vac. It’s optional to use, as the sander still works when not hooked up to a vacuum. However, it will significantly cut down on cleaning time by capturing most of the dust. With the long hose length, it won’t significantly cut down your range of motion, either.
Weight and Balance
At just over nine pounds, this is one of the most lightweight pole sanders out there. This makes it a great pick for home users, but the power and versatility still make it a solid choice for professional use as well.
The swivel head that allows you to get into corners and those hard-to-reach places improves the maneuverability but also makes the balance a little weird. We recommend getting comfortable with handling it without the motor on at first before turning it up to the full 1500 RPM.
It takes some getting used to and some fine-tuning to find the settings and angles that decrease the wobbling sensation, but this is true with any pole sander. If you’re worried about the handling and balance, consider this pole sander – which comes with a guard attachment for the edge of the disc to help minimize any damage from flipping or bumping into corners and ceilings.
Pros
- One of the most lightweight pole sanders available
- Wide variety of grit sizes included
- Precision speed control ranging from 600 to 1500 RPM
- Built-in 15” hose for dust collection
Cons
- Takes time to get used to handling it and figuring out how to minimize wobble
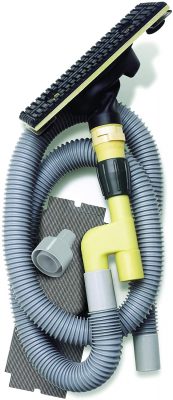
2. Best Budget: HYDE 09170 Dust Free Drywall Vacuum Sander Kit
Editor’s Rating:
Quick Facts:
- Motor: N/A
- Grit: 120
- Weight: 1.8 lbs.
The Hyde pole sander kit comes with a hose and sanding screen attachment that fits all shop vacuums. It uses a unique sanding screen that is more durable than sandpaper or sanding discs and better allows dust to pace through into the vacuum hose.
Power and Versatility
There’s no real power behind this drywall sander since it’s more or less a special sanding attachment for your shop vac. It’s more like an upgraded manual sander. With that in mind, the sanding screen is a unique detail that sets it apart from other manual sanders.
The screen offers a 120 grit but is more durable and long-lasting than typical sandpaper or sponges. The metal screen will hold its coarse texture much longer than these other materials.
The screen design also allows it to collect dust through the small holes in between the metal grating. It’s large enough for dust particles to fall through but small enough to provide plenty of coarse surface area for sanding.
So you’ll still have to put some muscle into it, as you would with any manual sander, but you get better dust collection than you would with others in this category and you don’t have to replace your screen as often as you have to replace paper and sponges.
There’s also a place for attaching a pole extension so you can use this as both a hand sander or a pole sander, although you do have to buy the pole attachment separately.
Weight and Balance
The sanding attachment and hose weigh just under two pounds so handling it won’t be a problem. There’s also a comfortable grip near the base of the sanding head and it swivels to give you a range of angles without having to move around as much.
Overall, it’s easy to handle and light enough to use for hours at a time. However, if you’re doing more than one room, your probably want something with some power behind it, like this one so you can get the job done faster and with less manual effort.
Pros
- Unique sanding screen lasts longer than paper or sponge
- 120 grit size is perfect for drywall
- Hose attachment is compatible with any shop vacuum
- Swivel head and lightweight design for easy handling
Cons
- Not recommended for larger jobs
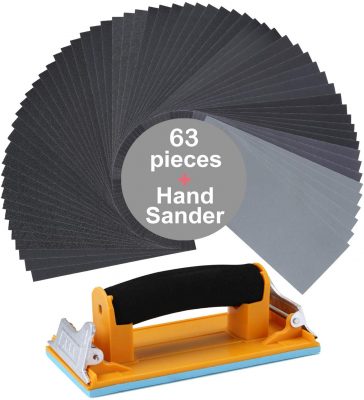
3. Best Manual Sander: Aouker Hand Sander with Grit Wet Dry Sandpaper Assortment
Editor’s Rating:
Quick Facts:
- Motor: N/A
- Grit: 60-3000
- Weight: <1 lb.
This little hand sander comes in a complete kit with enough sandpaper in a wide enough variety of grit sizes to handle any kind of sanding you need, drywall or otherwise. It’s both affordable and versatile, making it perfect for home DIY projects.
Power and Versatility
The handle design makes it easier to sand with than either using a piece of sandpaper alone or having it wrapped around a piece of scrap wood. It helps to distribute pressure evenly across the paper so you don’t have the issue of wearing down one side while leaving the other side almost untouched.
That also helps to speed up the job a little since you’re covering more surface area with each pass. It’s still not going to be nearly as fast as an electric sander. But the waterproof design makes it suitable for both wet and dry sanding so you can make the work a little easier on yourself by opting to do wet sanding.
What really sets it apart from other manual sanders, though, is the set of 63 pieces of sandpaper. That includes three pieces of 21 different grit sizes. So, there’s really no surface this tool can’t sand.
However, if you’re solely using this for drywall, most of those pieces are going to be useless to you since you really only need grit between 100-220. So for something that includes a variety more targeted to drywall sanding only, consider this orbit sander with sanding plates ranging from 80-180 grit.
Weight and Balance
The less-than-one-pound design and the handlebar feature make this easy to handle and light enough to use for extended periods of time. The plate and handle design help to distribute pressure across the sandpaper but also allow you to use your entire palm rather than just your fingers to apply pressure. The result is that your hand won’t tire out nearly as quickly and you’ll be able to apply more pressure with less effort.
Pros
- Lightweight handlebar design is easy to handle
- Comfortable for hours of sanding
- Suitable for both wet and dry sanding
- 21 different grit sizes
Cons
- For drywall sanding only, the 63-piece set may be a lot of unnecessary clutter
Editor’s Rating:
Quick Facts:
- Motor: 4.7 Amp
- Grit: N/A
- Weight: 8.5 lbs.
Porter Cable is a well-known brand in the drywall sanding space. If you’ve ever rented a sander, there’s a good chance this is the brand you got. That’s because it offers a powerful motor without all the bulk that usually comes with it so they’re easier to handle but still capable of handling tougher jobs.
Power and Versatility
The 4.7 amp motor offers variable speeds ranging from 1,400 to 2,000 RPMs. That’s fast enough for even the toughest jobs. The plate also comes with a brush skirt around the edge which prevents you from gouging the walls and joints.
That’s a useful feature to have considering how powerful this is. And it has the added benefit of helping with dust collection so more gets funneled into the vacuum hose and less escapes out of the sides.
The 13’ hose attaches to any shop vac for easy dust collection. Between the hose and the brush skirt, this is one of the most dustless set-ups you’ll find.
Weight and Balance
The entire pole sander weighs just 8.5 pounds, despite reaching speeds of up to 2,000 RPM. This is the main reason professionals rely on this brand so much. It’s easier to handle, less likely to flip or spin out of control, but still powerful enough to get the job done quickly and efficiently.
One design feature that helps improve the handling is the location of the motor. Rather than being positioned up at the head like most pole sanders, the motor is lower down on the handle. This moves the center of gravity and makes it much less top-heavy.
For everything it has to offer, this Porter Cable sander does not come cheap. Home users who just need it for their own DIY projects might not want to pay such a steep price. Instead, consider an alternative like this one which offers a comparable weight and speed range at a fraction of the price.
Pros
- Lightweight and compact design
- Powerful 4.7 Amp motor reaches RPMs up to 2000
- Brush skirt trim for gouge-prevention and dust control
- Unique design makes for easy handling
- 13’ hose compatible with all shop vacuums
Cons
- Expensive
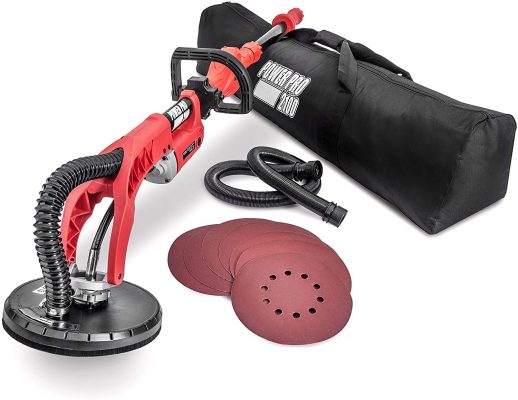
5. Best Pole Sander: POWER-PRO 2100 Electric Drywall Sander
Editor’s Rating:
Quick Facts:
- Motor: 5.9 Amps
- Grit: 80-240
- Weight: 15 lbs.
With an extendable handle, adjustable angles, and 12 sanding discs in six different grit sizes, you can’t beat the versatility offered by this pole sander from Power-Pro. It can handle a wide variety of tasks even though it’s primarily designed for drywall.
Power and Versatility
This professional design is built to handle all your drywall sanding needs. The 5.9 Amp motor offers a range of high-powered speeds from 1,000 all the way up to 2,100 RPMs. This will scour away popcorn ceilings, remove stubborn mud or joint compound, and sand rough patches smooth with ease.
With all that power, you do have to be careful, though. Even at it’s lowest setting of 1,000 RPMs, you need to make sure you don’t apply too much pressure to your wall. Otherwise, you risk gouging it or creating valleys that will be difficult and time-consuming to repair.
For something a little gentler, you might try the WEN pole sander which goes as low as 600 RPMs but still offers high power when you need it.
In addition to the variable speeds, you also get variety in grit size and pole length. The 12 sanding discs that come with your equipment come in six different grit sizes including 80, 100, 120, 150, 180, and 240. You’ll be able to start with a coarser grit and adjust to increasingly finer sizes as you near the finish line on the job.
The pole can adjust your sander from four feet up to six feet so you can cover high walls and even reach the ceiling.
Weight and Balance
At 15 pounds, it’s not the lightest pole sander available but it’s also not too bulky. The added handle attached to the pole helps to improve your handling so it’s much easier to wield than other pole sanders with similar motors.
The pivoting head makes it easier to sand wide areas of wall and ceiling without having to change your position. So, as far as high-powered pole sanders go, this is one of the easier ones to use. But it is still a heavy-duty pole sander so beginners will need to take a little time to practice maneuvering it.
Pros
- Six grit sizes included
- Adjustable pole goes from 4’ to 6’
- Handle on pole for easier maneuvering
- 5.9 Amp motor is powerful enough for professional jobs
Cons
- Limited low RPM options
6. Best Dust Control: HYDE 9160 Sponge Dust-Free Sander

Editor’s Rating:
Quick Facts:
- Motor: N/A
- Grit: Medium
- Weight: 1 lb.
This lightweight yet durable hose comes with a compartment designed to fit a sanding sponge. This allows you to sand while vacuuming up the dust all in one smooth action. It’s an affordable way to meet your drywall sanding needs if you’re only doing a small space or a weekend craft project.
Power and Versatility
This is a very versatile option for this price point and it has a lot of reusability potential. The hose can attach to any standard shop vac. When you buy the hose, it comes with two medium grit sanding sponges already.
The size of sponge it works with is standardized so you can easily buy replacements as needed when the two it comes with are worn out. However, because they are sanding sponges, they do wear out quickly compared to sanding plates or even sandpaper. If you’d prefer a dustless manual sanding option that doesn’t wear out as quickly, check out this other vacuum attachment from Hyde which features a sanding screen instead of a sponge.
By using the sponge inside the vacuum attachment instead of on its own, you’re able to remove about 90% of the dust created by sanding before it has a chance to escape and create a huge mess on the floor.
Weight and Balance
This is a very lightweight and easy to maneuver option because it’s just a plastic hose that attaches to your existing shop vac. So, there’s no risk of gouging or injuries. This makes it a great option for corners, edges, and all that detail work that you just can’t get at with an electric sander.
Pros
- Excellent dust control option for manual sanding
- Compatible with standard sanding sponges
- Includes two medium grade sanding sponges with the purchase
Cons
- Sponges wear out quickly
7. Best for Detail Work: 3M Large Area Drywall Sanding Sponge
Editor’s Rating:
Quick Facts:
- Motor: N/A
- Grit: Fine/Medium
- Weight: < 1 lb.
The dual grit and durable foam construction make this a reliable sanding sponge for both wet and dry sanding. You can use it for those final spot touch-ups after the bulk of the sanding is done or for the entirety of a smaller project.
Power and Versatility
While it might not seem like it, this little sanding sponge is quite versatile. The dual-sided design gives you a coarse medium grit as well as a finer grit. You can tackle those stubborn spots using the medium grit and then flip it over to polish it off with the fine grit side.
It’s also safe to use in either wet or dry sanding. The durable and absorbent foam can soak up enough water to soften the uneven section of drywall. And the grit on either side of the sponge remains coarse and functional, even when wet. Then, just let it dry while your wall dries and use it for some final dry sanding to finish the job.
Rinse and reuse it multiple times, until the grit on either side wears down. It’s also compatible with shop vac sanding hose attachments like this one.
Weight and Balance
This lightweight foam couldn’t be easier to hold and maneuver. Being a sponge, it’s not heavy at all. And the dimensions are perfectly suited to fit comfortably in your hand. Since there’s no motor involved though, balance is not an issue.
The key drawback is that it’s not really up to the task of larger jobs. Not only would it take forever to sand an entire wall with this sponge but the grit size is not really suitable for the larger bumps and creases.
Pros
- Durable foam construction
- Dual-side design offers two different grit sizes
- Suitable for both wet and dry sanding
- Compatible with some sanding hose attachments
Cons
- Only suitable for minor touch-ups and smaller projects
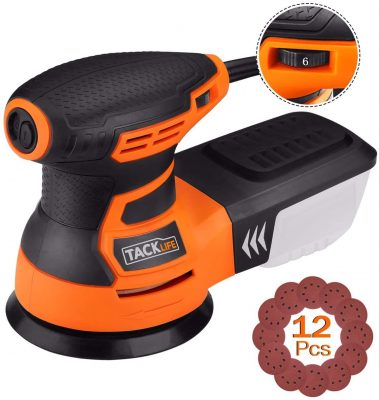
8. Best Overall: TACKLIFE 5-Inch Random Orbit Sander 3.0A
Editor’s Rating:
Quick Facts:
- Motor: 3.0 Amps
- Grit: 80-180
- Weight: 3.4 lbs.
This six-speed hand sander is a great little helper for just about any home renovation project. Whether big or small, you can shave hours off your project and get the job done with much less effort compared to manual sanding.
Power and Versatility
The sander comes with six speed settings that you can easily adjust using the dial. The maximum speed is 13,000 RPM which is more than enough for most projects. However, at 3.0 amps, this is not the most powerful hand sander out there.
For bigger projects or for professional use, it might not pack the punch you need to handle the variety of work you have to do. For something a little more heavy-duty, check out this pole sander with a 6.7 Amp motor.
If you are just looking for home use or light use, though, this compact sander is a great choice. The built-in vacuum and dust collector make it an all-in-one machine. There’s no need to connect it to a shop vac or deal with dust flying everywhere.
Holes in the sanding discs allow the vacuum located inside the machine to pull in dust and deposit it into the small compartment that attaches to the back. When it’s full, just detach it and dump it in the trash.
Weight and Balance
At less than four pounds, this hand sander is great for DIYers who need something lightweight and easy to maneuver. The rubber grip handle also helps to provide a secure and comfortable grip.
The placement of the handle directly over the sanding plate and motor means that you can press down and maneuver all in one action. This gives you greater control over the movements and pressure applied. It also creates a more even weight distribution, instead of a lopsided or top-heavy distribution like some other designs.
Pros
- Built-in vacuum and dust compartment
- Compact and lightweight design
- Convenient rubber grip handle design
- 6 speed settings
Cons
- Not powerful enough for tougher jobs
9. Most Powerful: TACKLIFE Drywall Sander 6.7A

Editor’s Rating:
Quick Facts:
- Motor: 6.7 Amp
- Grit: 120-320
- Weight: 16.7 lbs.
This pole sander offers variable speeds between 500-1800 RPM and a built-in vacuum system that frees you from your shop vac while still cutting your post-sanding clean-up time in half. It’s powerful, efficient, and comes with everything you need to start sanding right away.
Power and Versatility
With the 6.7 Amp motor, you can reach speeds of up to 1800 RPM which is enough to take on just about any drywall sanding project. It also comes with 12 sanding discs, six of 120 grit and six of 320 grit. Use the 120 grit to start and get the biggest bumps and imperfections sanded down. Then use the 320 grit to polish the wall to perfection.
What really sets it apart, though, is the built-in vacuum system. It’s not just a hose that attaches to your shop vac. It has its own vacuum system that attaches to a bag that you can carry on your back. This means you don’t have to drag a shop vac around the room with you.
Weight and Balance
As with any pole sander, there’s a learning curve to get the handling and balancing right. But the 16.7 pound weight also makes this a little more challenging than some of the lighter weight pole sanders available. However, when you need the kind of motor power this offers, you just have to accept the added weight that comes with it.
One of the standout features of this pole sander is the optional chassis that guards the edges of the sanding disc. This easy-to-assemble plastic blocks those sharp edges so that if you do accidentally hit an adjoining wall or flip the sander, it won’t cause as much damage.
This feature makes it very beginner-friendly and takes some of the stress out of the adjustment process when you’re still figuring out the right settings and angles for handling your new pole sander.
If you would still rather just go with a lighter, easier to handle pole sander, though, this one might be a better choice.
Pros
- Powerful 6.7 Amp motor offers professional-quality functionality
- 12 sanding discs included
- Vacuum hose attachment with bag for improved portability
Cons
- Heavy and harder to handle for beginners
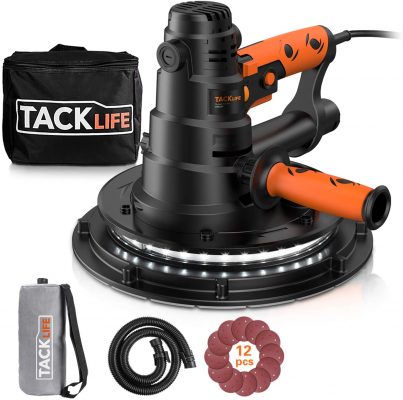
10. Best Hand Sander: TACKLIFE Drywall Sander
Editor’s Rating:
Quick Facts:
- Motor: 6.7 Amps
- Grit: 120-320
- Weight: 9.3 lbs.
With a 6.7 amp motor, a built-in vacuum system, and a well-built handle design, this is one of the best hand sanders you could get. It’s fast, efficient, and produces a professional quality finish on all your drywall.
Power and Versatility
The powerful motor offers speeds ranging from 770 to 2100 RPMs so this is ready for drywall sanding jobs of all sizes. It can also handle plaster, popcorn ceilings, and exterior walls. The wide 9” sanding pad also allows you to cover a lot of space in a single pass.
One of the most convenient features included is the built-in vacuum system. With a flip of the switch, you can turn on the vacuum mechanism inside the base of the sander. This will suck the dust through the holes on the sanding disc and into the bag that is included in this set.
You can carry the bag over your shoulder so that you can sand and vacuum at the same time without having to drag a shop vac behind you.
Weight and Balance
The dual handle design makes this one of the easiest to handle sanders on the market. Use the top handle to apply as much or as little pressure as you need to. Then, put your other hand on the side handle to guide the sander where you want it to go.
Both handles are padded with a soft-grip material that helps minimize vibrations. This makes it easier to operate the sander for long periods without fatigue. To make it even more convenient, the side handle can be installed on either side of the sander so even left-handers can comfortably use this equipment.
While it is heavy for a hand sander, the dual handle design makes that extra weight hardly noticeable and it’s a worthy tradeoff for the powerful motor you get with this tool. However, if you’re looking for something more lightweight, check out the 3.4 pound sander from this same brand which uses a smaller motor so you can have a sander at a fraction of the weight.
Pros
- Powerful 6.7 Amp motor offers 770-2100 RPMs
- Dual-handle design for comfortable handling (even for left-handers)
- Built-in vacuum system
Cons
- Heavy
Drywall Sanders Full Guide and Sanding Tips
Before we dive into our guide about how to use your drywall sander, there are a few other factors worth discussing before settling on a final choice.
Plate Type
On electric sanders, you’ll see either rectangular plates or rotary plates. The shape is less important than the action. A rectangular plate oscillates back and forth when it’s on, acting a little more like a manual sander. A rotary plate is round and spins when it’s on. Generally, these provide a smoother result but both can get the job done.
In addition to type, pay attention to size. Some brands use their own custom sizing, forcing you to buy their own branded replacement sanding discs. Other brands, like this one, use standardized sizing so that you can buy more affordable generic replacements when needed.
Dust Control
With manual sanders, you won’t always have much choice where dust control is concerned. Although, there are manual sanders like this one that attach to your vacuum to provide some dust control.
In general, however, this feature is only available on electric drywall sanders. Some don’t have it but others will be designed to vacuum up the dust it creates as it goes. Typically, they do so by having small holes in the sanding plates that allow the dust to be pulled through into a hose attached to a vacuum or into a separate collection compartment.
Dust control helps minimize the clean-up after you’re done sanding but you’ll still have to prep the space and wear proper protective gear. “Dustless” just means “less dust,” not “no dust.”
Portability and Versatility
Some sanders are more portable than others. The larger and bulkier they are, the more difficult they are to take with you. However, if you’re getting this for personal use at home, that’s unlikely to be a major issue. For professional use, however, you want something that could potentially come apart and be packed away. This makes it easier to take with you on jobs.
In addition to portability, the versatility of your drywall sander could also be an important factor to consider. This is something DIYers will be more concerned about than professionals. Professionals will need a variety of more specialized tools to do their jobs. However, at home, you don’t want to have multiple drywall sanders sitting around. It’d be better to have one that can reasonably handle a wide range of jobs.
DIY Drywall Sanding Tips
Doing your own renovations and repairs is a very cost-effective and gratifying process. But when it comes to drywall, it can get tedious. This is even more true as the drywall stage is usually near the end of the renovation process so you’re starting to get impatient to see the end result. Don’t rush through this final step, though.
If you rush and do a bad job on the drywall sanding, you will be able to notice it in the uneven surface of your walls, even after you paint. So take your time to learn how to sand drywall and use the tips and information below to make sure you’re doing the best possible job:
Get All the Necessary Equipment
Before you can start sanding drywall, make sure you have all the equipment you need to get the job done. The most important piece of equipment is, of course, the drywall sander itself. You’ll have to choose between a handheld, pole sander, or manual sander depending on what kind of job you need to do.
But to sand drywall safely and effectively, you’ll need more than just your drywall sander. It can be a messy and somewhat dangerous job so you’ll want protective gear and other tools to get it done properly.
In addition to your sander, you’ll also need:
- A putty knife
- Goggles
- Dust mask
- Extra sandpaper
- Extra sanding sponge
- Flashlight (or headlamp)
- Bucket (if wet sanding)
Goggles, masks, and other protective gear prevent dust and debris from getting into your eyes, nose, and mouth. The putty knife allows you to scrape away large chunks or apply patches as needed. The flashlight will help you check how level the surface of your drywall is by making it easier to spot shadows and crevices.
Prep Your Space
The large amounts of chalky white dust produced in the process of drywall sanding is not just unpleasant to breathe but difficult to clean up once it gets into carpeting, wood grain, crevices, and other parts of the house.
You can minimize clean-up by taking the proper steps in advance to prep the space. For that, you will need generous quantities of tarp, plastic sheeting, and painter’s tape or duct tape.
Lay plastic down over the floors and tape it down along the edges. Make sure the tape securely holds down the edges and covers up any nooks and crannies that the plastic might not be able to reach.
Then, tape plastic or tarp over windows and doorways to prevent dust from escaping the room you’re sanding. Any fixtures, electrical outlets, or other small parts in the room should also be covered with plastic.
This process may require placing a strip of tape along some of the drywall you need to sand. This is fine. You can go back over these edges and details with a sanding sponge once you finish the bulk of the job. The amount of dust produced in that detail work is minimal enough that you can manage to clean it up with a vacuum and duster afterward.
Decide on Wet Sanding or Dry Sanding
There are two main methods of sanding: wet and dry. The key difference, as you might guess, is whether or not your sander is wet when you are sanding the wall. Let’s take a look at what kind of work is involved in each method and when to use each kind:
Wet Sanding
With a wet sanding sponge, you are able to both soften the drywall and remove major imperfections. Part of that imperfection gets sanded away by the coarse texture of the sponge and the rest gets smoothed out over the rest of the drywall.
This is much more efficient and thorough than dry sanding but it also requires a bit more finesse.
The most important thing to keep in mind is that you can’t do more than two passes over the same spot with a wet sanding sponge. If you do, the drywall becomes too wet. If it gets too wet, it loses its integrity and you could end up making a crater or removing too much of the drywall.
So, pass over a spot once with a coarse grain sanding sponge or electric sander. Then, do a second pass with a softer grain. If there are still imperfections in that area, let it be for now. Don’t go back over it until the drywall has had time to dry again.
Other important things to keep in mind with wet sanding include:
- Rinse and rewet your sanding sponge regularly as you work.
- Change out the water in your bucket when it gets milky and thick.
- Use wide, gentle strokes to start and finish with smaller, more vigorous strokes.
- Don’t sand too aggressively when wet sanding. It can create craters and holes.
- Use warm water to better soften the drywall.
- Generously soak the sanding sponge before sanding.
This method of wet sanding is generally used soon after putting up drywall in order to level it out and get it ready for its first coat of paint. You won’t really need to do it for smaller renovation jobs where you’re just removing old paint in preparation to put up a fresh coat.
If you do an expansion, tear down a wall, or do anything else that requires tearing out and replacing drywall, you will need to do some wet sanding.
Dry Sanding
Dry sanding is a little bit easier and more straight forward of a process. Get a sander and begin sanding. However, the challenge comes after during the clean-up. Dry sanding produces a lot more dust than wet sanding.
It also takes a lot more elbow grease because dry drywall is tougher to sand down. To get a smooth and consistent surface across the entire wall, you’ll need to pass over spots multiple times and the bumpier the drywall, the more muscle you’ll need to do it.
With that said, dry sanding is useful at the end of the process. Once you’ve done wet sanding to smooth down the worst bumps and edges, dry sanding can be done to touch up corners and smooth out any minor spots.
Generally, use wet sanding for big jobs and major projects. Use dry sanding if you’re just prepping a wall for a fresh coat of paint.
Be Patient
Sanding is a labor-intensive and time-consuming process. While dry sanding is a little faster than wet sanding, both are going to take time. There’s no real way to cut corners here without sacrificing the quality of the end result.
With wet sanding, if you get impatient and start sanding too aggressively to speed the process up, you’ll end up creating craters, valleys, and melting spots of drywall that will take even more time to patch up. So, in the long run, being patient now will save you time spent repairing a rush job later.
Drywall Sanding Mistakes to Avoid
Those who are newer to drywall sanding tend to make some of the same mistakes. This mostly stems from inexperience, but you can save yourself a lot of stress and time spent fixing damaged drywall if you plan ahead and make sure to avoid these common mistakes.
Not Balancing the Sanding Pole
When getting to those hard-to-reach places, you might use a pole sander. These are very useful and effective but they are also a little cumbersome to use if you’re not prepared. If it’s your first time using one, practice holding and maneuvering it while it’s still unplugged.
If you’re using a hand sander that you’ve mounted to a pole, make sure that it is precisely balanced and mounted correctly before you use it. If you skip these steps, it could flip over while you’re sanding, ruining surrounding drywall and potentially hurting someone else in the room.
Scrubbing Excessively
When sanding, it’s too easy to get lost in the detail. You’ll start focusing on perfecting this one little spot and forget about the rest of the room. The problem with this approach is that you can end up creating valleys and waves in your drywall by overdoing it on tough spots and under-sanding the easier spots.
You’re basically digging into the wall on those stubborn spots, which leads to that uneven look in the end.
Instead, go over the entire surface once or twice, even if some spots don’t get fully sanded down in the process. Then, go back for touch-ups for the more stubborn areas. Even during those touch-ups, make sure to focus on broad strokes where you apply pressure to a wider area.
Skipping the Protective Gear
You really do want the mask and goggles. Hours of sanding means hours of dust and debris in an enclosed space. Even if it’s a smaller job, you still want this protective gear. A small piece of debris landing in your eye could be a big enough annoyance to stop your progress while you go rinse it out. Breathing in drywall dust also isn’t much fun.
Sanding the Gouges
Sanding is meant to smooth down bumps and edges. It can’t fix a divot or gouge in the drywall because it can’t fill in the empty space. Instead, you need to patch the gouge with mud and then sand down the mud to be level with the rest of the wall after it dries.
Using an Electric Sander Near Edges
Electric sanders like the ones you saw in the list of recommendations above are meant to do the bulk of the work on the open spaces of the wall. If you get to close to an interior corner or a ceiling, the edge of the sander might gouge into the opposing wall or ceiling.
If you do that, you’re creating more work for yourself since you’ll have to patch the gouge and sand down the mud. Instead, keep the electric sander for the bulk of the job. Then, finish the edges and corners by hand with a sponge or sandpaper.
Sanding in a Straight Line
When using any sander, especially electric, you don’t want to move the sander in a straight line. This might create the appearance of streaks or grooves in the drywall. Instead, move the sander in small circles across the wall.
Is an Electric Drywall Sander Worth It?
Investing in an electric sander can save you a lot of time and headaches. The bigger the job, the more of a necessity it becomes. You can get away with sanding a small patch on the wall by hand but if you’re sanding an entire room or house, you want something powerful enough to do the job quickly.
While the option to rent an electric drywall sander exists, the cost to own is not that outrageous and they are a handy tool to have around the house. They’re not just for major renovations. You can also use them for smaller jobs like repainting a room, doing woodworking projects in the garage, and other odd jobs around the house.
Do I Need to Sand Drywall?
Yes, you do. Even if you’re just repainting, it can be tempting to be lazy and skip the sanding step but please don’t! Putting a layer of paint up over an old layer of paint causes tons of problems.
Not only will it result in an uneven finish, it will add extra weight to your drywall. The more layers of paint you throw on, the heavier it becomes and the more you’re at risk of entire chunks of drywall just peeling off. That will be a much bigger and more expensive fix than just taking the time to sand off the old paint now before putting up the fresh coat.
What Is the Fastest Way to Sand Drywall?
An electric sander like this one is by far the fastest option. If you’ve got a large area that needs sanding, doing so by hand could take days of grueling labor. With an electric sander, you could cut that down to a single afternoon, with another few hours spent touching up the corners and edges by hand.
Final Word
Choosing the best drywall sander is about understanding the needs of the job you’re using it for. Professionals need something with a powerful motor that can handle bigger jobs. For personal use, however, you’d be better off with the more compact and easy-to-handle models. In either case, you’ll also need some manual sanders on hand to do the finishing touches and detail work.