
Learning how to seal a deck will protect it against the elements and save you money. While you could hire a professional, it’s not a complicated task and going the DIY route can you save between $551 and $1263 depending on where you live.
First, however, you need to learn how to do it. In this article, you’ll find a step-by-step guide to sealing a deck and get some answers to the most frequently asked questions about deck sealing.
How to Seal a Deck in 10 Steps
Sealing a deck is a pretty easy job that’s beginner friendly. The most important thing is choosing the right sealer. Once you’ve got that, prepping your deck and applying it is very straightforward. While the whole project will probably take upwards of four days, depending on deck size, most of that is down time spent just waiting for your deck to dry. Here’s what you need to do:
1. Get Your Equipment
There’s not a lot of special equipment required. Here’s what you need:
- Deck cleaner. This is a special cleaning formula made to clean wood without using any chemicals that could harm the nearby plant life. If you want to save a few bucks, you can achieve similar results with a homemade mixture of white vinegar, powdered oxygen bleach, and water.
- Paintbrush. If your deck has railings, use a brush to seal them. For the rest of your deck, use a roller or sprayer.
- Paint roller or sprayer. Rollers will do just fine but, if you prefer, you could invest in a paint sprayer for a quicker and more even result.
- Rags
- Broom
- Scrub brush
- Medium grit sandpaper
- Deck stain or sealer
The key at this stage is choosing the right sealer. If your deck is exposed to direct sunlight rather than shaded by trees or an awning, you should use a wood stain which provides UV protection.
This protects the deck from fading but stains can also change the color of your wood so pay attention to the shade. If you don’t want to change the color, choose a stain that closely matches the existing color of your deck.
If you live in a rainy or humid climate, you should use a deck sealer. This is a clear coat that sits on top of the wood instead of soaking into it like a stain does. It provides the best protection against water damage and won’t change the appearance of the wood.
You can also choose to use both. If you live in a place with both rainy and sunny seasons, the dual protection of using both could be your best option.
2. Protect Flowerbeds and Lawns
Any plant life surrounding your deck should be spritzed with water and covered with a tarp so they don’t get splashed or dripped on by the stain or sealer. These formulas often contain solvents that could harm your flowers, vegetables, and grass. Keep them covered until the deck is fully dry and ready to use.
3. Protect Anything You Aren’t Sealing
You should also tape plastic sheeting over windows, walls, doors, and anything else near your deck that shouldn’t get deck sealer on it. Stains and sealers will stain surfaces—that’s sort of their job—so if you don’t cover these surfaces, you’ll end up with splash marks and drips that can only be removed with sanding.
4. Sweep the Deck and Wipe Down Railings
Sweep and wipe off any leaves and debris that have gathered on your deck. Try to get as much dust and cobwebs removed at this stage as well. For sealer to work as intended, it needs a thoroughly cleaned surface to adhere to. Dirt and debris can create gaps in the seal. So, this step and the next one are crucial to making this project a success.
5. Clean the Deck and Railings
Working in small sections, spray the deck down with a deck cleaner and scrub it clean with your scrub brush. Start from the railings and work your way down so that any dust and debris that falls from the railings can be scrubbed away by the time you’re working on the deck itself.
While you’re scrubbing, keep an eye out for raised nails, loose fasteners, or splinters in the wood. If you spot any, remove them. If you find splintered wood, peel away the splinters and use sandpaper to sand the area smooth. Make sure to scrub away sanding dust.
Once everything is sanded, scrubbed, and neat, do a final rinse with a hose to wash away excess deck cleaner.
Take your time on this step, really put some muscle into scrubbing and make sure you clean every board, railing, and seam. As mentioned earlier, getting your deck as clean as possible is crucial. Plus, from here on out the project gets easier so go ahead and use up all your elbow grease on this step.
6. Let the Deck Dry
Have a glass of lemonade or a cold beer and let your muscles take a break while the deck dries. Make sure it dries completely; this may require a second beer.
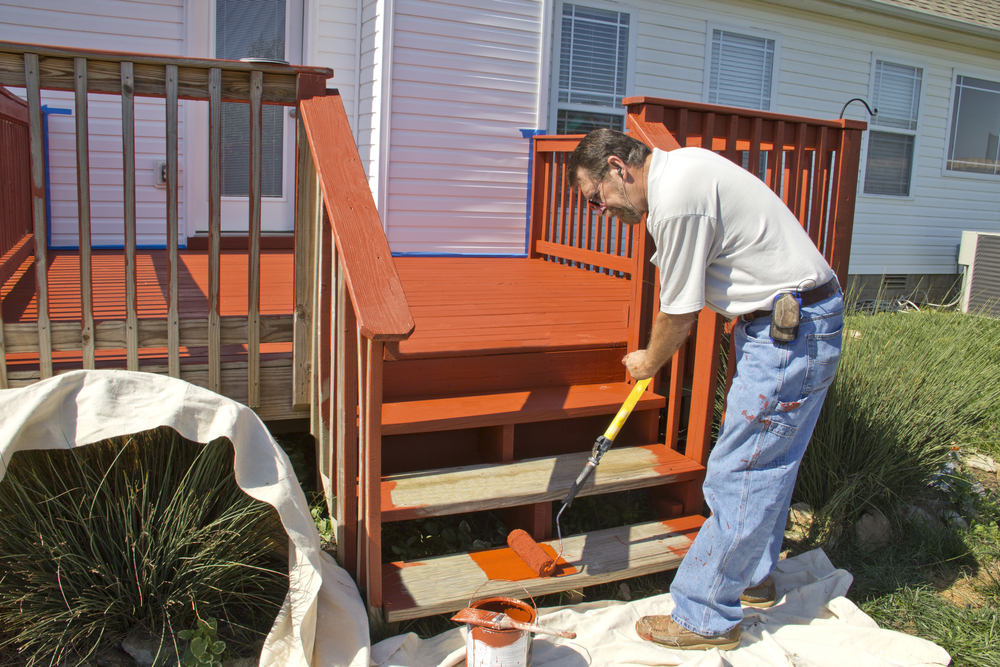
7. Seal the Railings
When the deck is dry, you can start applying the sealer. It’s a good idea to start with the railings because you can immediately get started on the deck boards while those are drying. If you did it the other way around, you wouldn’t be able to stand on the deck until it dried.
Application methods vary a bit depending on the sealer you chose so doublecheck the instructions on the package before you start. However, the general process will involve using a paint brush to apply a thin layer of sealer to the railing.
Work in small sections and work at a steady to maintain a wet edge. This means the last section you did should still be wet when you move to the next section. If it dries before you move on, you’ll end up with separate patches of sealer instead of one solid seal. This will lead to cracks and peeling later.
When using a paintbrush or roller, it’s easy to accidentally overdo it. Check for drips and pooling before moving on to a new section.
8. Seal the Deck Boards
Depending on how big your deck is, you could get away with using a paintbrush here, too, but a paint roller will be faster. For an even faster and more even coating, use a paint sprayer. As you work on the deck boards, make sure you do it in a way that you end at an exit point. You don’t want to seal yourself into a back corner. Start at the back corner and work your way toward the stairs.
If you’re using a brush or roller, apply the coat of sealer and then wipe it smooth with a rag. Wiping will help spread it and remove any excess all in one fell swoop.
If you’re using a sprayer, make sure you move it continuously across the boards to avoid pooling. After covering a few square feet of boards, stop spraying and wipe down the area with a rag before going on to the next section.
9. Wait Some More
Once you’ve applied the sealer to the entire deck and its railings, wait 24-48 hours for the deck to dry completely. The packaging your deck sealer came in should have a recommended waiting time. If you live in a humid climate, give it some extra time. If you suspect rain, do your best to tent the area without touching the freshly sealed deck.
While the deck is drying, don’t walk on it or put any furniture back on it.
While a lot of sealers only need one coat, if yours requires two coats, let the first coat dry for two to three hours before putting on the next one. It should be dry to the touch but not completely dried through.
10. Clean the Rags and Brushes Right Away
Deck sealers contain solvents that make them a fire hazard. That rag you used to wipe down your deck could spontaneously combust if left in direct sunlight. So, don’t leave it in direct sunlight and wash it well, even if you’re just throwing it away. If you don’t, it could combust in the trashcan as well, starting a garbage fire, which is not the ideal way to end a weekend of hard work. Avoid this by rinsing off everything you used to apply the sealer.
Frequently Asked Questions About Sealing a Deck
Now that you know how to seal a deck, how often should you do it? What should you use? We’ll answer these questions and more below:
Is Sealing a Deck Necessary?
Yes. If your deck is made of wood, a well-maintained seal is one of the best ways to extend the life of your deck. Without a seal, rain and snow can cause rotting and warping. Then, sunlight will cause the wood to turn gray and brittle.
Going back and forth between baking in the sun and soaking in the rain will cause it to split and erode. Spending a few dollars and a weekend on sealing your deck will save you thousands on having to replace it entirely.
What Is the Best Thing to Seal a Deck With?
This depends on what your deck needs. A deck sealer is a low-cost alternative or addition to stains that offers maximum waterproofing but limited UV protection. A stain can protect against UV rays, give your wood a richer tone, and provide some water resistance.
If you live in a humid or rainy climate, you need a deck sealer. A stain alone won’t be enough waterproofing. If you live in a sunny and dry climate, you might be able to skip the sealer, but you need a stain or else your deck will go gray in a matter of months.
How Often Should You Seal a Deck?
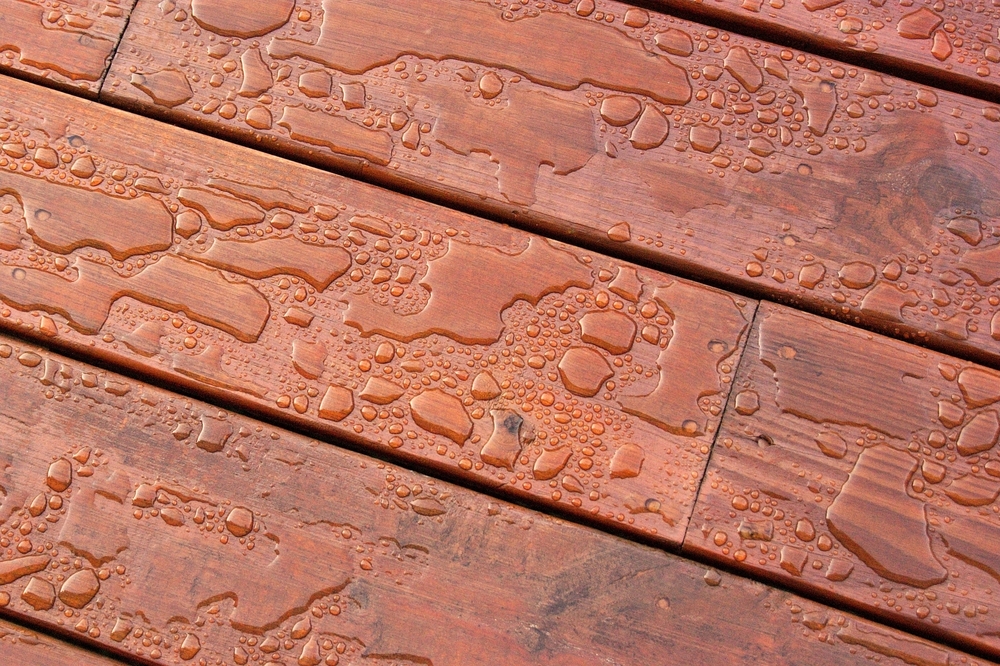
Depending on where you live, you should apply a fresh seal to your deck every one to two years. To check whether your deck needs a new seal, splash a little water on a board that is most exposed to sun or rain. If the water beads up nicely and stays on the surface, your seal is fine. If it soaks into the board, you need a new seal.
When Should You Seal a Deck?
Summer or fall are usually the best times of year for this project. It’s best to do it in dry, warm weather when air and sunlight can help the deck dry evenly and quickly. It’s possible to do it in high humidity as long as no rain is forecasted but remember to factor in extra waiting time for the deck to dry. However, rain, snow, or freezing temperatures can ruin the seal before it has a chance to dry.
Keep That Deck Safe
Sealing your deck will keep it safe from the elements, pets, and other types of damage. In fact, sealing your deck will even protect it from you. While the process takes time and patience, it’s a DIY job you can get done on your own or with a few friends. Either way, if you want your deck to last many years, keeping it sealed is the best way to do just that.