If you’re wondering how to remove carpet from your home, you’re not alone. About 60 years ago, carpet was all the rage. It used to be expensive to manufacturer, so having carpet was a way to one-up your neighbors and show off your luxurious lifestyle. Then, in the 1950s, technological advances made carpet manufacturing super cheap.
Suddenly, showing off with wall-to-wall carpeting was in everyone’s budget and we entered into a carpet frenzy where homeowners competed to have the tallest pile and most confusing color schemes possible. By the 70s, even bathrooms were getting the carpet treatment. It was madness.
Whether you’re trying to expose tragically ignored hardwood or just lay down fresh carpet with a more modern look to it, you will first need to remove that technicolor shag carpet the previous owners put in. Fortunately, this is a very doable DIY project. It takes some muscle, but it can be done. Keep reading for a step-by-step guide on how to remove carpet on your own:
1. Choose Your Replacement First
If you’re removing carpet to put down fresh carpet, go look at samples and figure out what you want to replace it with before you start ripping away at the old stuff. Sometimes, the perfect replacement is on back order, way more expensive than you anticipated, or just not the right fit after all.
If it turns out you need to wait a little longer for that perfect pick, you don’t want to live in a house with torn up carpeting while you wait.
2. Be Prepared for the Hard Work of Hardwood
If you’ve discovered hardwood underneath your carpeting that you want to refinish and use as your floor, get it inspected before you start. Sometimes, homeowners would cover hardwood because it wasn’t cared for well. Carpet can be cheaper than fixing stained and damaged wood.
Even if it wasn’t damaged before the carpet went in, decades of spills, accidents, pets, and other everyday things can lead to deep stains in the wood that will be tough to sand out. If parts of it need to be replaced, finding a perfect match can be tough.
If you’re renovating a fixer upper that’s fallen into serious disrepair, the wood underneath might even be unsalvageable.
Even in cases where you know this carpet has to go, be prepared for the worst. Have a Plan B and Plan C flooring option in mind, so you’re ready to switch gears to an alternative without stalling the renovation process too much.
3. Take Measurements
If you’re replacing old carpet with new carpet, you’ll need to take measurements of each room to figure out how much carpeting you need and what dimension each piece should be. If you’re just removing carpet in order to use the hardwood underneath, you don’t need to measure unless there are patches of wood that need to be replaced.
4. Assemble Your Tools
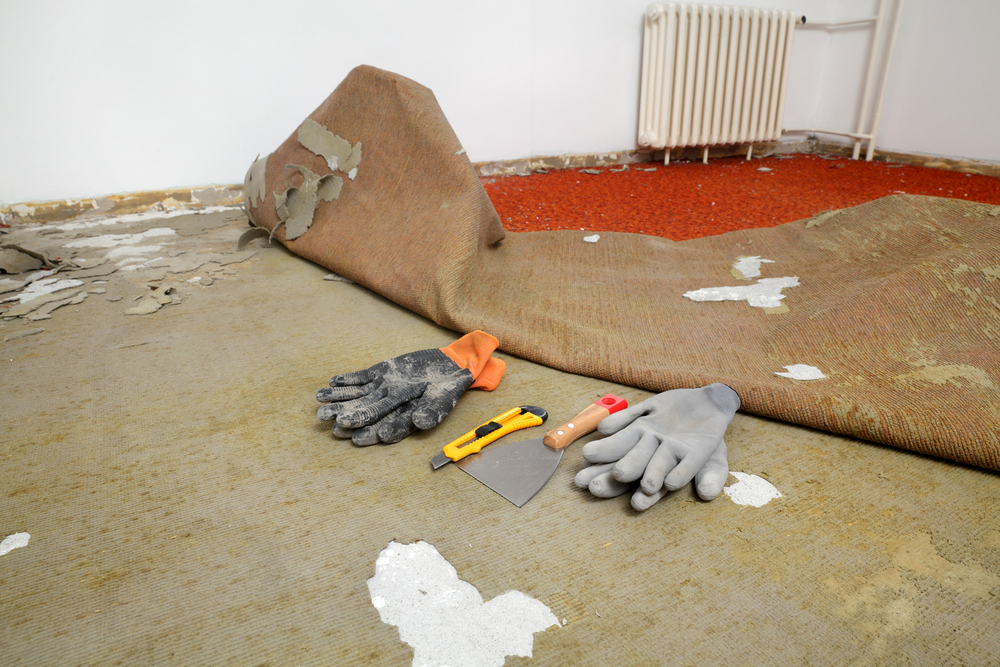
With all the planning and measurements done, you’re ready to get to the actual work of tearing out that old carpeting. First, get all the tools and protective gear that you’ll need to do the job. You can use this checklist:
- Face Mask
- Heavy Duty Utility Gloves
- Safety Glasses
- Knee Pads
- Pliers (in assorted sizes)
- Floor Scraper
- Pry Bar
- Duct Tape
- Contractor Bags
Carpet removal is a dusty process. Depending on how long that carpet has been there and how much water damage it’s been exposed to, that dust could be full of mold spores or toxins that you want to keep out of your eyes, nose, and mouth. Don’t skimp on the protective gear!
The pry bar and pliers will be needed for the actual process of ripping out the nails or staples holding the carpet in place. The floor scraper will be used to scrape off glue and stuck-on debris. Your duct tape will be for keeping the old carpet rolled up for easier carrying and the big contractor bags are what you’ll use to gather up pieces of padding and other debris.
5. Clear out the Space
Before you start, you need to take everything out of the room that could either interfere with the process or potentially get damaged. To be safe, just strip the room down to nothing but walls and floors.
Take out all the furniture. Remove all the paintings and decorations. Take all the doors off the hinges. If you don’t want it to break or get caked in dust, get it out of the room.
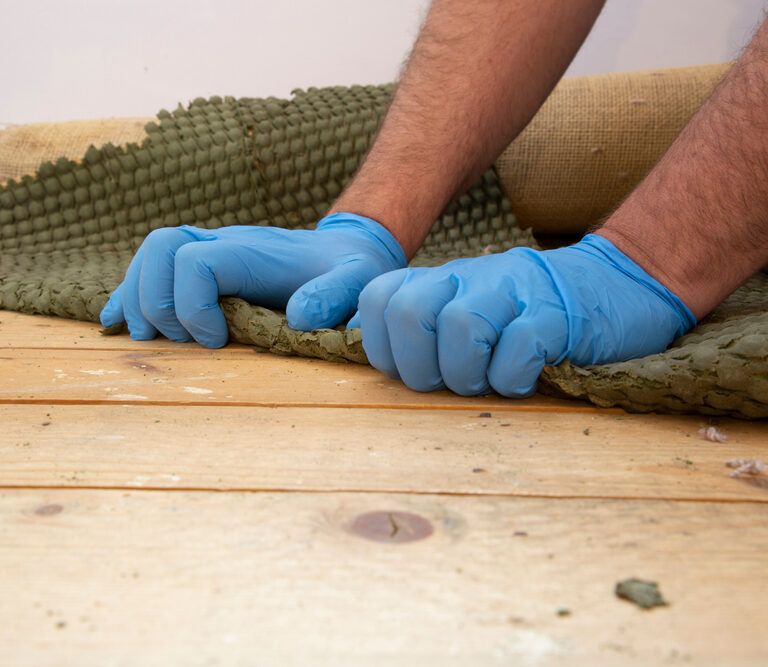
6. Detach the Carpet
Carpeting is held to the floor by tack strips along the perimeter of the room. To detach it, pick a corner to start in. Use pliers to grip the carpet and pull it up.
If it doesn’t come up easily, use a knife to cut a square a little larger than your hand out of the corner. Now, grab onto the carpet there and pull it up. Put some muscle into it. Continue pulling until you’ve detached the carpet from the entire permitter of the room.
7. Cut the Carpet Down
For the sake of convenience, cut up the carpet into smaller strips that you can easily roll up and lift. These will be much easier to remove than an entire, room-sized piece of carpet. You can also combine this with the previous step to make the process more efficient.
As you pull up a foot or two section of carpet, cut it away from the rest that’s still nailed down. Set it aside. This will make the remaining attached carpet a little lighter and easier to work with.
8. Remove Carpet Pad
Most carpets will have padding underneath. In a lot of cases, it’s also nailed down along the permitter. You’ll need to detach it the same way you detached the carpet. If it’s especially old, it may break apart as you try to pull it away so keep a contractor bag with you to toss pieces in as you work your way through the room.
If the carpet was put on top of a concrete floor, the pad will most likely be glued down. This will be a lot harder to get rid of. Use your floor scraper to scrape it away.
If you’re trying to preserve hardwood, use pliers or a small pry bar to remove the nails or staples holding the carpet and padding in place so that you don’t gouge or splinter the wood during removal.
9. Remove Tack Strips
If you’re going to leave the floor underneath exposed, you want to get rid of the tack strips along the perimeter that the carpet was attached to. You can do this with a pry bar. If you’re installing new carpet, you can leave them in as long as they aren’t rusted or damaged.
10. Prep the Floors
Once the carpet, padding, and tack strips are gone, the carpet removal process is done. The next step is to thoroughly vacuum and clean the floors in preparation for whatever you’re doing next.
If you’re preserving hardwood, you’ll closely examine the surface for scratches, stains, rot, and other damage that will need to be fixed before you refinish them. Use wood putty that matches your floors to putty over the nail holes along the edges where the carpet was nailed down. Sand down any surface-level scratches or stains and replace any unsalvageable boards.
If you were hoping for hardwood but ended up revealing an unfinished subfloor, you can install a new hardwood floor on top of it. That will be a lot more expensive than carpet and less simple to DIY, but it is an option.
If you’re putting in carpet, closely examine the tack strips for damaged sections that need replacing before you install the new carpet. If too much of it is damaged, just pull it all up and put down new tack strips.
In both cases, make sure to scrape away every last trace of glue. Then, make sure the entire surface is clean, debris-free, and dry before you begin the next steps of your DIY renovation project.
5 Tips for DIY Carpet Removal
Ripping out old carpet is a pretty simple job. It only really gets tricky if you’re trying to preserve the hardwood floors underneath or if the padding has been glued down all the way across.
Even so, it just takes a little more patience to get the job done. Here are some extra tips you can use to make the process as smooth as possible:
- Use the Fold and Cut Method. For easier removal, detach one full edge of carpeting. Then, rip up two- to three-foot sections and fold it over. Cut along the folded edge. Use duct tape to secure the roll you created. Toss it out.
- Repeat.Remove Baseboards. There should be about ¼-inch of carpet edge tucked under the baseboards. This free edge can be easier to get a grip on for pulling the carpet up. If you’re replacing the baseboards anyway, rip them out to make the carpet removal process easier. If you want to preserve them, use a pry bar to gently untuck the edge from beneath them.
- Use the Floor Scraper on Staples. If your carpet was stapled down (most common on plywood or particleboard subfloors), use the razor-sharp edge of your floor scraper to shear through staples instead of individually ripping them out. To do this, pull the carpet or padding up with one hand and scrape along the edge with the other. This will save you having to tediously remove each staple, one at a time.
- Start at the Top of Stairs. If you’re removing carpet from stairs, begin at the top of the steps. This way, you’re pulling downward to detach it which means gravity will be on your side. Cut off the loose carpet every third or fourth step so you don’t have too much bulk to carry as you work your way down.
- Use Long-Handled Scrapers on Subfloors. If you have to scrape glue and stuck-on padding from an entire floor, you don’t want to do the whole job on your knees. Be sure the handle on your scraper is long enough to allow you to stand up for this portion of the job.
While some of these tips won’t apply to your jobsite, knowing what to look for throughout the process will make the job easier.
Final Thoughts
Altogether, you should be able to remove all the carpet from a room in about an hour. That includes pre-removal prep and post-removal clean up. If your padding was glued on, it might take a little longer but even so, this is a quick project. So, go clear out your furniture, assemble your gear, and get started!