Looking to polish your concrete floors or concrete countertops?
In this article, we’ve brought you a helpful step-by-step guide to doing both.
But before we get to all that, here’s an honest disclaimer: polishing concrete (especially concrete floors) can be a pretty complicated process. It’s not your average DIY job, as it requires lots of equipment, money, time, patience and expertise. It’s possible to do the job yourself, but it’s not necessarily recommended.
Later in this article, we’ve assessed the pros and cons of getting a professional in for the job.
But first, here are two DIY guides for the more adventurous and independent among you…
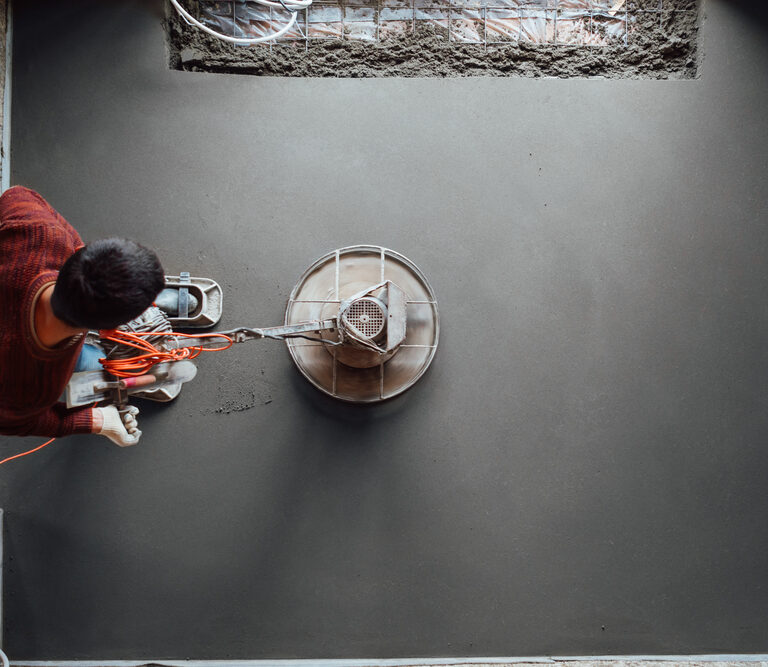
How to Polish Concrete Floors – The DIY Way

Concrete floors are currently undergoing a big boom. They’re durable, they’re easy to maintain and they look clean and tidy. For those reasons and more, commercial properties have been using concrete floors for years, but that popularity is now also taking hold in lots of residential properties around the world.
If you want to try polishing your own concrete floors, here’s our step-by-step guide:
1) Assemble Your Equipment
You won’t get much concrete polishing done without the right concrete-polishing equipment. First up, you’re gonna need a concrete grinder. You can’t just pick one of these up online, so you’re gonna have to rent one from your local hardware store or industrial store.
You also want grinding discs, burnishing pads, some sort of hardener or densifier and some concrete sealer. It’s very important to note that some of these things are only compatible with certain concrete polishers, so you should rent or buy these things from the exact same place you get your concrete polisher.
We purposely haven’t provided links to any specific products, as you should buy or rent products which are suitable for your floor and your concrete grinder.
2) Do Some Pre-Polishing Prep
There’s probably already some sort of coating on your concrete floor. And there’ll definitely be some marks and scratches. Before you do any proper polishing, you want to eliminate all of this stuff.
You do that by using some of your grinding discs. All of the ones graded 200 or below are typically good for this task (though you should check with the supplier/manufacturer of your particular polisher).
Start with the lowest-numbered disc, and progressively move up to the highest-numbered disc (stopping at a maximum number of 200 – you’ll move on to the higher numbers later). You’ll need to do lots of separate passes, making this a pretty time-consuming process. You’re done when there are no longer any marks, scratches or stains on your concrete.
3) Densify That Concrete
You want your floor to be as dense and hard as possible before you move on to the proper polishing.
First and foremost, vacuum the area to make sure you aren’t gonna pour your densifier on top of any dust or debris. Next, pour a liquid densifier over the concrete to plug any small gaps and toughen up that concrete.
4) Do the Real Polishing
Here’s where the proper polishing begins.
During this stage, you’ll use the higher-numbered grinding discs in turn, working all the way up to your highest-numbered grinding disc. Again, you’ll need to make lots of passes. After the final stage, you’ll then need to use a burnishing pad, which will give that final, glossy, shiny finish.
5) Get Sealing
For your last stage, use a concrete sealer to finish the job, to keep the newly-polished concrete protected under a lovely layer of sealant. When that sealant is dry, you’re all done!
Again, the above is a very complicated, difficult, time-consuming job. But if you want to try it yourself, you can – just make sure you rent your equipment from somewhere with a good reputation. WerkMaster are one of the best in the business at polishing concrete floors, and they supply excellent equipment for getting the job done right. Here’s their expert video on polishing concrete floors.
Here’s more information (from WerkMaster) on the products you need for the job. You by no means need to use WerkMaster or any of their products (we’re not sponsored by them or whatever, you little cynic), but their site is a good entry-level introduction to the appropriate equipment and techniques you need.
In all honesty, polishing your own concrete floors is a pretty heavy-duty DIY job. It’s lengthy, expensive, and fraught with the potential for possible mistakes, so unless you’re particularly confident in your concrete-polishing abilities, it might be best to get a professional involved instead. But more on that later.
How to Polish Concrete Countertops – The DIY Way
Polishing concrete countertops is a little easier than polishing concrete floors, as you don’t need industrial-level equipment. You still need good equipment, but you can buy what you need, instead of being forced to rent it.
Broadly speaking, polishing concrete countertops is a similar job to polishing concrete floors, but (obviously) on a smaller scale. Here are the steps you need to follow to polish your concrete countertops:
1) Assemble Your Equipment
The type of grinder we’ve linked above is usually a good start. Make sure you have suitable (and compatible) diamond grinding pads and some hand-held diamond grinding pads, for hard-to-reach areas.
2) Prepare the Space
Wash your countertop with water and a sponge, to make sure it’s clean, tidy and free of debris. If there are any holes in your countertop concrete, fill them with a (store-bought or homemade) patching slurry.
3) Start Polishing
Use your grinding pads (in order from lowest-numbered to highest-numbered) to polish and buff your countertop, making sure you’re cleaning the surface with water and a sponge between each pad. Eventually, you’ll wind up with a shiny, sheeny surface.
If there are any edges or corners you can’t reach, use your hand-held grinding pads to get right into the edges.
4) Finish the Job
When you’re all done, and the surface is all clean and dry, use a food-friendly countertop sealant to seal the surface.
Here’s a short visual introduction the entire process of polishing concrete countertops:
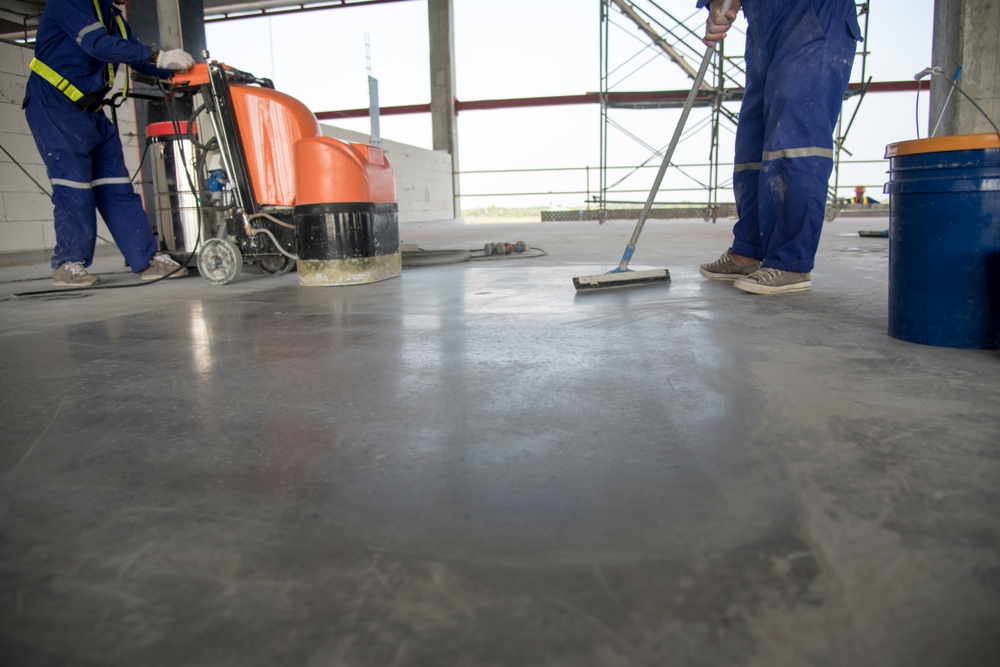
How to Stay Safe When Polishing Concrete
Polishing concrete can be a dangerous job. Here’s how to stay safe while doing it:
- Wear goggles – you don’t want dust and debris flying in your eyes
- Wear a dust mask – dust is ridiculously bad for our bodies
- Wear ear defenders – it’s a noisier job than you think
- Make sure you know how to use the specific equipment you’re using – and make sure all of that equipment is compatible
- Speak to an expert before you begin – you want to know exactly what you’re doing for this big job
A big note on safety: It’s important to know that most of the time, you can choose to dry polish or wet polish.
With wet polishing, water is applied to the concrete to soak up all the dust and stop it from flying around in the air. If you want to completely avoid the chances of breathing in any dust, you want to go for wet polishing rather than dry polishing – but be aware that wet polishing is a messier, harder job, and you need to make sure you’re buying the appropriate tools and equipment.
Should I Hire a Professional to Polish My Concrete?
It’s probably best to get a professional, especially if you want to polish your concrete floors. Not only is it an expensive venture, it’s also a pretty difficult one.
Here are the pros and cons of hiring a professional for polishing concrete:
Pros:
- You don’t run the risk of ruining your surfaces. You need lots of expertise, knowledge and equipment to properly polish concrete, and it can quite easily go wrong.
- You won’t make a big mess of your house.
- You don’t need to spend endless time reading, researching and visiting hardware stores or rental places.
- You don’t need to do anything. Sometimes, being lazy is nice.
Cons:
- You won’t get that DIY sense of achievement. But don’t worry, I won’t judge you.
- You’ll spend a little more money, but not a huge amount more, as hiring concrete polishers (especially for floors) can be a pricey venture. Sometimes, renting a concrete floor polisher and all the appropriate equipment can clock in at more than $1,000.
Overall, we recommend getting a professional to polish your concrete, especially if you’re polishing concrete floors.
Put the pride to one side, and enjoy getting someone else to do the hard work instead.
We rarely recommend getting a professional in, as we’re all about independence, DIY and self-sufficiency. But for polishing concrete floors, it’s pretty much always the best approach.
If you’re only polishing your countertops, you can probably do the job yourself, but make sure you buy some quality equipment.