When someone pulls up at your place, what’s the first thing they notice?
It’s not the lush landscaping or your fancy façade, but the humble driveway that catches their eye. And because first impressions definitely do count, a cracked or weathered driveway is a sure-fire way to ruin your curb appeal.
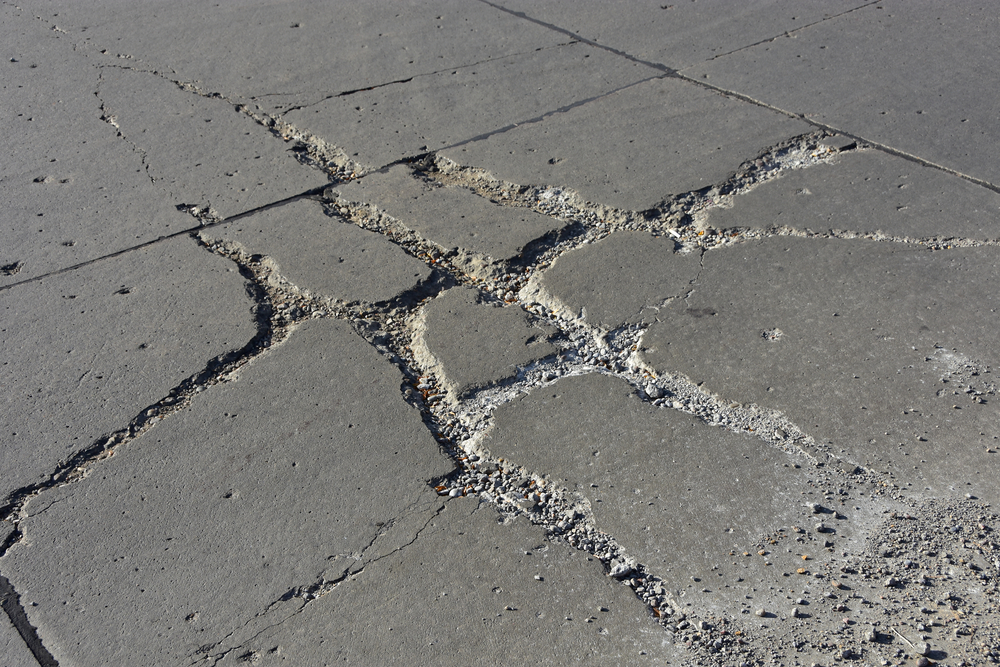
Whether you’re rocking gravel, concrete, or asphalt out front, your driveway will eventually start to degrade. Freezing winters, scorching summers, metric tons of moving metal, and bucket loads of rain will cause cracks and crevices to proliferate.
Not only do these fractured imperfections look unsightly to behold, but if left as is, they’ll expand and form potholes.
Thankfully, driveway maintenance is relatively straightforward, and you can fill in the gaps yourself. In this in-depth how-to guide, we’ll walk you through the process with the three most common driveway types: concrete, asphalt, and gravel.
Repair, Resurface, or Replace: Which Should You Choose?
A DIY repair isn’t the only way to revitalize your driveway—in some situations, it’s better to resurface or replace. Let’s take a closer look at each option.
Repairing a Driveway
Repairing a weather-worn driveway is the cheapest option, but it’s not always the best.
If a handful of cracks are sprouting up, you could try and patch them yourself. But if it’s suffering from severe damage—cracks over a quarter of an inch, potholes, and distortions—then you’ll probably find repairs are Band-Aid solution. You’ll fix some cracks just to have others spring up in their place.
Resurfacing a Driveway
A badly damaged driveway may need resurfacing to restore its former glory. Unfortunately, it’s a complex process that requires heavy machinery and skilled hands.
Don’t even bother trying to DIY. Contact a reputable driveway specialist in your area for a quote.
Replacing a Driveway
Installing an entirely new driveway is only worthwhile when you’re not happy with what’s already in place.
You can repair a mildly cracked driveway or resurface a badly damaged one. Only look at replacing it completely if you want a fresh new look—say, stone pavers with sleek geometric patterns.
How to Repair Your Driveway
Now you’ve determined repair work is the best way forward, it’s time to get into the nitty-gritty. The ideal approach depends on the driveway type, so we’ll break the essential info down into three easily digestible chunks.
Repairing Concrete Driveways

Concrete is the toughest material of the lot, so you shouldn’t have to spend much time keeping your driveway in good shape. Nonetheless, nothing is invincible, so expect to undertake occasional maintenance.
Poorly formulated concrete mix, a slippery clay base, and insufficient curing time can all cause long-lasting damage to concrete.
Spalling Concrete
Spalling is when concrete starts to flake away in small patches and leaves an unappealing and uneven surface. The best way to treat the condition is to purchase and apply a concrete re-surfacer such as Flo-Coat from Sakrete.
- Mix the re-surfacer with water according to the instructions on the label.
- Only prepare a mix you can use within 20 minutes; otherwise, it will dry out.
- Smear the mixture evenly over the spalled surface with a
- Allow it to cure for at least 6 hours before walking on it and 24 hours before parking your car.
Small Cracks
Little cracks under half an inch are best fixed with a self-leveling concrete crack filler like this product from DAP.
- Sweep away any dirt and debris from the cracks.
- Load the sealant into a standard caulking gun.
- Puncture the nozzle.
- Squirt the sealant into the cracks.
- Allow the sealant to cure for 24 hours.
Because it’s a self-leveling sealant, you don’t need to smooth it down.
Big Cracks
On its own, a sealant isn’t suitable for larger cracks. Grab a foam pre-caulking rod as well, such as this one from Quikrete.
- Stuff the foam rod into the crack.
- Apply self-leveling concrete crack filler as you would for small cracks.
Without the foam rod in place, the sealant would simply seep into a wide crack. But when the two work together, you create a strong to plug up the crevice.
Grease and Stains
An oil leak in your engine bay will see the greasy liquid drip down onto your driveway and create a stubborn stain on the concrete.
Give your everyday household cleaners a miss and opt for something with a little more oomph, like ACT Microbial Concrete Cleaner (you should probably get your mechanic to check out the leak, too).
- Sprinkle the cleaning product onto the stain.
- Brush it through the stain using a broom.
- Spray on a small amount of water, as per the label.
- Let the solution sit there for two weeks to work its magic.
- Either rub it off manually or allow the rain to wash it away.
Repairing Asphalt Driveways

Although asphalt isn’t quite as durable as concrete, it’s still rather resilient and can hold its shape for 20 years or more. But heavy wear and chemical de-icing products can strain the surface, eventually resulting in cracks. Patch these up quickly, or they’ll transform into nasty potholes with time.
A Few Cracks
The best method for asphalt depends on how many cracks you’re dealing with rather than the size. If you only need to fill in a few, purchase a tube of asphalt crack filler—this product from Red Devil works like a treat.
- Sweep any dirt and debris from the crack.
- Puncture a hole in the nozzle of the tube.
- Load the tube into a caulking gun.
- Squirt the sealant evenly into the crack.
Lots of Cracks
If you’ve got stacks of cracks to deal with, you can save time using asphalt repair tubing instead. This half-inch tubing from Crack-Stix is specially designed for use on asphalt and does a fantastic job.
The downside is you’ll need a blowtorch, and not everybody has one lying around the house.
- Cut the tubing to size.
- Insert the tubing into the crack.
- Heat the crack and tubing with the blowtorch to melt the tar.
- Wait until the crack has cured (check the label).
Fine Spiderweb-Style Cracks
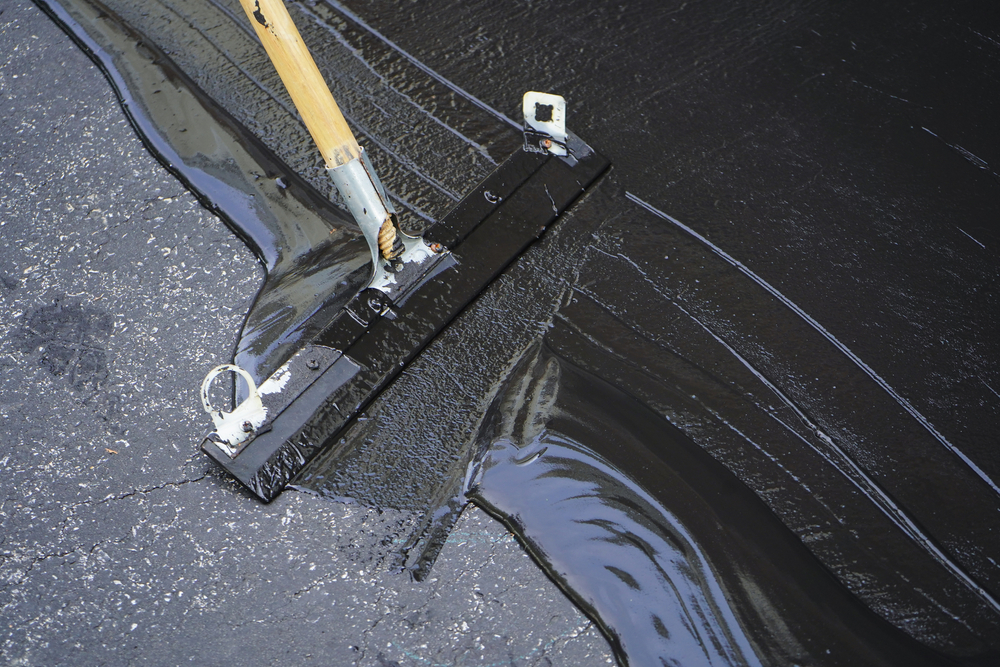
Weather-worn asphalt can result in a series of hairline spiderweb-like cracks, which are best remedied with a mop-on asphalt filler and sealer like this product from Henry.
Even if you don’t have any cracks on your asphalt, a sealant like this can help prevent damage from automotive chemicals, de-icing agents, and inclement weather. Aim to apply a coat every five years.
- Wait for a pleasant day of at least 55 degrees.
- Flip the bucket upside down overnight to help mix the formula.
- Sweep the driveway thoroughly to remove any debris (use a leaf blower if you can).
- Stir the formula well before use.
- Spread the formula evenly over the surface with a long-handled squeegee.
Potholes
If you don’t fix cracks in time, moisture will seep down and cause the gravel underneath the asphalt to crumble. The result is a big ugly pothole, not unlike what you see on a poorly maintained road. The best way to resolve the issue is through a pothole patch—again, Henry offers an excellent solution.
- Sweep dirt and debris out of the pothole.
- Fill the pothole with the product.
- Level the product using a
The color probably won’t be a perfect match for your driveway, which is why it’s best to treat cracks before they become potholes.
Repairing Gravel Driveways

Gravel is cheap to install, making it the material of choice for long driveways in rural areas.
The downside is gravel is prone to wear and tear. Constant vehicle traffic can result in ruts, while heavy rain and run-off warp its shape. In these situations, you’ll need to pay an excavator to re-grade the driveway—there’s no easy DIY fix.
Removing Weeds
One issue you can resolve yourself is weeds, which often sprout up in gravel driveways during the spring. Round Up makes a powerful weed killer that eliminates the invaders and prevents new flora from growing in their place.
- Keep animals and children clear of the area.
- Spray the weed killer on the affected area with the attached pump.
Driveway Repairs: The Last Word
Your driveway is an essential piece of infrastructure and the first thing guests notice upon arriving at your home. Not only will regular maintenance preserve its appearance, but you’ll also prevent the formation of potholes and extend its lifespan overall.
Follow the ideas in this guide to safeguard your driveway and maximize the curb appeal of your home.
