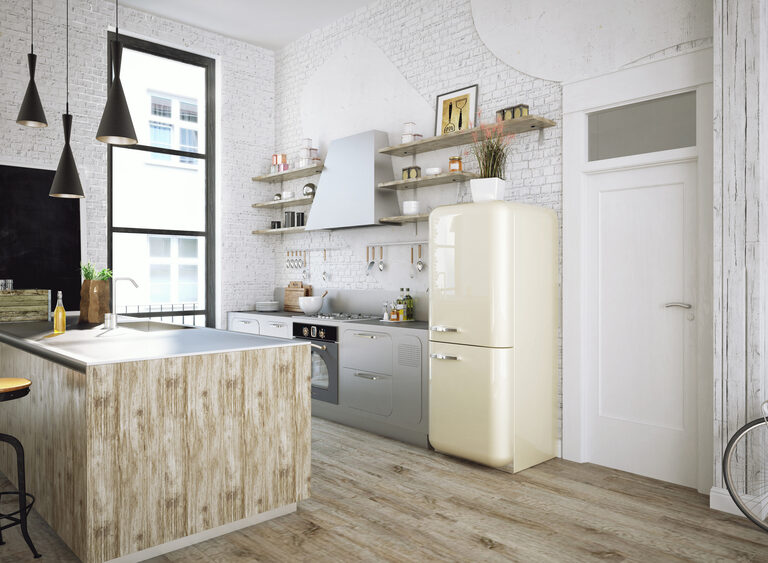
Cheap, reliable and visually appealing, the technique of limewashing has been around for thousands of years. Once used by the Romans and ancient Egyptians, it’s now experiencing a rediscovery and revival amongst homeowners across the country. It can be applied to almost any surface, but in this guide we’ll take a look at brickwork in particular, which can see some unique and spectacular results that can’t be replicated with even the most expensive paint.
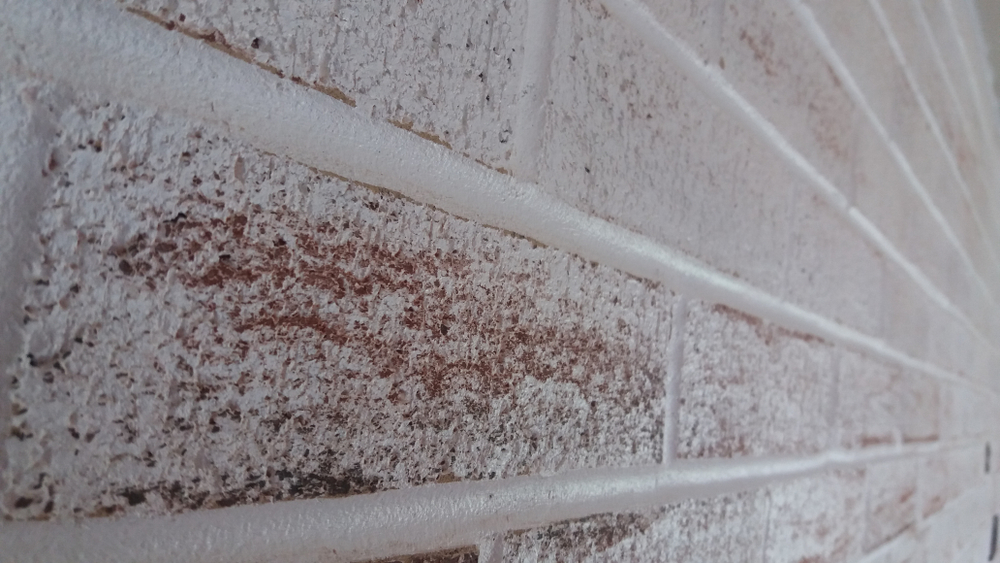
As owners of brick houses will know, keeping your home looking pristine can be an issue. The rough surface isn’t particularly easy to paint, with its grooves and indentations, and erosion can take its toll over time. Crisp, fresh brickwork can soon become pitted and soft at the edges, no matter how high-quality the workmanship. A good weather-resistant coating can combat this, but who wants to empty their wallet on expensive materials when there is another option that’s simple, time-tested and a fraction of the price?
This guide will cover the background and process of limewashing brick, and by the time we’re done you should be on the right track to tackle whatever project you have in mind, whether interior or out.
Limewash Basics
Before we dive into the benefits and techniques of limewashing, let’s start at the beginning.
Limewash is a mixture of slaked lime, a powder of treated limestone, and water. When applied to a surface it creates a protective coating that is long-lasting and durable in inclement weather, while also being attractive to look at.
There are a number of types of wash or smears that are similar in technique, though differ in composition. The term “whitewash” may be more familiar to you, and some use it interchangeably with “limewash,” but it is not the same. Mortar washing is another practice that may be confused for limewashing. The distinction is easy to remember, however – a classic limewash contains only lime and water, and nothing else. That said, it may be worth your time looking at these alternatives as they offer their own benefits, and we will touch upon them briefly in our FAQ.
A technique with a long history, limewashing is favored today for its ability to coat porous surfaces with ease. It results in an aged appearance that is beneficial for historical restoration, as well as providing a modern home with a sense of age and gravitas. Suitable both indoors and out, it looks just as great on a brick fireplace as it does on exterior walls.
Why Choose Limewash?
There are many reasons why you would want to consider this technique for your project, but you should also bear in mind that it has its own drawbacks, too. Let’s explore some of these pros and cons, so you can best decide.
Pros:
- Limewash is thin, easily penetrating porous surfaces and making coating bricks simple.
- Limewash does not peel like paint, meaning less frequent maintenance.
- All-natural, limewash does not contain chemicals that could be harmful to you or the environment, unlike some specialty paints.
- A very cheap alternative, limewash costs far less than other options. You can expect to pay around $40 to coat an average-sized home if you avoid pre-mixed products and buy from your local hardware store.
- Easy to apply, requiring no special equipment, just like regular paint.
- Easy to remove if you find the final result isn’t appealing to you.
- Due to its antimicrobial properties, limewash provides a sanitary surface that is hypoallergenic and, to some small degree, air-purifying.
- Creates an appealing, aged look to brickwork that cannot be replicated by other methods.
- Allows moisture to evaporate from bricks, and does not trap it inside.
Cons:
- Can rub off on clothing when dry, leaving a chalky residue.
- If you are looking for an opaque, solid-color result then many coats may be required.
- Comes in a limited selection of colors.
- Limewash can fade with time, and will require reapplication every five years, on average.
- Due to the nature of the product, limewash can create an uneven coating even when applied carefully. This helps provide that ‘aged’ look, but may be undesirable for some projects.
- Variation in the mixture of batches may also result in a limewash of differing consistency, and can be noticeable on the surface after application.
How to Limewash Brickwork
The first step to beginning a limewash project is knowing what you need before you start. The amounts depend, of course, upon the scope of the project, but here’s what we recommend for a full exterior coat of an average, detached home:
- 1-2 bags Hydrated Lime (commonly found in the cement section of a hardware store)
- A large plastic container for mixing limewash batches
- A sturdy mixing utensil, preferably a power tool for larger batches
- A large paint brush
- Suitable safety gear, including gloves, goggles and mask
- Water
Safety
Before continuing, it should be noted that while limewash is a natural and chemical-free product, hydrated lime is caustic when mixed with water. As such, when mixing the product you should always wear suitable equipment to protect exposed skin, as well as the eyes and mouth. Should exposure occur it may result in burns of varying intensity, so care is advised.
Mixing
When mixing the limewash the ratios are important to bear in mind. You will generally want a wash that is the consistency of milk – it is not a paint, so should appear considerably thinner than what you might expect.
What we suggest here is a general-purpose average recommended by a leading authority that will suit most homes and projects. A ratio by weight of 15-20% hydrated lime to 80-85% water is suitable. This means a 50 lbs bag of hydrated lime should be mixed with 30.5 gallons of water.
Pigment may be added if you want a particular color, but bear in mind that limewash colors are muted once dry, compared to paint. If you add no pigments the wash will dry white.
It is best to mix the limewash in as large a batch as possible as small variation inevitably occurs between batches that may be visible in the final effect. You may then transfer portions of the wash to a smaller container for ease of application by paint brush. The large batch will keep for weeks if properly sealed, and can be taken from as needed.
Here is a video from the National Center for Preservation Technology and Training which goes over the process while also being generally informative of limewashing in general. Intended for professional application, it is nonetheless useful to amateurs.
Exterior Application
First, wash the brickwork with water before beginning your project. A hose-down followed by a scrub with a stiff-bristled brush is the best option. This will remove any dirt that would darken the limewash mixture and taint the result. It will also dampen the surface, which is an integral step before beginning. For more stubborn staining, try this guide from HGTV.
Your limewash mixture can then be applied to exterior brickwork as you would any ordinary paint. A soft- to medium-bristled paintbrush is recommended to stipple the rough surface of the brick and to properly coat the mortar grooves.
The coat will, at first, appear very thin though will become more opaque as it dries. You may want three or four coats before the desired color is achieved.
A limewash is best applied on days that are not too wet or too hot, as this will affect how it dries and reflect on the final appearance.
A paint sprayer may also be used, but we do not recommend it. This will waste much of the limewash and, due to the watery consistency of the product, often does not result in an even coating.
Interior Application
Limewash can be applied to interior brick in a similar fashion as above. The only major difference is that the room should be properly ventilated at all times, and children and pets should be kept away from the worked surface, as you would with ordinary paint.
An informative video can be seen here, displaying how to effectively and easily limewash an interior fireplace.
Aftercare
Once you limewash brick it is very low maintenance, and will require little care to keep its appearance fresh. However, staining may occur through general use and, in that case, we recommend gentle scrubbing with a damp sponge to remove surface dirt and grime. Do not be too zealous, however, as you will be removing a small layer of the wash as you do so.
When the time comes for a new coat, reapplication is as easy as applying the new layer over the old – no removal is necessary beforehand.
FAQ
What Are Similar Alternatives?
Whitewashing and Mortar Wash/German Smear are both similar in outcome to limewash when applied correctly, though differ in technique and consistency.
German smear is achieved by smearing mortar across a brick surface. This is preferred for its higher durability, though is tougher to remove than limewash.
Whitewashing is the dilution of white paint to make it thinner and less opaque when applied.
How Important Are the Ratios When Mixing a Limewash?
When mixing hydrated lime and water the ratio can vary and is yours to decide, depending on whether you want a thinner coat than what we have described in our guide. You should know, however, that any consistency thicker than whole milk has a strong tendency to crack after it dries and will look unappealing. Ultimately, the most important point is that you remain consistent when mixing new batches, as the difference will be noticeable upon the surface.
If you want a thicker, more opaque coating we instead suggest you apply additional coats to the surface with a brush, as opposed to mixing to a thicker consistency.
Can You Limewash Red Bricks?
Yes, though the color of the bricks will show through. Some people may like this effect, but you may need to apply several additional coats if you want a whiter appearance.
Does Limewash Come Off in Rain?
No. Once dried, limewash is highly weather-resistant. This property is why it has remained so popular throughout history.
Final Thoughts
Limewash can be a helpful tool. It can inject youth into otherwise old looking bricks and create an aesthetic that impresses you or your guests. Overall, if you’re looking to keep your bricks clean and fresh, limewash is one of your best options.