If you’re looking to refinish your wooden furniture or update your hardwood floors, you’re going to need to learn how to remove the old finish along with the stain first. It can seem intimidating, especially if it’s going to be a huge project, but once you learn the steps, you’ll see it’s not actually that hard.
In this article, we’re going to show you how to remove wood stain from flooring and furniture, and how to do it properly so you don’t make any mistakes.
Do the Necessary Preparations
Before anything else, you’ll need to prepare your workspace so you have a big enough uninterrupted space to work in, and also to prevent any potential mishaps.
Prep the Area
Wood stain removers or strippers may contain chemicals with strong, and sometimes harmful fumes, so make sure to work in an adequately ventilated area. It’s recommended to work outdoors if possible. If you have to work indoors, open all the windows so the fumes can get out.
You’re also going to want to clear your workspace of anything that you don’t need, as well as remove fixtures or accents that you don’t want to strip, including drawer pulls, hinges, bolts, and screws. Removing these things will allow you to strip items completely and more easily.
Removing Wood Stain From the Floor
Clean the area using soapy water, then wipe it dry using a shop towel or paper towels. You can use painter’s tape to mark boundaries and prevent strippers from reaching unwanted areas.
Removing Wood Stain From Movable Furniture
Place contractor’s paper or a drop cloth underneath the furniture to protect the floor from stain remover splashes and drips. If you want, you can place plastic sheeting under the first layer to add another layer of protection. Don’t use plastic sheeting alone since it’s slippery.
Removing Wood Stain From Immovable Furniture and Other Areas
If you’re working on doorposts, countertops, or pieces of furniture attached to walls, protect the surrounding area using painter’s tape, contractor’s paper, and/or drop cloths. Carefully place these so that connecting or adjacent surfaces, such as the backsplash, cabinet doors, and so on, will be protected from the stripper.
Practice Safety Precautions
Safety first! Keep in mind that you’ll be using chemicals to remove the stain. You’ll need to wear industrial-strength chemical-resistant gloves since some rubber gloves can melt when they come in contact with certain chemicals.
You also need to wear a long-sleeved shirt, long pants, and closed-toe shoes that you don’t mind getting dirty or ruined. Don’t forget to wear safety goggles to protect your eyes from splashes. And if you’re working indoors, you absolutely need to wear a respirator mask so you don’t inhale harmful fumes.
Stain removers or strippers normally come with manufacturer’s instructions that will tell you which safety gear to use when using their product, so make sure to check that as well.
Lastly, before you begin, pour the stripper into a smaller container designed to hold corrosive solvents, such as a metal bowl or aluminum pan. This will make it easier for you to apply the stripper. Dispose of the container after use.
Remove the Finish
Stained wood will typically have a finish, whether lacquer, shellac, varnish, or something else. Lacquer finishes can be removed by wiping them with lacquer thinner, and shellac can be removed using denatured alcohol.
Alkyd varnish and other cured finishes, on the other hand, cannot be removed using a solvent. These need to be removed using a chemical wood stripper.
Different Kinds of Wood Strippers
There are different kinds of stain removers or wood strippers. What you pick will mostly depend on what you care more about, whether it’s ease of use or the effectiveness.
Chemical Strippers
Chemical strippers are your best bet when it comes to fully dissolving the finish and removing some of the stain. Since they typically come in liquid form, they’re easy to apply using a paintbrush, but they can also be messy in the hands of a novice.
As the name says, they’re made of chemicals, which can be harmful to your skin and your respiratory system when inhaled. You’ll need to take extra caution when using them. Moreover, they’re especially runny, so you’ll need to be careful when applying them so they don’t spill or run off to unwanted areas.
Citrus Strippers
Citrus strippers are generally safer to use than chemical strippers and have a less offensive smell. They’re thicker so they can stay on surfaces really well, and can even remove several wood stain layers at once.
They’re great for beginners since they don’t get very messy and are relatively easy to apply. Their viscosity, however, prevents them from reaching deep crevices and sharp corners. They’re best used on furniture with fewer bent areas and joints.
Stripping Using a Heat Gun
If you prefer to avoid using a citrus stripper or a product laden with chemicals, you can use a heat gun instead to soften the old stain and make it easy to remove.
Using a Stripper to Remove Finishes
If the finish is really dark, you might want to apply the citrus stripper first.
Otherwise, you can proceed with the steps below.
Apply the Stripper and Let It Soak
Step 1. Dip a paintbrush into the container holding the stripper and use it to apply a thick layer of stripper onto the wood, taking care to avoid spills and/or splashes. Repeat the process until the entire surface and the crevices, if any, are covered evenly.
Step 2. Let the stripper sit for 15 to 20 minutes, or the amount of time the manufacturer indicated on the label.
Step 3. Reapply the stripper as needed to prevent it from drying.
Scrape the Stripper
Step 1. Once the stripper or stain has bubbled up, it’s time to scrape it. Get a scraper—preferably a plastic one so it doesn’t damage the wood—and use it to scrape the stripper in a straight line, starting from one edge and making your way across the surface of the wood. Scrape straight into a large trash bin if possible.
Step 2. Scrape away any residue. Wipe the surface with a damp cloth to remove any remaining debris.
Step 3. Repeat the process on the rest of the surface, and continue until the stripper is completely removed from the surface.
Use a Heat Gun Instead of a Chemical or Citrus Stripper
Step 1. If you want to use a heat gun instead, start by cleaning the surface you want to strip using a shop towel dampened with clean, warm soapy water, then wipe the surface dry using a lint-free cloth. Use a tack rag to remove excess particles.
Step 2. Plug the heat gun into a nearby power source, turn it on and set it to low or medium heat. Hold it about two to three inches away from the surface of the wood using your non-dominant hand, and move it slowly about six to seven inches up and down. The heat will soften the finish and cause it to bubble.
Step 3. Get a triangular-shaped scraper using your dominant hand and scrape the stain as it is being heated. Use the scraper’s pointed edge to scrape the stain away from corners, crevices, and edges. Wipe away excess stain using a rag.
Step 4. Repeat the process until you have removed the stain. You might notice a little bit of stain remaining; we’ll deal with this next.
Scrub the Difficult Areas
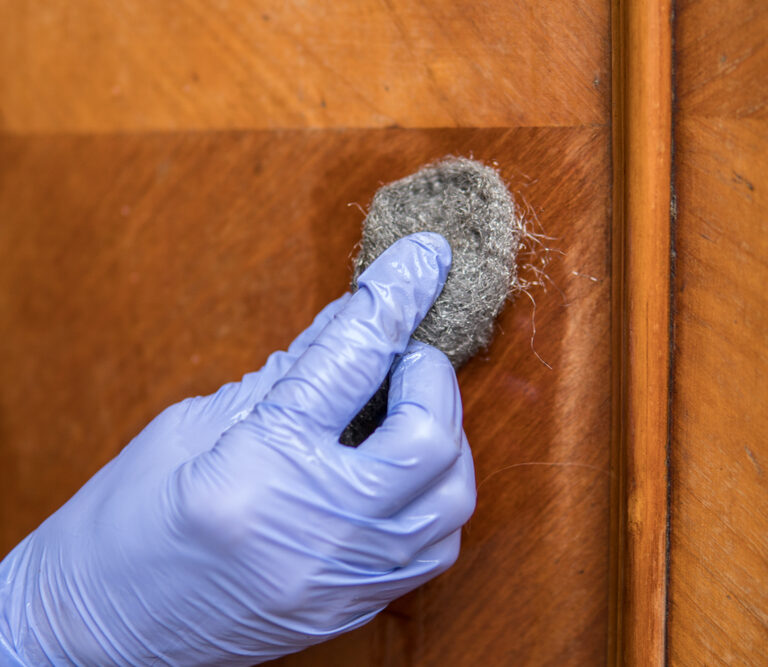
Step 1. Get half a pad of refinishing steel wool and dip it in the stripper, preferably a chemical one.
Step 2. Rub the drenched steel wool against the difficult spots in a circular motion, or the direction of the grain.
Step 3. Keep doing this until all residue is removed.
Wipe the Surface Down
Once you have removed all of the protective coating from the wood, wipe the surface down with a wet cloth and let it air dry for 24 hours.
Sand the Surface
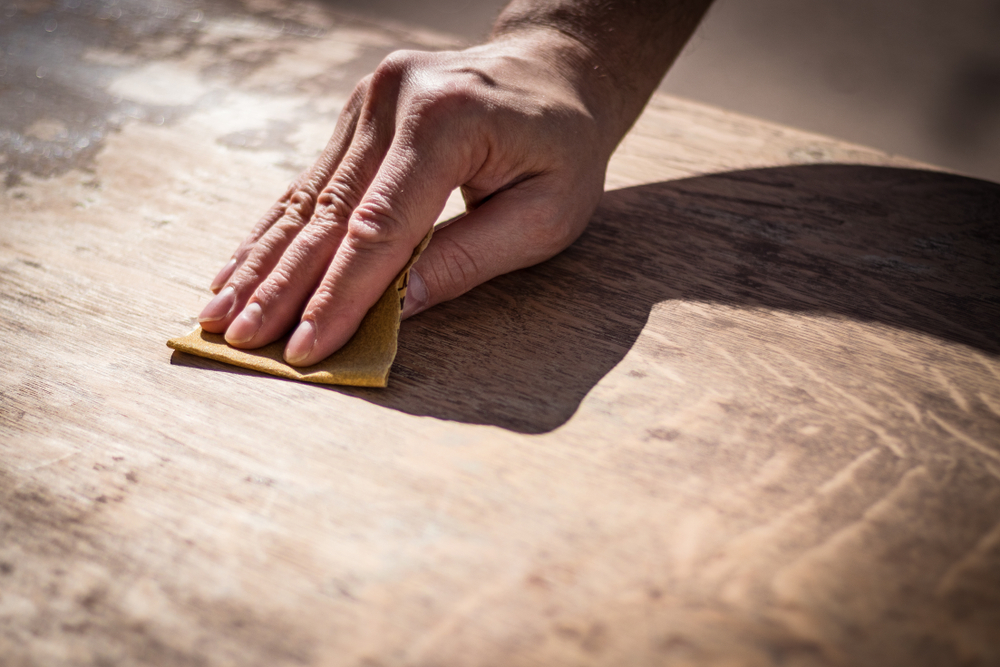
Once the wood is dry, sand the surface using medium-grit sandpaper (150 grit will do unless the surface is very rough). As you sand the old stain away, you’ll see the surface slowly going back to its original color. Gradually switch to higher grit sandpaper until the surface is smooth. Don’t forget to wear your protective goggles and respirator mask.
An electric hand sander is ideal if you’re working on large areas, or if you’re planning on applying a new stain and need to remove any color left by the old stain. If you plan to do the latter, you may need to sand out as much as 1/16-inch of wood. Finish sanding by hand using the same sandpaper as the one you used in the electric hand sander.
Clean the Surface
Clean the entire wood surface using a cloth dipped in mineral spirits. This is the final step of the whole process, and once you’re here it means you have removed the old wood stain. All that’s left for you to do now is refinish the surface.
Final Thoughts
Knowing how to remove wood stain is a great skill that offers massive rewards. Not only will you be able to save tons of money by not paying a professional to strip your wooden floors or furniture, but you also now have the skills needed to remove wood stain whenever you feel the need to. Just remember to practice safety precautions every step of the way to avoid any unwanted consequences.