Replacing your linoleum flooring is a great way to upgrade—and sometimes totally change—the look of your home, especially if you have old linoleum flooring that almost looks like it’s straight out of a horror movie about a haunted mansion.
The idea of removing any type of flooring yourself, however, can be pretty daunting for those who have zero experience in the department. But your worries end here, since we will walk you through each step on how to remove linoleum flooring so you can finally install new, fresh flooring that you actually like looking at.
Things to Consider Before Starting
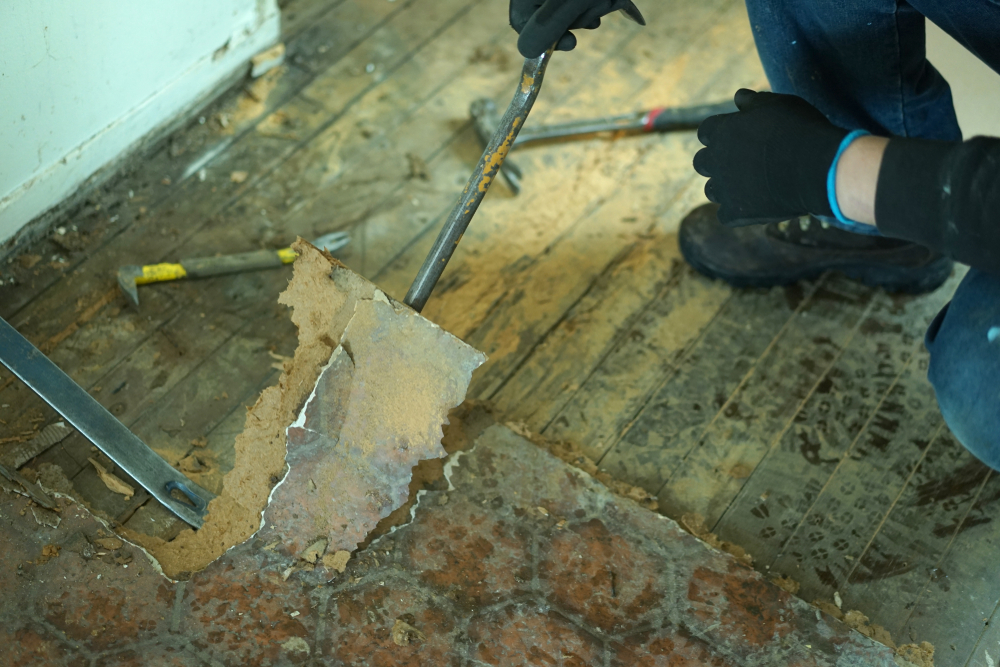
It’s important to understand the parts of a linoleum flooring before you start removing it. A linoleum floor has two layers: the topper and the underlayment. The topper is a plastic-like layer that embodies the color or design of the linoleum. It’s pretty easy to take out and some DIYers think once that is removed, it’s time to celebrate. However, that’s literally just scratching the surface.
The underlayment is the bottom half of a linoleum floor. This is the sticky paper that bonds with the adhesive, which makes it a toughie to get out. There is a slight chance that both layers can be removed in one go but not everyone gets to be so lucky. This rare instance happens when the adhesive of the linoleum floor has broken down.
You Have to Remove Linoleum Glue From the Subfloor
One of the selling points of linoleum is its durability. Linoleum flooring is known to last for decades. And during these years, the bond of the linoleum and the adhesive becomes stronger. Removing the linoleum glue is the most time-consuming part of the job and you might be tempted to simply cover it up with your new floor.
You shouldn’t do this for three reasons. One, your new floor will end up uneven and you’ll be tripping over holes and bumps. Two, linoleum glue has oils that can discolor or destroy your new floor. Lastly, you’ll never know what your subfloor is made of. Who knows what lies beneath that outdated, mint green linoleum? You might be surprised to uncover timeless, hardwood floors.
Linoleum Flooring May Contain Asbestos
Asbestos is a mineral that was highly used in construction during the mid-1900s. Many countries including the U.S. have since banned certain uses of asbestos as it causes a lot of harmful conditions. If the house you are living in was built before the 70s, there’s a huge chance your flooring has asbestos.
If you want to get solid confirmation, you can always take out a floor sample and send it out for testing. Make sure you are wearing protective gear, including gloves and a mask. You also need a plastic bag or resealable storage bag for the sample and water for pouring over the floor—this will keep the dangerous asbestos dust from being inhaled.
Using a chisel, break off a small piece of linoleum floor from the corner of the room. Pour water on the linoleum as you slowly get the piece. Put the linoleum flooring directly into the storage bag and zip it.
Prepare the Work Area
First things first, you need to clear out the entire room. You won’t be able to remove the linoleum flooring with a refrigerator or heavy furniture on top of it. Next, you need to gather your tools, such as a knife, chisel, pliers, and a heat gun. Don’t forget safety gear too, from goggles to knee pads.
Another thing you shouldn’t overlook is the removal of the baseboards. Whether you replace your floor with something new or decide to keep the original subfloor, the height of your floor will change either way. Your baseboard will be left with an awkward gap or it will end up partially covered. What’s more, your baseboard might not match the aesthetic of your new floor.
If you plan on re-using your baseboard, you need to be more careful when you remove each section. It’s also a good idea to mark their placements for when you need to put them back.
Remove the Linoleum Flooring
You’re now a day (or an afternoon if you’re lucky) away from installing your new flooring. Here’s a step-by-step guide on how to remove linoleum flooring from its topper to underlayment.
Remove the Topper
This part is the easier one of the two but it can still be a knee-shaking and back-breaking experience.
Step 1: Cut the Linoleum Into Strips
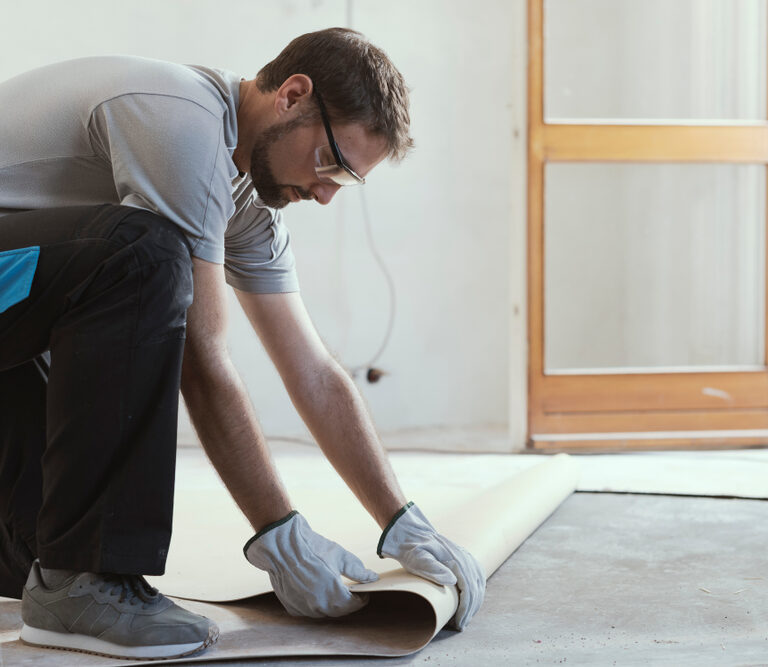
Starting from one side of the room, use a utility knife to cut the linoleum floor into strips, about 6 to 12-inches wide, that run parallel to the wall. The smaller the strip, the easier it will be to pull out.
Step 2: Heat the Topper
Use a heat gun to make the linoleum flooring easier to pull out. If you don’t have a heat gun, you can make do with a hairdryer. To make sure you are heating the linoleum strip evenly for a cleaner pull, slowly move your heat gun or hairdryer back and forth, from top to bottom.
Step 3: Make Pull Tabs
You can use anything from a chisel to a flat pry bar or even a floor scraping machine to create pull tabs on your linoleum floor strips. Starting from the corner of the strip, scrape off a piece of the topper until it is big enough to grasp.
Step 4: Start Pulling
Use your hands or pliers to slowly pull off the linoleum floor strips. Remember, this isn’t a Brazilian wax where a quick yank does the job. If you pull too quickly, you might not be able to remove all of the topper.
Remove the Underlayment
Here comes the more challenging task, the removal of the underlayment. Aside from this part taking more time, it will also require more concentration, especially if you don’t want to damage your subfloor.
Step 1: Soften the Adhesive
There are many ways you can make it easier to make the underlayment easier to scrape off, from using a blowtorch to soaking the floor in hot water. It all depends on the subfloor material you have.
Step 2: Scrape Away
If you are dealing with delicate subfloors, you need to be careful in applying pressure to your scraper. Use the scraper at an angle of 45° to keep it from directly driving into the subfloor. You may also opt for an oscillating tool to ease some of the pressure off your hands.
Step 3: Use a Solvent for Stubborn Spots
When it comes to impressively sticky adhesive, it’s time to turn to a solvent. It can be as mild as alcohol or as strong as paint thinner. Follow the instructions on the solvent and make sure it is suitable for your subfloor type.
Finish Up
Once your floor is nice and even and finally free from adhesives, it’s time to clean up. Vacuum or sweep up any remaining debris on the floor.
Removing Linoleum Glue From Wood

Linoleum glue is more difficult to remove from wood. For starters, you need to check how the wood panels are positioned. This way, when you scrape off linoleum glue, you won’t be cutting across the wood grain. After the linoleum glue is scraped off, you then need to clean and sand the wood before you refinish it.
Removing Linoleum From Concrete
Handling concrete requires less finesse but pretty much the same physical effort as other subfloors. You can cut strips on the linoleum without worrying about scratching the concrete. When it comes to softening the adhesive, you can simply soak the entire floor in water and dish soap overnight. If you don’t want to wait a day to start scraping, you can simply burn off the adhesive with a blow torch.
Conceding to a Real Pro
Congratulations are in order since you now know how to remove linoleum flooring like a pro. Now, it’s time to understand that there’s nothing wrong with getting professional help, especially if your linoleum floor has asbestos or your subfloor is very brittle.
It should also be noted that small room projects are very do-able but if your entire home is a fixer-upper, you’re going to need to concede to a real pro to get all of that linoleum floor out of the way.
