Caulk is designed to seal up gaps while helping to improve the overall look around the edges of the materials where it is used. When installed correctly, caulk can last for many years. Over time, however, it can become damaged or discolored, prompting you to need to replace it. Before you can add a new “bead” (line) of caulk, however, you will need to completely remove what is there. With the right tools and knowledge, removing old caulk is an easy job.
Tools Needed to Remove Caulk Properly
Before beginning this task, you will want to make sure you have all the tools you will need on hand and ready to go. Since caulk is often used to keep water out of areas that it doesn’t belong, it is important to fully complete this job before using the sink or shower in the area to prevent water damage. With this in mind, check to ensure you have each of these items available:
- Caulk Remover Tool
- Caulk Remover Solution
- Putty Knife
- Rubber Gloves
- New Caulk
- Clean Rag
- Mold Mildew Remover (optional)
There are many different types of all of these products. When choosing one for your job, take some time to find the ones that will work best in your situation. If you are removing caulk from a confined area, for example, selecting a caulk remover tool that is smaller is going to be much easier to work with.
One safety tip before beginning this job. If you are removing caulk from a confined area with no open windows, turn on a fan to circulate the air before using any caulk remover solution or applying new caulk since both can have unpleasant fumes.
How to Remove Caulk in 4 Easy Steps
Step 1 – Clean the Area Around Existing Caulk and Prep the Caulk
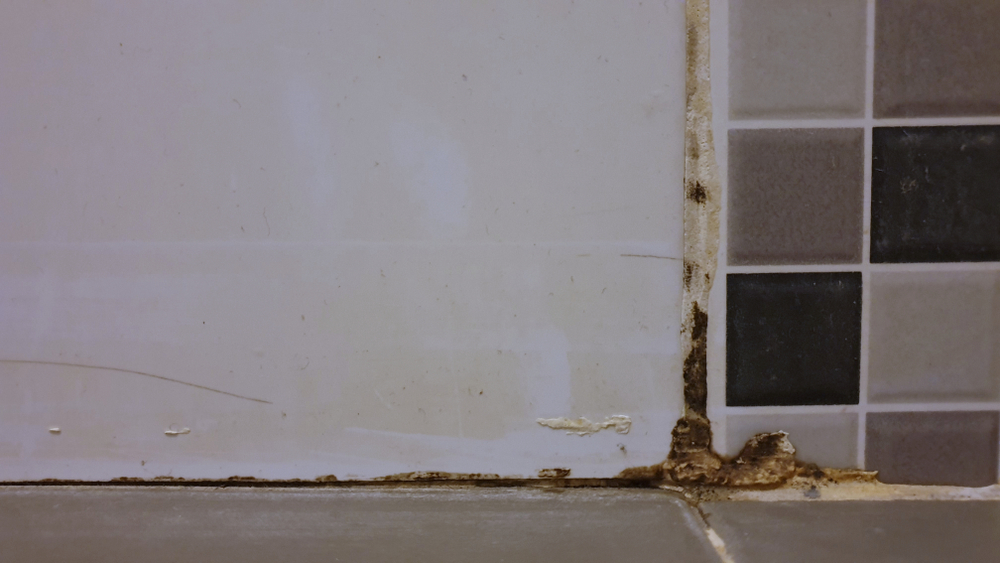
It is very common for mold, mildew, dirt, and grime to build up on and around caulk. You do not want these contaminants getting into the opening when the caulk is removed. In addition, it is always easier to work on a clean surface.
To get started, spray the area down with a mold and mildew cleaning spray (or any tile cleaning spray) and wipe it down following the instructions on the cleaner. Let the surface dry.
Once dry, take your caulk remover solution and spray down the area where you will be removing the caulk. If you are only replacing some of the caulk, make sure to take care not to get any of the remover on areas that are not being replaced.
Leave the spray on the caulk for as long as the instructions recommend, which is typically 60 seconds. This product will penetrate into the caulk and soften it, which makes it easier to scrape out.
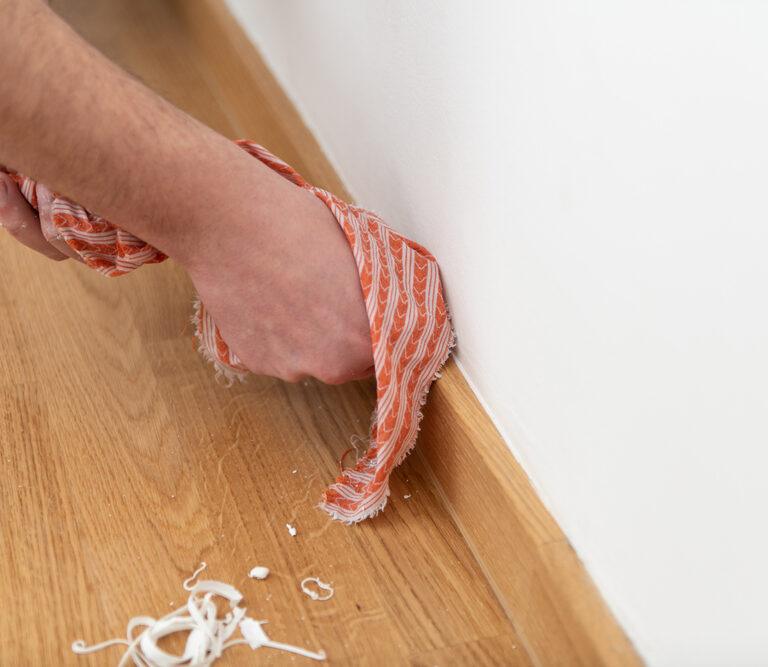
Step 2 – Scrape out the Old Caulk
Now that the caulk has been softened, you will want to begin scraping it out. Begin by working the narrowest edge of the tool into a corner or other starting point. Carefully pry the caulk out, grabbing it with your other hand as it is removed. Apply gentle pulling pressure as you run the edge of the caulk remover tool along the back edge of where the caulk is located.
As you slowly move along the length of the caulk, it is likely that it will break off in multiple places. Discard the old caulk and continue working the tool along until the bulk of the caulk has been removed. At this point, you can run the tool along the area again to attempt to remove any remaining caulk, or scrape it with a thin putty knife.
Continue to scrape away any remaining stubborn areas until it has all been eliminated. If you run into any spots that are giving you a lot of trouble, spray them again with the caulk remover solution, or soak a paper towel in the solution and hold it against the caulk to help soften it.
If you did not purchase the caulk removal product, there are a few alternatives that most people have in their home that can help soften stubborn caulk:
Rubbing Alcohol
Soak a rag or cotton ball in rubbing alcohol and hold it against the caulk to soften it up for removal.
Heat
Use a hair dryer or heat gun to apply heat directly to the caulk for about 30-45 seconds to soften it up.
Razor Blade
A razor blade will often be able to cut any remaining caulk away from the tile quickly and easily.
Step 3 – Clean the Area
Once all of the caulk has been removed, the area will likely have quite a bit of tiny pieces of dust, dirt, and scrapings from the tile or other materials. In order for the new caulk to take hold properly, it is important that the surface is completely clean and dry.
With this in mind, you will want to spray the entire area down with your favorite tile cleaner, and wipe it down with a clean cloth or paper towel. Repeat this process until the area looks completely clean. Allow the area to dry entirely before attempting to apply new caulk.
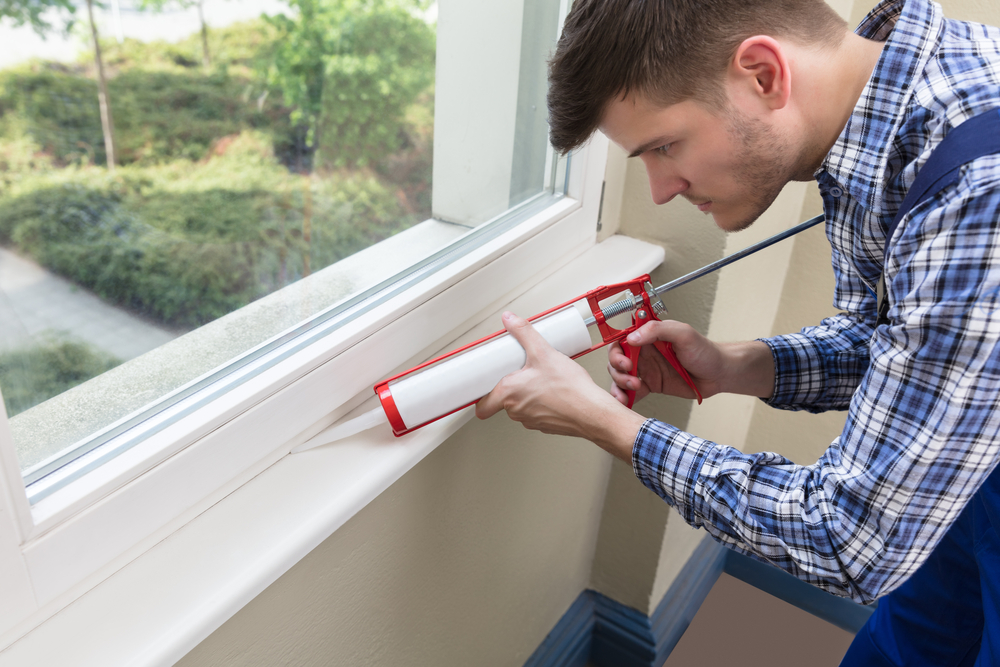
Step 4 – Apply New Caulk
If you are simply replacing the caulk in an area, it is now time to apply the new caulk. Simply follow the instructions that are included on the caulking to complete this job. Applying the new caulk correctly will help ensure you do not have any leaks or other exposure to moisture in the area that you are sealing.
Removing Caulk Is a Simple Task Anyone Can Handle
Removing caulk in your bathroom, kitchen, or any other area is a surprisingly easy job. If you are looking for a great way to improve the look of your home, removing and replacing caulk can be an excellent and very affordable option to consider.
While caulk removal can definitely be time consuming, the process is easy to understand and follow. Once you have done it a few times you will have the steps down and can complete this job again whenever it is needed. If you make sure to clean off the tools and store them properly, you will also be able to save money on all future jobs because you will still have the tools available.
Now that you know how to remove caulk, give it a try. You will be glad you did.