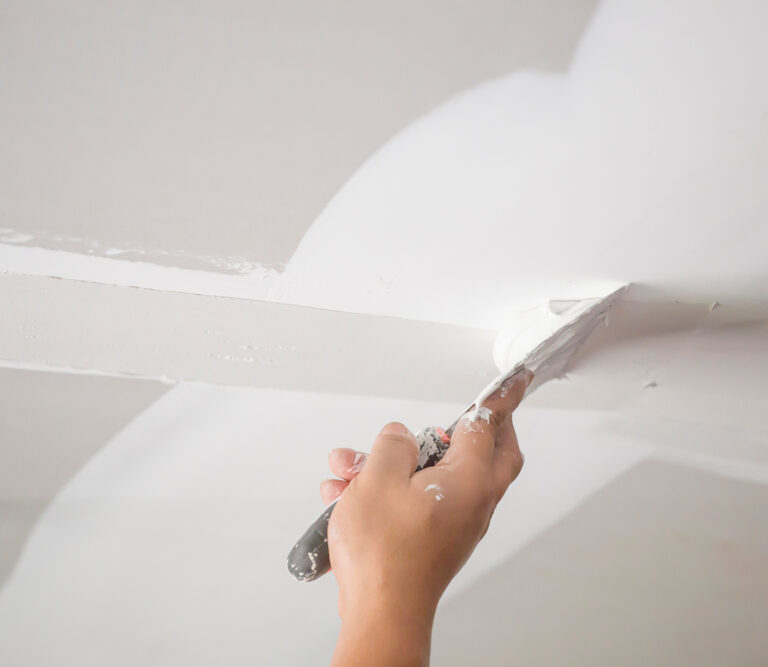
Though it’s only been around for about a century, drywall has become the standard way to construct interior walls and ceilings in most homes, offices, and other buildings in North America. To create a wall or ceiling that has a strong, seamless look, the finishing process, called mudding and taping, is critical when building with drywall.
While it’s a messy job to be sure, DIYers can learn to mud and tape drywall (almost) as well as the pros, which can help save them money and hassle over the years. Be ready to get dirty as you learn how to properly mud drywall.
What Is Drywall?
Due to its ubiquity, it’s easy to look past drywall and take it for granted. However, the advent of drywall in the 20th century helped usher in a new era of construction. It’s also known as plasterboard, wallboard, or Sheetrock, which is technically a brand of drywall.
By the 1940s, the postwar baby boom meant new homes needed to go up quickly, but using wood or plaster, both common wall materials at the time, was laborious and time-consuming. Drywall, with its premade sheets of pressed gypsum, offered a quick and simple alternative.
More than 21 million new homes went up between 1946 and 1960, and drywall became the leading material used in constructing walls and ceilings. (Want to learn more? Check out this seriously fascinating history of drywall.)
What Is Drywall Mud?
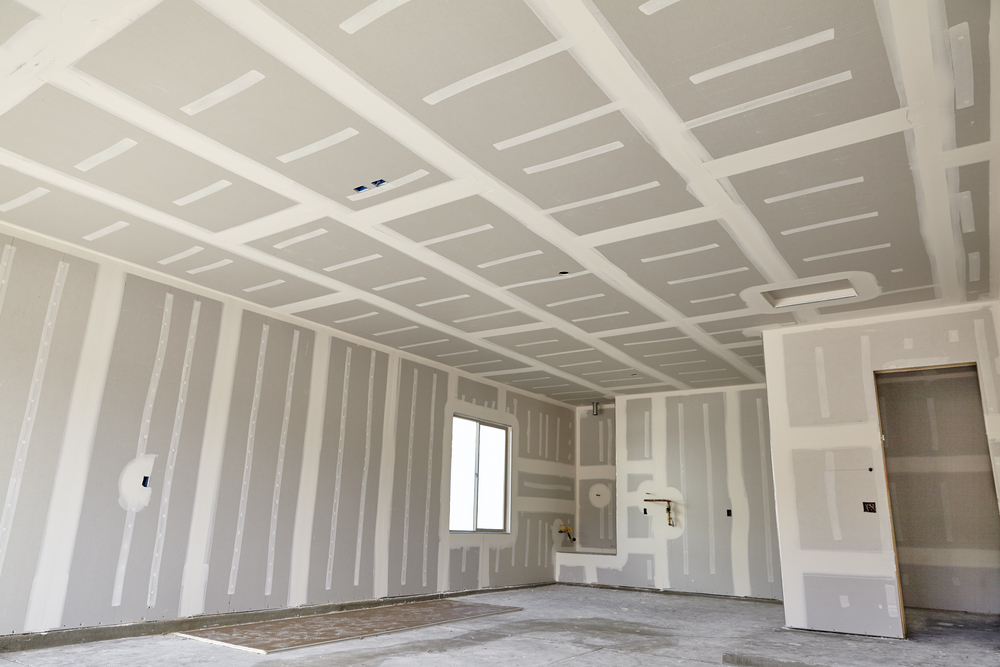
The process for making a wall or ceiling out of drywall sheets involves screwing the sheets to wall studs or ceiling joists, and then sealing joints, gaps, corners, and edges, and covering screw holes. Two finishing products — mud and tape — are used in tandem throughout the process.
Let’s explore the different types and subtypes of drywall mud, often referred to as joint compound.
Pre-Mixed
For beginners and DIY’ers, pre-mixed drywall mud is much easier to work with. This type of drywall mud or joint compound comes in a bucket or box, and it’s already been mixed with water to create a smooth consistency. There are a few subtypes of pre-mixed joint compound that have varying uses.
All-Purpose
Especially for those who are new to drywall mud, this is the most useful type of joint compound. You can use it for any type of drywall finishing or repair project, and it should dry in just a couple of hours. The average non-professional will never need to use any other type of joint compound unless they become true masters and want to experiment with other types.
Topping
If you’ve graduated to slightly more advanced drywall-finishing projects, consider topping mud as a clean and simple way to provide a final topcoat, often called a skim coat, to the drywall in preparation for painting. Topping mud doesn’t have the strong adhesive properties of all-purpose joint compound, so it’s best to use it as a final step before paint.
Lightweight All-Purpose
As the name suggests, this is a type of all-purpose mud that has a lighter consistency and therefore dries quicker. Most professional drywall finishers avoid this type of mud for initial applications and prefer it for topcoats or skim coating.
Powdered
While it’s common to use pre-mixed joint compound for all purposes, powdered drywall mud allows for more customization of consistency, and pros often use it for creating ceiling and wall texture. DIYers likely won’t use it, but it’s helpful to understand the different types and what to look out for.
Powdered mud comes in two main versions, standard and fast setting. The latter is often referred to as hot mud or setting mud, as it hardens rapidly thanks to a compound that reacts to water and quickens the drying process.
What Is Drywall Tape?
While it may be possible to repair a small defect in existing drywall with mud alone, larger repairs and all drywall finishing products require the use of drywall tape. Once it dries, drywall mud becomes hard to the touch. However, without an underlying structure, over time the joint compound will shrink, and seams will become visible.
As with drywall mud, there are a few types of drywall tape that each offer advantages and disadvantages.
Paper
For most drywall finishing and repair projects, paper drywall tape is the most effective option. As the name indicates, this type of drywall tape is made of paper, so it’s quite thin, which allows you to create a finished product that appears seamless. Many types are made with a crease down the center to make it easier to create corners.
Mesh
This type of drywall tape is made using fiberglass threads in a mesh pattern and comes with an adhesive backing that allows it to stick to drywall on its own. It’s thicker than paper drywall tape, which makes it inappropriate for many applications, as seams will be evident when mesh tape is used for standard joints.
However, mesh tape has stronger moisture resistance than paper tape, which makes it a good product for areas that are likely to come into contact with water, including bathrooms and kitchen backsplashes.
Pre-Formed
Applying mud and tape to straight runs of drywall is a straightforward process, but every wall ends, and it’s not likely you’ll be able to avoid corner joints. While standard paper drywall tape usually comes with a crease down the center, which can make it easier to create corner joints, whether where two walls meet or where walls meet ceilings, there are several advantages to using pre-formed corners instead.
Pre-formed corner tape or corner bead comes in a variety of materials, including vinyl, composite, metal, and metal-reinforced paper. Composite and metal-reinforced tape are ideal choices for beginners due to their versatility.
Steps to Proper Drywall Mud Application
Now that you’ve learned more than you thought possible about the types of drywall mud and tape products, it’s time to get a feel for the steps involved in finishing a wall or ceiling using drywall mud. First things first, though — make sure you have the tools you’ll need. Gather the following:
- Safety glasses or goggles
- Drywall mud (if using powdered mud, follow manufacturer instructions on mixing it)
- Drywall tape (including pre-formed corner tape, if applicable)
- Drop cloth (avoid plastic, as it can become slippery)
- Bucket of water and rags for cleaning spills or splatters
- Small and large drywall taping or putty knives (6-inch and 10-inch are ideal)
- Mud pan (if you don’t have any specific drywall tools, consider a pack, like this one)
- Pole sander or hand sander
1. Protect the Floor
Use the canvas drop cloth to cover up the floors and any furniture that may be in the room. Drywall mud, like natural mud, can be quite messy, and avoiding a lengthy cleanup process is ideal.
2. Get Your Mud Ready
If using a pre-mixed drywall mud, remove the lid; if you’re using a powdered mud, follow the manufacturer’s instructions for mixing to the desired consistency. Load the pan with mud using a few scoops with the 6-inch knife. Avoid overfilling so that you can ensure you have room to remove excess joint compound by dragging the knife against the edge of the pan.
3. Apply Mud to Screw Indentations
Using your 6-inch taping knife, fill and smooth the area around any screw indentations. These may appear along a line where each wall stud or ceiling joist is, as well as along corners if special corner tape or bead is used. Take a small amount of mud and push it into the hole and then run the flat edge of your knife back across the surface to remove any excess.
4. Apply Mud to Tapered Joints
Depending on the layout of your walls or ceiling, you will likely encounter several joints where whole pieces of drywall meet each other. Drywall comes from the factory with beveled sides, and when these two sides meet, a small indentation is created.
As you did with the screw holes, take a bit of mud and push it into these joints and then run the flat edge across the seam to make it as smooth and even as possible; plan to apply about 5 inches of mud around a beveled joint. In some cases, screw holes will fall near these joints, and in those cases, you can kill two birds with one stone.
5. Tape the Seams
Cut a piece of drywall tape to fit the length of the seam you’re covering and center it over the joint while the mud is still wet; this process is called bedding. Lightly press it onto the joint and run your 6-inch taping knife at a 45-degree angle down the length of the joint, pressing lightly to smooth the paper and push out any air bubbles. Clear any excess mud with the knife.
6. Mud and Tape Inside Corners and Outside Corners
Once you’ve sealed the tapered joints, use your corner bead or regular drywall tape to mud and tape inside corners. Be sure to use light pressure and gentle movements to bed the tape without dislodging it from the corner.
7. Mud and Tape Butt Joints
Butt joints occur when two pieces of trimmed drywall meet, rather than meeting at a beveled end. Getting a smooth finish in these types of joints is more difficult, but the basic process is the same. Apply joint compound to the seam and then follow with a span of drywall tape. In this case, it’s important to be sure you don’t apply too much joint compound, as the lack of a beveled edge means there’s nowhere for any excess to go.
8. Apply Two More Coats of Mud
Allow the mud to dry following the manufacturers’ recommendations. For the second coat, apply mud to the screw indentations, joints, and corners just as you did the first time around; the difference with the second coat of mud is that you don’t need to continue applying tape. Simply put on a thin layer of mud to further smooth the seams and remove any excess mud.
When applying a second coat on butt joints, using the 10-inch taping knife is helpful to create a smooth appearance by feathering the mud on either side of the seam. For the third and final coat, use your 10-inch knife to apply small amounts of mud to the same spots, but making sure to feather out the edges and create a seamless, smooth appearance.
9. Sand and Clean
Once the third and final coat is completely dry, use a hand sander or pole sander to smooth all screw indentations and joints. You know you’re done when the wall is completely smooth. Use a shop-vac or lightly damp paper towel to remove any dust.
You may apply a thin skim coat of joint compound over the entire wall, but this will depend on your plans for wall coverings (paint sheen is an important consideration). If so, this will add another cycle of application, drying, and sanding to ensure a smooth finish.
Common Mistakes and How to Avoid Them
Especially for beginners, it takes a lot of trial and error to become proficient at properly mudding and taping drywall. If you’ve given it your best shot and still aren’t satisfied with the finish, here are a few errors and tips for preventing them.
Bad Inside Corners
If it’s your first time using regular drywall tape to build up the inside corners of your walls, chances are good that once you’ve done your coats and let everything dry, your inside corners will appear to be cracked, pulling, or uneven. Using metal-reinforced tape or vinyl corner beads can create the rigid structure you’re looking for.
Tape Shows Through Final Coat
For the first two coats of mud and tape, you should clearly see the tape, but if it’s still showing after the final coat, apply another thin coat and feather out the edges well to create a smooth finish.
Joints Are Cracking
Going too quickly, applying coats that are too thick, and not following the manufacturer’s instructions for drying time all can cause drywall joints to crack no matter how many coats of mud you apply.
Mud Drying Quickly
You should get in the habit of cutting the lengths of drywall tape you’ll need before you put any mud on the wall. Having a helper can make this process go much more smoothly, but if you’re on your own, create a process for measuring out the tape you need, then cutting it and setting it aside before you apply the first coat of mud.
Go through the same steps after that, and be sure to follow the same process for all your joints.
Patience and Progress
You probably won’t get good enough at doing drywall mud to consider it as your new full-time career, but with a little bit of patience and paying close attention to what you’re doing, the average DIYer can easily become an adequate drywaller, which can save you serious money over time.