Whether you’re working on a floor, wall, or countertop, tiling is a big job. And the most fulfilling part of the process is when you get to grout—that’s when the whole project comes together in a filthy bundle of fun.
But as marvelous as the mucky task may be, you must get your grout done right. If not, your tiles will look terrible and become susceptible to instability and unnecessary repairs.
To guide you through the process—and ensure an excellent grout job the first time around—we’ve put together this comprehensive step-by-step guide.
The Different Kinds of Grout
Not all grout is created equal—the muddy stuff comes in varying different forms. We’ll run through the essential info on each to help you choose the ideal option for you.
Cement-Based Grout
Cement-based grout is the go-to option for the home improvement crowd, mostly because the substance is so easy to use. Choose from one of two different types: non-sanded grout (joints 1/8 inch or less) or sanded grout (joints larger than 1/8-inch).
Epoxy Grout
Epoxy grout is a clever combination of solids and additives, a two-part mixture that offers optimal water resistance but comes with a hefty price tag. As its composition is more complex, epoxy grout requires lots of labor and advanced skills to install. Give this one a miss if it’s your first time grouting.
Urethane Grout
Urethane grout is pretty pricey but comes with one key advantage: it’s pre-mixed and ready to go right out of the bucket. Once you’re done, you can simply snap the lid shut tight and reuse the rest at a later date. It takes a full seven days to cure; look elsewhere if you need your bathroom back in a hurry.
Choosing the Right Grout Color
Grout also comes in a wide array of colors, and it’s crucial to choose the right hue for your room.
The trick is to choose a color that complements your tiles. If you like the look of stark lines, for example, opt for an intense contrasting color—say, black grout on sleek white tiles.
When grouting tiles on the floor, you might want to focus more on the filth factor. White grout lines will highlight dust and debris, while darker shades will mask your lack of cleanliness.
To bolster grout intensity, go easy on the water during the mixing phase—a thicker consistency makes for more eye-catching grout. Remember to mix it thoroughly to reduce color variation, though.
The Tools You Need to Grout Tile
Now that you’ve chosen the perfect color and type of grout for your tiles, it’s time to gather the essential tools.
- Grout
- Caulk
- Closed-cell sponges
- Rubber gloves
- Cloths
- Grout sponge
- Painter’s Tape
- Rubber grout float
- Margin Trowel
- Grout mixing attachment
Grouting Tile: 6 Easy Steps
Follow these six simple steps to grout your tiles like a pro.
1. Mix It Up
Although it may seem straightforward, you must follow the manufacturer’s instructions carefully. Be particularly cautious not to add too much water as that’s a sure-fire way to end up with weak runny grout.
Feel free to mix your grout with whatever tool you please—a big wooden spoon will do in a pinch. To speed up the process, pop a grout mixing attachment on the end of your drill bit and let the motor do the hard work for you.
Pro tip: Try using three-quarters of the recommended volume of water, mixing it with the grout powder for a while, and then adding the final quarter of water.
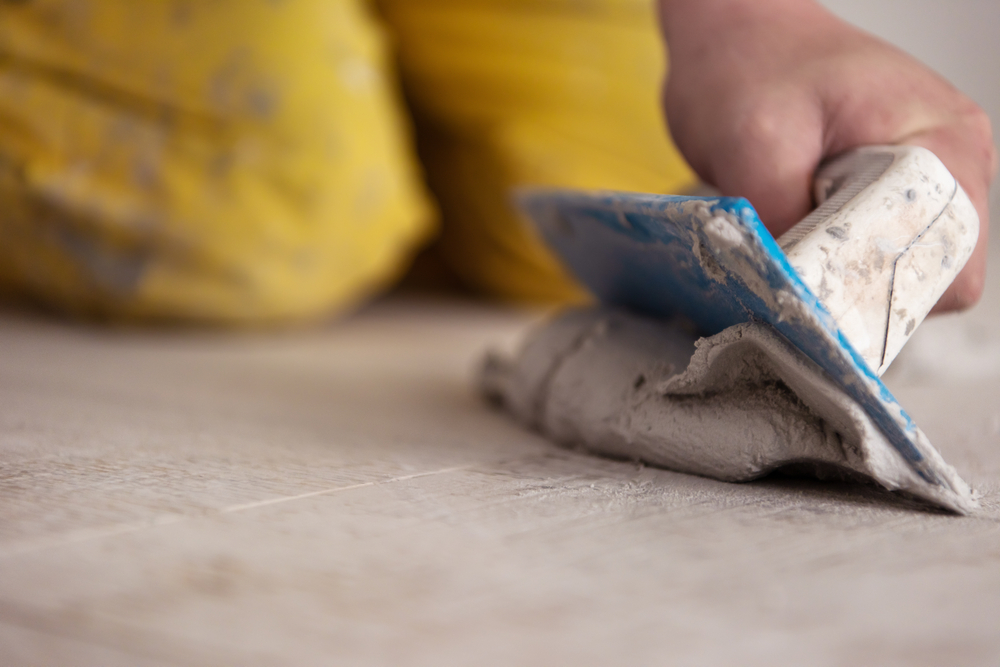
Consistency is king in the grout mixing game. If you end up with something similar to waffle batter, you’ve done a stellar job.
2. Smear on the Grout
Here’s where things start to get messy.
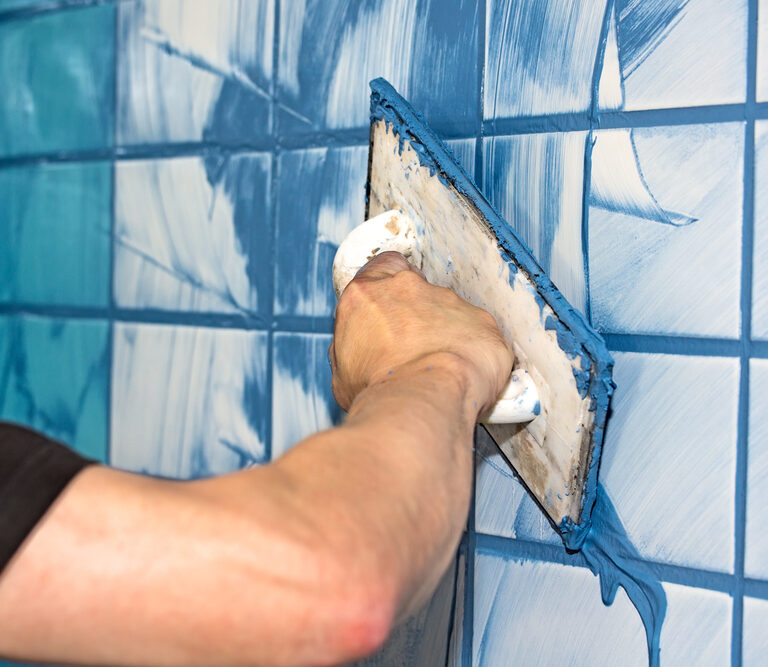
Applying grout to tile requires rubbing the mixture everywhere with a grout float, a special smoothing tool with a flat rubber pad. It’s a dirty job, but someone’s got to do it.
Work in small areas at a time, no more than 3 x 3 feet.
- Pour about 1/3 gallon of grout on the tiles.
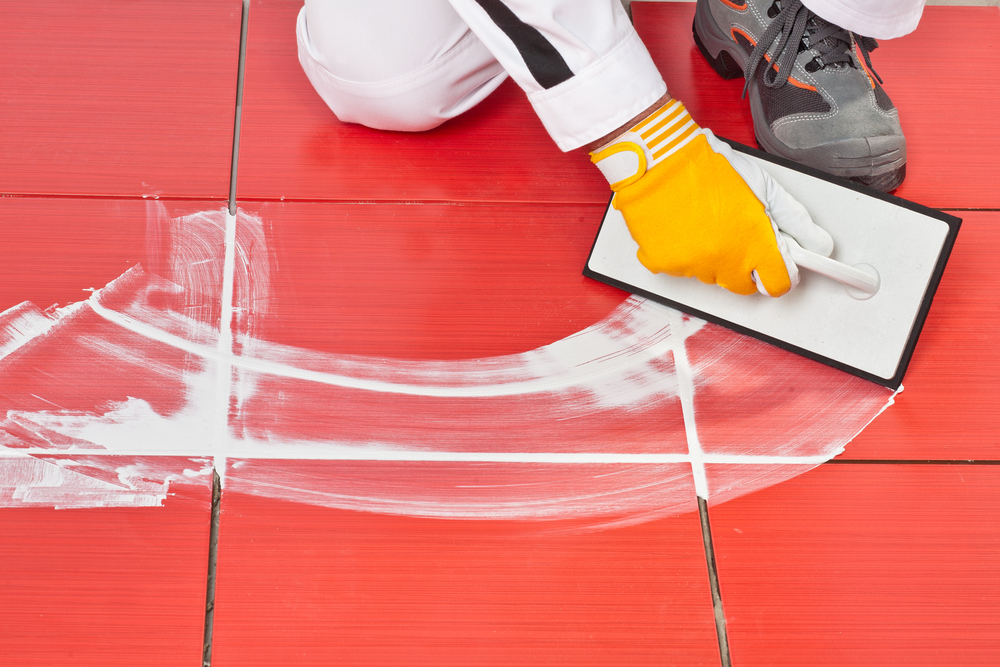
- Hold your grout float at a 45-degree angle.
- Smear the mixture across the tiles with sweeping arc-like motions.
- Squish the mixture into the joints to fill them up (ensure every grout line has been completely filled).
- Hold your grout float at a 90-degree angle.
- Sweep the area in a diagonal direction to remove excess grout from the tiles.
Protip: The first 45-degree angle is super important as that’s what mushes the grout into the joints.
3. Clean the Scene
You’ve successfully scraped most of the grout away with your 90-degree angled float, but there’s still a big pile of gooey mud on the floor. Best clean that up.
- Wait 10 minutes for the grout in the joints to set.
- Dunk your grout sponge into a bucket of clean water and rinse it thoroughly.
- Wipe the damp grout sponge in a circular motion to clean the tiles.
- Rinse the sponge frequently to keep it clean.
- Replace the muddy water as necessary.
Don’t allow too much water to soak into the grout sponge before cleaning. If excessively soggy, the sponge will spread water all over the tiles and into the joints, creating an awful muddy mess. The sweet spot is slightly damp but not sopping wet.
Be careful not to scrub any grout out from the corners or joints. You want to apply enough pressure to soak up grout on the surface but not within the lines.
- Repeat steps three and four until you’ve covered the entire surface.
4. Scrub Away the Haze
Even if you’re a grouting goddess, you’re going to be left with a murky haze. But that’s okay because it’s easy to clean when you know what to do.
- Wait 24 hours for the grout to fully dry.
- Wipe the area gently with a damp cloth.
- Immediately scrub the tiles vigorously with a dry cloth.
- Sweep away any leftover residue when you’re done.
5. Seal the Grout
Unless you’re using a water-resistant epoxy grout, it’s wise to finish the job off by applying some sealant. Stacks of sealants are available on the market, each with a slightly different application process (learn more in our How To Seal Grout guide).
Generally speaking, you’ll need to follow these steps:
- Let the grout fully cure (check the label for the curing time).
- Apply the sealant with a brush or applicator.
- Immediately clean up any spills or smears.
- Give the sealant time to cure (24-48 hours, check the label).
6. Caulk the Walls and Baseboards
The final step isn’t strictly necessary, but it’s a good idea nonetheless. Seeing as you’ve gone to so much effort to tile and grout your house, you might as well get the job done right.
Caulking the walls and baseboards will seal the joints and flex as these areas expand and contract with varying weather.
- Choose the appropriate caulk.
- Cover the baseboards and walls with painter’s tape.
- Load the caulk into a caulk gun.
- Apply the caulk at a 45-degree angle.
- Immediately flatten the caulk with the tip of your glove for a smooth finish.
The best caulk depends on the room in question. A waterproof silicone-based caulk is perfect for splash zones, while acrylic latex is paintable and works better at filling in cracks.
How to Grout Tile: Final Thoughts
The grout phase is officially done and dusted, and you can now step back and marvel at your glossy new tiles. If you took your time and followed each step of this guide, we’re confident the final result will have been fabulous.
And seeing as you’ve slapped on some sealant and caulked the corners, you won’t have to worry about maintenance for many years to come.