Regardless of whether your home is cozy and classic or minimalist and modern, you probably have at least a few pieces of wood furniture tying every room together. If you want to keep these pieces looking their best, it’s wise to familiarize yourself with wood’s temperamental nature before attempting to clean them.
Not only is wood porous, which means it can absorb the cleaning agents you apply, but it’s also vulnerable to scratching. As such, you’ll want to avoid using any abrasive materials.
Armed with the right cleaning agents and materials, though, you can revive even the most drab-looking pieces, breathing new life into your home in the process. If your wood furniture is in dire need of cleaning but you’re unsure how to get started, this handy guide will help.
Dusting With Care
As long as the furniture resides where people—and perhaps animals—roam, then hair, dander, dirt, and other debris will inevitably accumulate on its many surfaces. If left unchecked, these particles can eventually scratch the finish. They can also mix with old polish, forming a stubborn film that attracts even more dirt.
To avoid damaging the topmost layer of wood—and to maintain the air quality in your home—you need to actually remove the dust, and not merely spread it around. As such, you’ll want to use tools that are designed to trap it, rather than just kick it up into the air.
A classic feather duster is a great option for dusting wood furniture. The dust will cling to the feathers, which are gentle enough to sweep across delicate surfaces without scratching them. Microfiber cloths are another good choice. To enhance their ability to trap dust, dampen them slightly before use. If you leave any trails of moisture behind while you work, just make sure to wipe them off promptly using a clean and dry terrycloth towel.

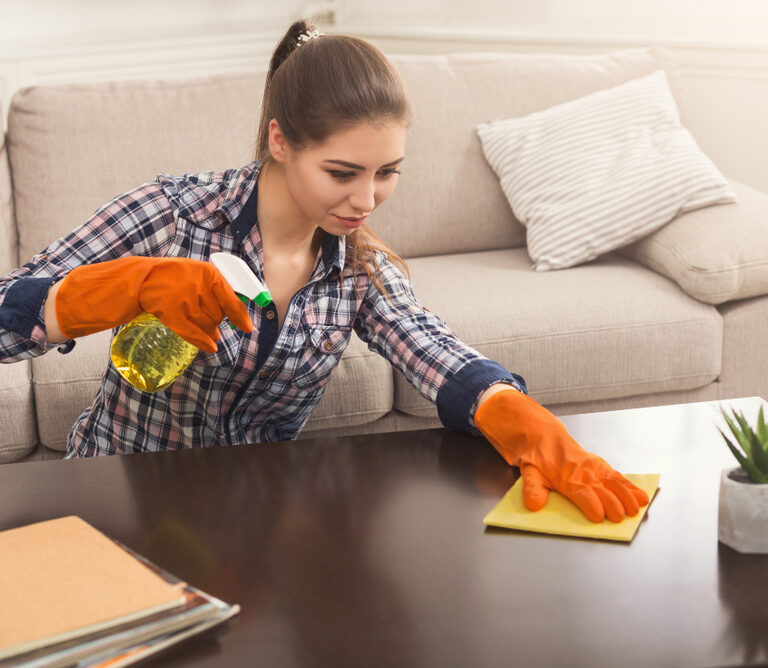
Performing a Deep Clean
If you’re diligent about dusting your wood furniture regularly—at least once a week, but more frequently if you have any furry friends—it will remain in fairly good condition over time. Periodically, however, you’ll also want to deep clean each piece to maintain the wood’s natural luster. In the average bustling household, tackling this task once a season should suffice. Deep cleaning used pieces, like those from antique shops and yard sales, as you acquire them is wise, as well.
When your wood furniture is due for deep cleaning, you can use one of two methods. The dish soap method is gentler, so it’s advisable to start there. If you’re unsatisfied with the results you get from dish soap, you can proceed to the mineral spirits method, which is more aggressive.
The Dish Soap Method
After moistening a cotton ball with water, apply a pea-sized drop of standard liquid dish soap to it. Then, wipe the cotton ball on an inconspicuous surface, like the back of a leg. As long as the soap doesn’t mar the finish, you’ve got the green light to proceed.
In addition to the dish soap, you’ll need a bucket, some warm water, and a nonabrasive sponge. Mix about ¼ cup of dish soap with about a gallon of water in the bucket until it’s nice and bubbly. Then, dip the sponge in the solution. After taking it out, squeeze it so it’s barely damp, and rub it gently along every nook and cranny.
Stop periodically to re-dip and then re-squeeze the sponge. And if you leave any streaks of water in the sponge’s wake, make sure to dry them promptly with a clean, dry terrycloth towel.
The Mineral Spirits Method
Like dish soap, mineral spirits should be harmless to most furniture finishes. It’s wise to test this method on an inconspicuous area, however, before wiping down the entire piece just to be sure.
When using mineral spirits, it’s best to work in a well-ventilated area, so turn on the ceiling fan and open the nearby windows when you’re ready to get started. For the test area, apply a dab of mineral spirits to a clean, lint-free cloth. Rub it on a small area, and watch it dissolve layers of polish, wax, and grime. As long as it doesn’t dissolve the finish, too, you can proceed.
Moisten—don’t soak—a clean cloth with mineral spirits, and wipe down every wood surface on the piece in question. If the residual layers from years of polishing and waxing are especially stubborn, you may need to go over the same area again and again with more mineral spirits (and perhaps a little elbow grease).
Removing Old Polish
If you purchase an antique piece of furniture, you’ll want to remove the decades—or centuries—of polish that have accumulated on it. Black tea can effectively do so without damaging the underlying finish because of the tannic acid it contains.
For every three square feet or so that you need to address, steep two bags of standard black tea in one cup of boiling water for about five minutes. After taking the bags out, let the tea cool to room temperature. Then, dip a soft, lint-free cloth in the tea. Wring it out so it’s damp and not dripping before wiping the areas that are coated with old polish.
With this method, it may take a little determination—and a lot of elbow grease—to get rid of all the offending polish. Once you’re finished, though, you’ll undoubtedly be impressed at the natural wood without that layer of age-old grime you’re so used to seeing.
Applying New Polish
If the wood looks splotchy or dry in some places after you’ve finished removing all the old polish, applying a fresh layer will restore its once-glossy luster. Thankfully, you don’t need any special supplies to do so. There are a number of homemade recipes for gentle furniture polish, and you probably already have all their ingredients on hand.
One of the simplest DIY “polishes” that’s safe for use on wood furniture is 1 cup of olive oil and ¼ cup of white vinegar. Mix the two ingredients together until they’re thoroughly combined, and then dab a soft cloth into the solution. Wring it out as needed so it’s damp and not dripping before applying it to the surface of the wood.
Make small, tight circles with the cloth, moving in the direction of the grain. Buff every nook and cranny of the piece until you’ve reached the desired shine.
If the furniture happens to have metal hardware, like hinges or knobs, don’t neglect those once you’re done. You’ll know they’re due for polishing if they look tarnished, cloudy, or otherwise discolored.
Different kinds of metal call for different forms of polish. If you’re unsure what the hardware is comprised of, hold a magnet up to it. If the magnet doesn’t adhere, it may be silver, gold, copper, brass, or bronze. If it does adhere, on the other hand, it may be iron, nickel, or steel.
If you can’t tell what kind of metal you’re dealing with even after performing the magnet test, remove the hinges or knobs and bring them to the hardware store with you. An associate should be able to help you find the right polish for the job. Then, simply follow the instructions on the packaging to restore the hardware so it’s as shiny as the rest of the piece.
Protecting the Finished Product
If you noticed any dings or scratches while you were so lovingly cleaning and polishing your wood furniture, you’re probably wondering how to prevent future damage. Once you’ve completed all the tasks mentioned above, there are a couple of ways to protect the surfaces that are most vulnerable to damage.
An easy—and stylish—approach is using decorative coverings. Examples include tablecloths, runners, placemats, and coasters. Placing coverings on surfaces that see a lot of traffic will protect them from daily wear and tear.
For pieces that you can’t—or don’t want to—cover, there’s furniture wax. High-quality wax can be applied to any finish to both complement and protect it. You can either buy a premade formula that was specially designed for wood, or you can make a DIY solution, assuming you can get your hands on ingredients like beeswax and paraffin.
Once you’ve bought or made the wax, use cheesecloth to apply it in large, circular strokes. Let it dry for about 30 minutes, and then use a different piece of clean and dry cheesecloth to rub off the excess while buffing the surfing to a glorious sheen in the process.
For ongoing protection, pieces that are used daily—like tables and chairs—may need to be waxed every three months or so. Pieces that are rarely touched, on the other hand, like bookshelves, may only need to be waxed every six to twelve months.
A Final Word
When it comes to home décor in the 21st century, wood furniture is arguably as ubiquitous as flat-screen TVs and venetian blinds. This is because it’s as sturdy and durable as it is elegant and timeless.
To ensure every piece looks as good as it did on the day you bought—or restored—it, it’s important to get into a regular cleaning routine. By following the tips in this handy guide, your wood furniture will always be in exceptional shape. This, in turn, will allow your family to pass it down for generations.