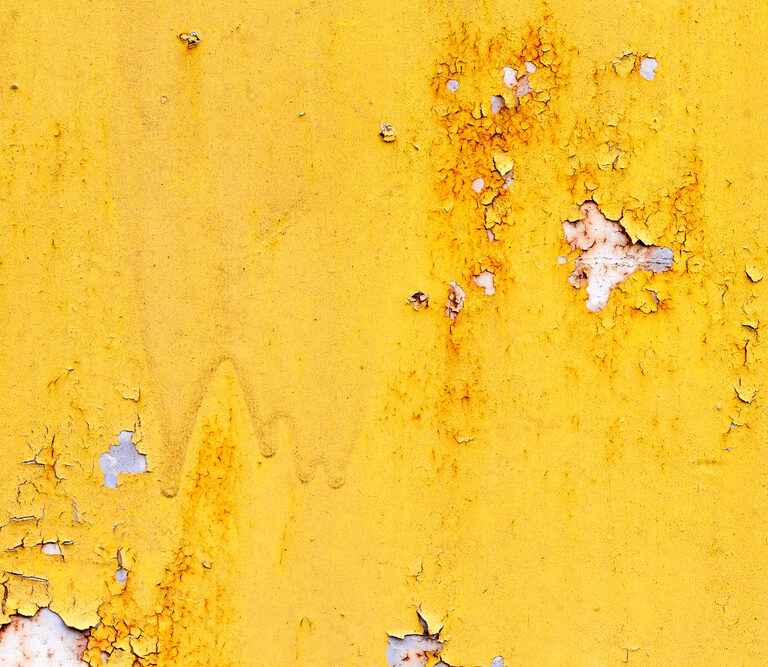
Discovering peeling paint in your home can be distressing. The good news is that it’s rarely the sign of a serious or expensive problem. The bad news is that you’ll probably have to sacrifice a weekend to fix it. Keep reading to learn about the potential causes of peeling paint in your home, and how you can fix them.
Why Is My Paint Peeling?

There are dozens of things that can cause peeling paint. In this section, we’ll go over some of the most common reasons for new paint to peel and the most common reasons old paint starts peeling.
5 Reasons Your New Paint Job Is Peeling
If you just painted your walls and they’re already starting to peel, the problem can most likely be found somewhere in the painting process. In rare cases, it might be due to the room design. Here are the five most common reasons for why your new paint is peeling:
1. You Didn’t Prep the Surface
Before you can put up a new coat of paint, you need to sand off the old paint and then thoroughly wipe down the surfaces to get rid of dust and grime.
If you paint on top of old paint, the new coat doesn’t get a secure grip on the wall. It just clings to the old paint instead. This can end up pulling that old paint up and creating sagging, bubbles, or full-on cracks.
If you apply paint to a dirty or dusty wall, a similar problem occurs. The paint doesn’t get an even grip on the wall, so pockets of air emerge that can crack and peel.
2. You Didn’t Wait Long Enough Between Coats
The first coat needs to be bone-dry before that next coat goes on. If it isn’t, the second coat is just going to cling to the first and pull it down, the same way it would to old paint. Check the label on your paint can to find out how long it takes for a coat to dry.
The surface might be dry to the touch in an hour or two, but you’ll need to wait anywhere from 6 to 24 hours for it to be dry enough for the next coat. If humidity levels are above 50% where you’re painting, add an extra few hours to your drying time between coats, because humidity will slow down the drying process.
3. The Paint Isn’t Made for That Surface
Not all paints work for all surfaces. Different formulas are designed to cling to specific kinds of surfaces. If you’re painting metal, you need a paint designed to cling to metal. If you’re painting wood, you need paint that’s made for wood.
When you’re shopping for paint, check the label to find out what kind of surfaces the formula is made for. If you’re painting walls in your home, you probably need a latex paint for drywall. In older homes with plaster walls, you’ll probably need an oil-based formula, at least for the primer.
4. There’s a Water Leak
In some unlucky cases, peeling paint might be the sign of a more serious problem: either a leak in the structure or a broken pipe in the wall. If the peeling is confined to one area, especially if it’s near the roof or in a room with water pipes (bathroom, kitchen, mud room, etc.), this is an unfortunate possibility.
5. The Room Isn’t Ventilated Well
If you live in a humid climate and you don’t have great ventilation in your home, humidity can prevent your fresh paint from drying properly. If humidity levels are above 85%, hold off on painting until the weather is a little drier.
After you repaint, make sure to keep a dehumidifier and fan going in the room to help control humidity and improve air flow. In the long term, consider looking for some solutions to better ventilate the room, especially if it’s a bathroom or kitchen where the paint will be regularly exposed to heat and humidity.
5 Reasons Your Old Paint Is Peeling
If you’ve noticed an existing paint job suddenly start to peel and crack in places, the cause really depends on where the paint is located and how long it’s been there. Here are some of the most common culprits behind old paint peeling:
1. You Have Oil Paint on a Wood Surface
If you’re in an older home and the peeling paint is on a wood surface, it’s possible that the paint used was oil-based. As seasons change, wood expands and contracts. Eventually, the oil-based paint becomes so dry and brittle, it can’t keep up with the changes and starts cracking.
Replacing it with a latex-based paint should do the trick. Latex-based paints are much more flexible, so they can better handle the expanding and contracting of wood.
2. You Live in a Humid Climate
If you live in a place with chronic high humidity, paint just isn’t going to hold up as well. For paint to keep its shape well, it needs to be dry. Although, as you’ll see later, if you live in too dry a climate, that can also be a problem. Paint is finnicky like that.
3. You Live in a Dry Climate
Over time, dry climates will sap too much moisture out of your paint and cause it to crack. Paint likes a temperate climate. If the humidity falls above or below the 40% to 50% range for most of the year, you’re just going to have to expect some peeling.
If you figure out that it’s the climate causing the problem, you can just patch fix as you notice spots starting to peel. You don’t need to foot the bill for a full paint job every couple of years.
4. Sun Damage
For paint on the outside of your house or directly facing a window that lets in a lot of light, peeling is likely a sign of sun damage. Direct sunlight burns paint just like it burns your skin. Unfortunately, they have yet to invent SPF for paint.
If you’re tired of fixing sun damaged patches of paint, you could try planting some trees around your property to provide some shade. When you’re ready to fully repaint the exterior of your home, make sure you spring for the higher quality paint and get a formula that’s meant for exteriors. This won’t stop sun damage, but it will slow it down.
5. Your Paint Is Just Old
Even if you live in a perfectly temperate climate with lots of shade trees and well-ventilated rooms, all paint eventually just gets old and needs to be replaced. If you can’t find any other logical explanation for your paint’s sudden decision to detach from the wall, this is probably the issue.
For exteriors, paint usually ages out within three to seven years, depending on your climate. For interiors, it depends on the surface and the room.
Kitchen walls that are exposed to heat and food odors will need freshening up every four to five years. The same goes for bathrooms, where the steam from showers can cause premature peeling.
For hallways and other high traffic areas, you might need to repaint every three to five years, especially if you have children or pets. For bedrooms, you can probably go as long as 10 years between paint jobs.
How to Fix Peeling Paint
If there isn’t an underlying problem like roof damage or broken pipes, fixing peeling paint is really just a matter of repainting your walls. However, to ensure you don’t go through all that work only to end up with peeling paint all over again, be meticulous about each step of the process:
Step 1: Sand Down the Old Paint
Use an extra coarse sandpaper—something with a 24 to 36 grit size—to sand down all of the old paint off of your walls. If you have a lot of area to cover, consider using a drywall sander or a paint stripper to speed up the process.
Step 2: Putty Any Imperfections
If there are cracks, holes, or chips in the surface of the wall, those will translate to cracks, holes, and chips in the paint. Use putty to cover these imperfections. When the putty dries, sand it down until it’s even with the rest of the wall.
Step 3: Wipe Down the Walls
Before you paint, wipe down the walls with a damp rag. This will seem like an unbelievably time-consuming step and you’ll probably think, “what’s a little dust in the grand scheme of things?” But that little dust will cause bubbles and peeling in the finished job. So, power through it! Clean walls will grip the paint better.
Step 4: Prime the Walls
This is an especially important step for walls that will be exposed to humidity. Primer allows the paint to cling to the surface better and helps it last longer. There are three main kinds of primer to choose from:
Oil-Based Primer
This helps lock in moisture so that your paint isn’t exposed to moisture from underneath. It’s good for bathrooms or kitchens, where humidity is an issue, and for porous surfaces like brick or plaster.
Latex Primer
Latex primers are more flexible, making them great for wood surfaces, but they’re also a popular choice for unfinished drywall. They don’t offer the same stain-protection that oil-based or shellac primers do, but they’re easier to work with.
Shellac Primer
Shellac works on just about any material. It’s great for sealing in moisture and stain-protection. They’re a little more expensive, but they will hold up well in a kitchen or on difficult materials like metal that’s usually hard for paint to cling to.
Step 5: Paint the Walls
With the prep work done, you’re finally ready to actually paint. Apply a thin, even coat over the entire surface. Then, wait for the full recommended time listed on the paint can to do a second coat. Once you’ve put up all the coats you want, wait a full day before moving furniture back in, to avoid denting or damaging the paint job.
A Note on Patch Fixes
If the offending flakes are only in a small patch and the rest of your walls don’t seem to be affected, you can probably get away with just patch-fixing the problem area. First, you need to figure out what’s special about that area.
Refer to the list of possible causes discussed earlier and try to narrow down why this area is peeling while the rest is fine. If it’s a broken pipe or a leak in the ceiling, you need to fix that underlying problem first before you repaint.
Once you’ve found and fixed the underlying problem, use the same process described above to touch up the paint job. Make sure you sand down an area a few inches wider than the affected patch to ensure all the damaged paint is gone before applying a fresh coat.
Final Thoughts
Hopefully our helpful and informative guide has allowed you to figure out why the paint in your home is peeling, and given you the know-how to fix the problem. With careful application, that new coat of paint will look vibrant for years to come.